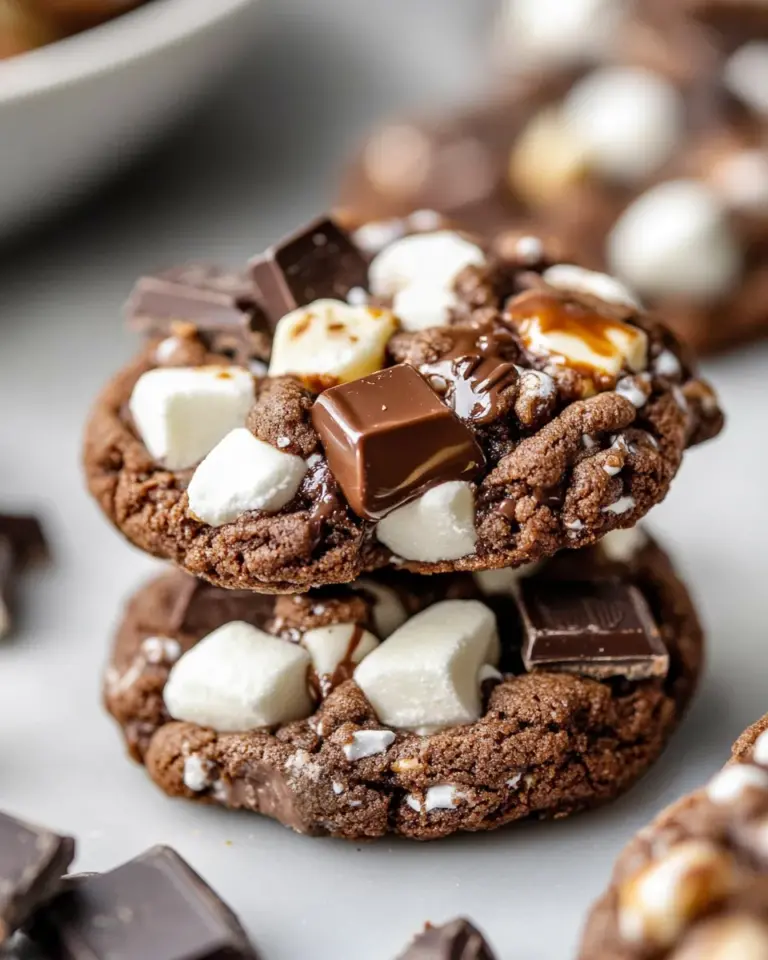
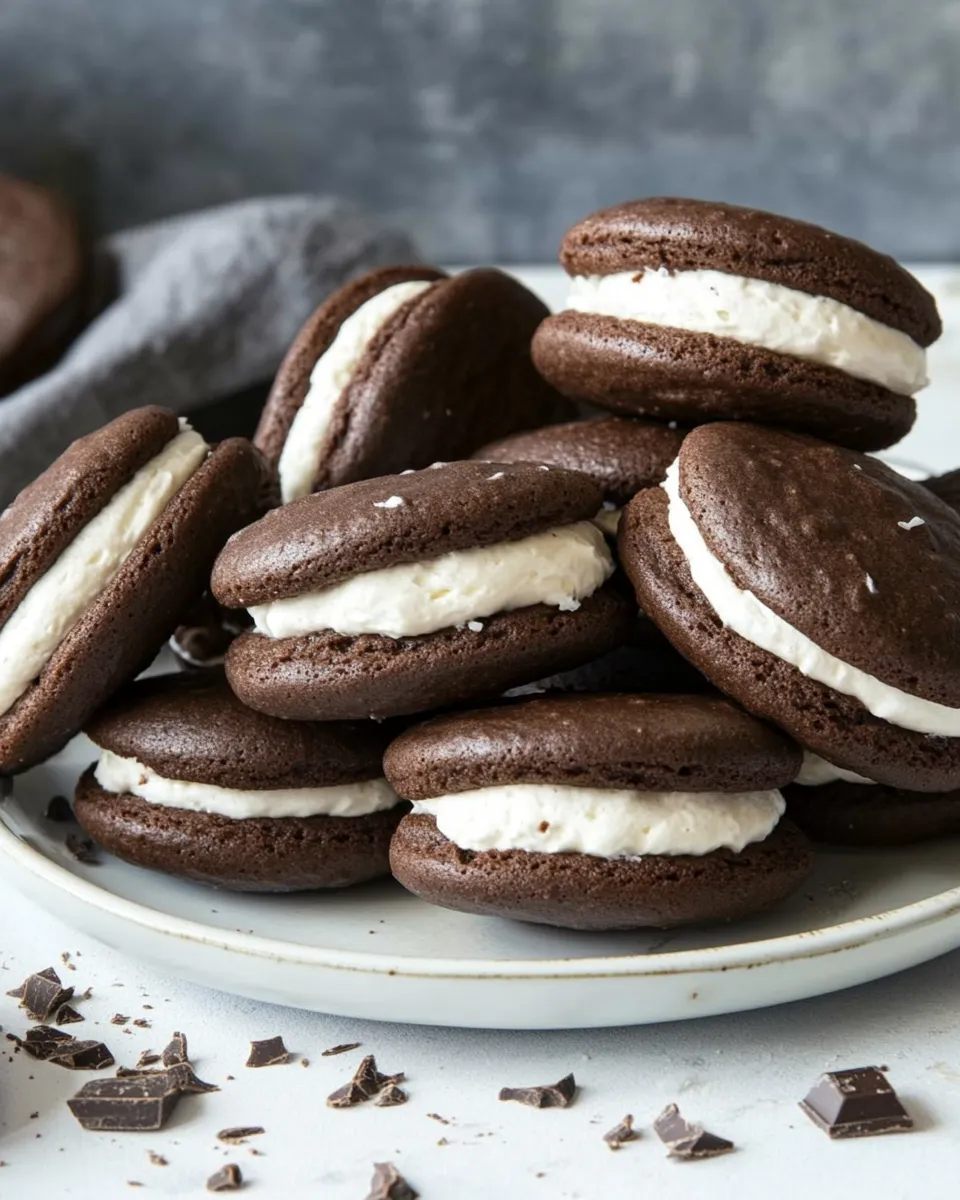
Chocolate Gobs (aka Whoopie Pies)
If you’re searching for the ultimate chocolate treat that embodies nostalgia and indulgence, look no further than Chocolate Gobs, also known as Whoopie Pies. These delightful confections consist of two soft, cake-like chocolate rounds filled with a luscious, creamy marshmallow center. Perfect for sharing or keeping all to yourself, Chocolate Gobs are a versatile dessert that will charm both kids and adults alike. With a rich chocolate flavor and a pillowy filling, these treats are sure to become a staple in your baking repertoire.
The Upside of Chocolate Gobs (aka Whoopie Pies)
Chocolate Gobs are not just a feast for the eyes, but they also offer a delightful combination of flavors and textures. The soft chocolate cakes are complemented perfectly by the sweet, fluffy filling, creating a dessert experience that’s hard to resist. Here are a few reasons why you’ll love making these treats:
- Easy to Assemble: Unlike traditional cakes, these pies require no layering and can be made quickly.
- Customizable Filling: You can easily switch up the filling to suit your taste, whether you prefer classic marshmallow or a twist with flavored creams.
- Perfect for Any Occasion: Whether it’s a birthday, picnic, or just a cozy night in, Chocolate Gobs fit right in.
- Freezes Well: Make a batch ahead of time, and simply freeze them for later enjoyment.
What We’re Using
To create these delectable Chocolate Gobs, you’ll need a few simple ingredients. Here’s a detailed list of what’s required:
- 2 cups (260g) all-purpose flour: This provides the structure for our pies.
- ½ cup (42g) unsweetened cocoa powder: Essential for that rich chocolate flavor.
- 1 teaspoon baking soda: Helps our pies rise and stay soft.
- ½ teaspoon salt: Balances the sweetness.
- ¾ cup (92g) vegetable shortening: Adds moisture and a tender crumb.
- 1 cup (198g) granulated sugar: Sweetens up our chocolate rounds.
- 1 whole egg: Binds our ingredients together.
- 1 egg yolk: Adds richness to the batter.
- 1 teaspoon vanilla extract: Enhances the overall flavor.
- ½ cup (120ml) buttermilk: Provides tang and moisture.
- ½ cup (120ml) hot water: Helps dissolve cocoa and intensifies chocolate flavor.
- 1 ½ cups (192g) marshmallow fluff: For the classic filling.
- 1 ½ cups (283g) vegetable shortening: Used in the filling for a creamy texture.
- 1 cup (113g) powdered sugar: Sweetens the filling.
- Pinch of salt: Balances the sweetness in the filling.
- 1 tablespoon vanilla extract: Adds flavor to the filling.
Cook’s Kit
Before diving into the recipe, gather your kitchen essentials. Here’s a quick list of what you’ll need:
- Mixing bowls: For combining wet and dry ingredients.
- Whisk: To mix the batter and filling thoroughly.
- Measuring cups and spoons: For accurate ingredient measurements.
- Spatula: For folding in ingredients and transferring batter.
- Baking sheets: To bake the chocolate rounds.
- Parchment paper: For lining the baking sheets and easy cleanup.
- Cooling rack: To cool the cookies before filling.
The Method for Chocolate Gobs (aka Whoopie Pies)
Ready to get baking? Follow this step-by-step guide to create Chocolate Gobs that will impress everyone!
Step 1: Preheat Your Oven
Preheat your oven to 350°F (175°C). Line two baking sheets with parchment paper to ensure your Chocolate Gobs don’t stick.
Step 2: Mix Dry Ingredients
In a medium bowl, whisk together the all-purpose flour, cocoa powder, baking soda, and salt. Set this mixture aside as we prepare the wet ingredients.
Step 3: Cream Shortening and Sugar
In a large mixing bowl, beat the vegetable shortening and granulated sugar together until the mixture is light and fluffy. This should take about 3-5 minutes with an electric mixer.
Step 4: Add Eggs and Vanilla
Add the whole egg, egg yolk, and vanilla extract to the shortening and sugar mixture. Beat until everything is well combined.
Step 5: Incorporate Dry Ingredients
Gradually add the dry ingredient mixture to the wet ingredients, alternating with buttermilk and hot water. Start and end with the dry ingredients. Mix until just combined; do not overmix.
Step 6: Scoop the Batter
Using a cookie scoop or tablespoon, drop heaping tablespoons of batter onto the prepared baking sheets, leaving space between each mound.
Step 7: Bake
Bake in the preheated oven for about 10-12 minutes, or until the edges are set and the tops spring back when lightly touched. Allow the cookies to cool on the baking sheets for about 5 minutes before transferring them to a cooling rack.
Step 8: Prepare the Filling
While the chocolate rounds are cooling, prepare the filling. In a mixing bowl, combine marshmallow fluff, vegetable shortening, powdered sugar, salt, and vanilla extract. Beat until the mixture is smooth and fluffy.
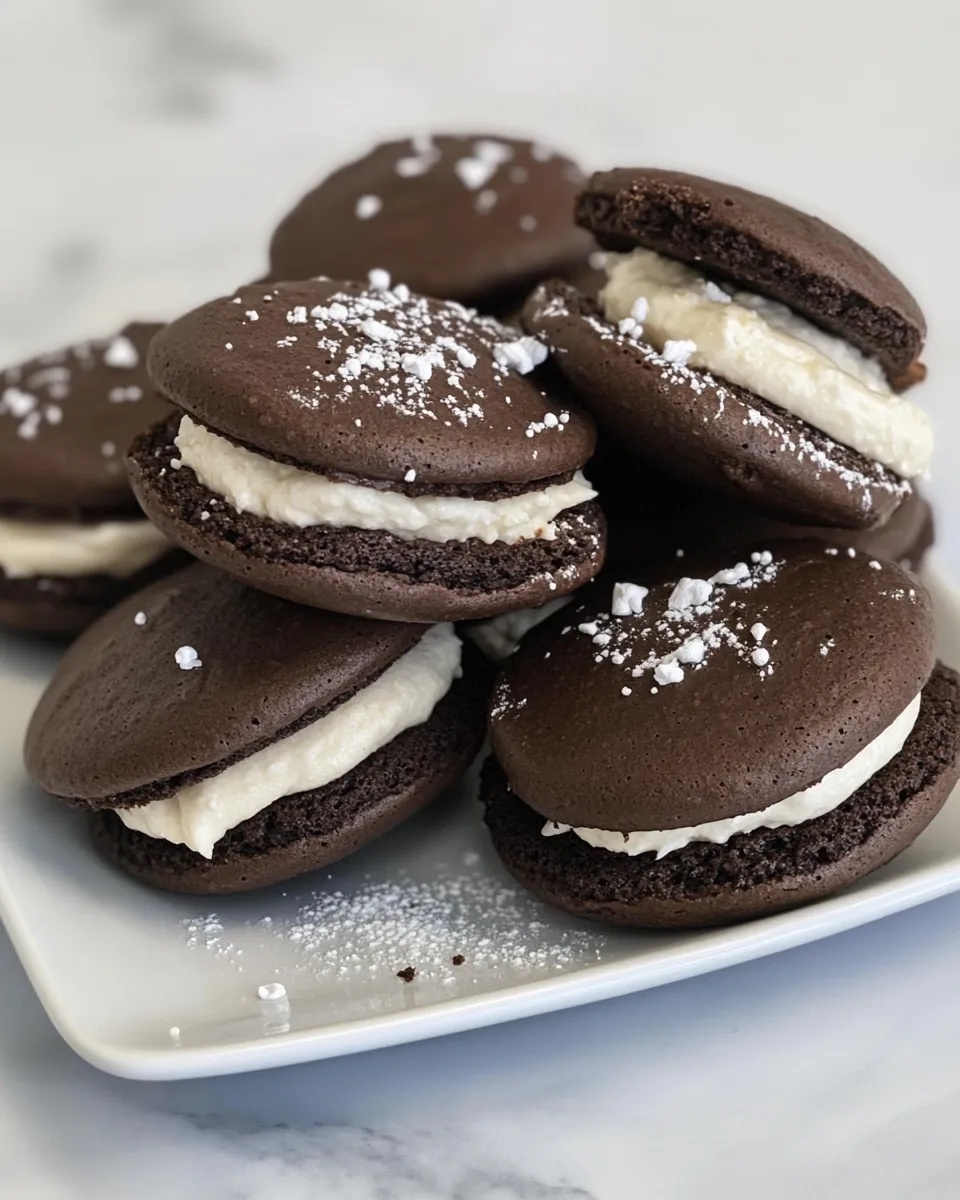
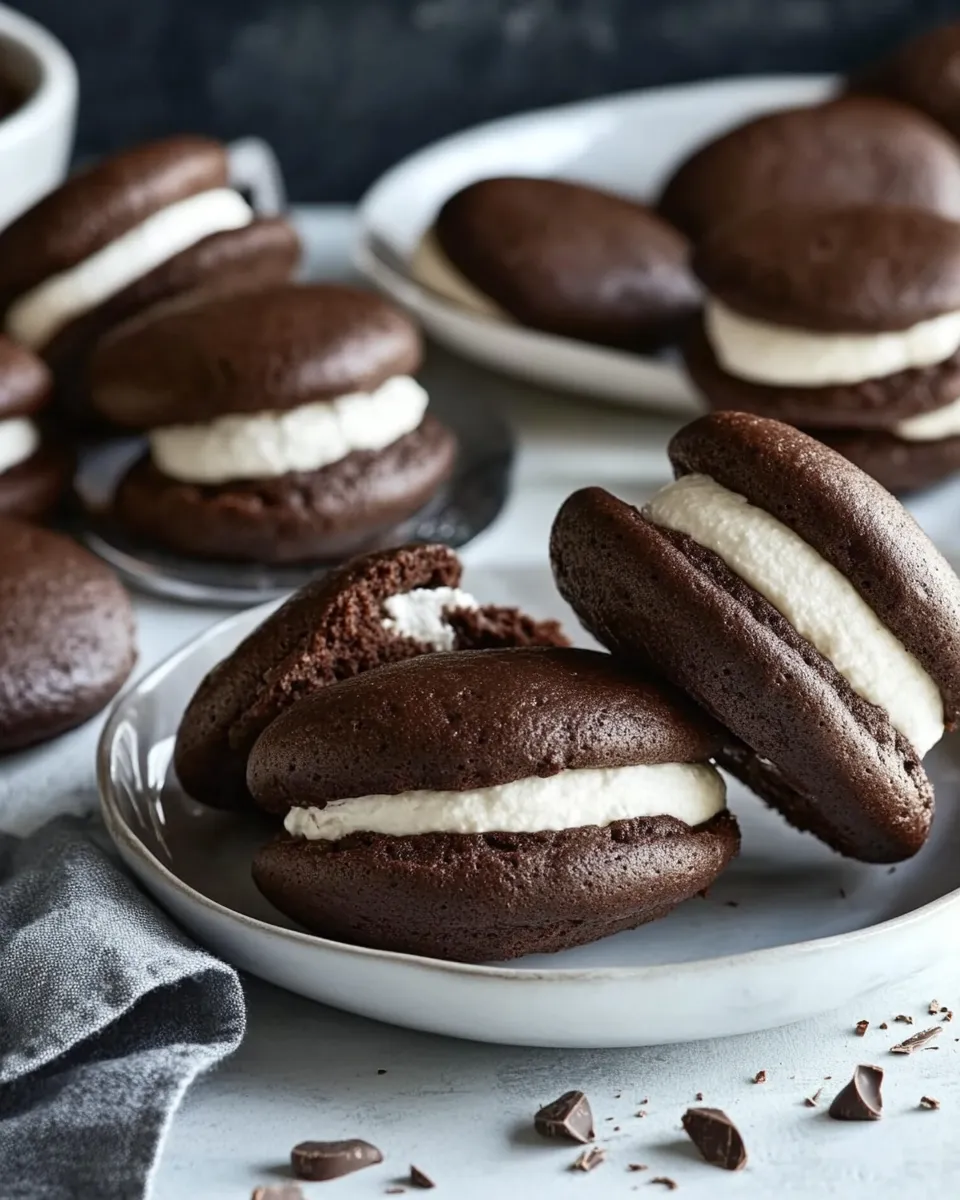
Step 9: Assemble the Chocolate Gobs
Once the chocolate rounds have completely cooled, spread a generous amount of the marshmallow filling on the flat side of one round and top it with another round, flat side down. Press slightly to create a sandwich.
Step 10: Enjoy!
Your delicious Chocolate Gobs are ready to be enjoyed!
Seasonal Twists
Feel free to get creative with your Chocolate Gobs. Here are some seasonal twists to try:
- Pumpkin Spice Filling: Add pumpkin puree and spices for a fall-inspired treat.
- Peppermint Filling: Mix crushed peppermint candies into the filling for a festive holiday version.
- Nutella Swirl: Incorporate Nutella into the marshmallow fluff for a rich, chocolate-hazelnut experience.
- Coconut Cream Filling: Blend shredded coconut into the filling for a tropical flair.
What I Learned Testing
Through several batches of Chocolate Gobs, I discovered a few key points:
- Consistent baking times are crucial; every oven is different, so start checking at the lower end of the baking time.
- Letting the chocolate rounds cool completely is essential to prevent the filling from melting.
- Using a cookie scoop ensures uniform size and baking, resulting in a better overall presentation.
- Experimenting with the filling can elevate the classic whoopie pie to new levels of deliciousness.
Storage & Reheat Guide
To keep your Chocolate Gobs fresh, follow these storage tips:
- Room Temperature: Store in an airtight container for up to 3 days.
- Refrigeration: For longer storage, keep them in the fridge for up to a week.
- Freezing: Freeze unfilled chocolate rounds for up to 3 months. Thaw before filling and serving.
Your Questions, Answered
Can I use butter instead of shortening?
Yes, you can substitute butter for vegetable shortening, but it may result in a slightly different texture and flavor.
What can I use if I don’t have buttermilk?
You can make a buttermilk substitute by mixing ½ cup of milk with ½ tablespoon of vinegar or lemon juice. Let it sit for 5-10 minutes before using.
Can I make these gluten-free?
Yes! Substitute the all-purpose flour with a 1:1 gluten-free flour blend for a delicious gluten-free version.
How do I prevent my filling from being too runny?
Ensure that your vegetable shortening is at room temperature and well-beaten with the powdered sugar to create a stable filling. If it’s too runny, adding a bit more powdered sugar can help thicken it up.
Next Steps
Now that you’ve learned how to make Chocolate Gobs (aka Whoopie Pies), it’s time to gather your ingredients and get baking! Whether you’re preparing for a celebration or simply indulging in a sweet treat, these delightful pies are sure to bring smiles. Don’t forget to share your creations and variations with friends and family, and enjoy the joy that comes from baking delicious desserts.
With Chocolate Gobs, you’re not just making a treat; you’re creating memories that will last a lifetime. Happy baking!
Chocolate Gobs (aka Whoopie Pies)
Ingredients
Equipment
Method
- Step 1: Preheat your oven to 350°F (175°C). Line two baking sheets with parchment paper.
- Step 2: In a medium bowl, whisk together the all-purpose flour, cocoa powder, baking soda, and salt. Set aside.
- Step 3: In a large mixing bowl, beat the vegetable shortening and granulated sugar until light and fluffy (3-5 minutes).
- Step 4: Add the whole egg, egg yolk, and vanilla extract; beat until combined.
- Step 5: Gradually add the dry mixture to the wet ingredients, alternating with buttermilk and hot water.
- Step 6: Drop heaping tablespoons of batter onto prepared baking sheets, leaving space between each mound.
- Step 7: Bake for 10-12 minutes, until edges are set. Cool for 5 minutes on baking sheets.
- Step 8: Prepare the filling by beating marshmallow fluff, vegetable shortening, powdered sugar, salt, and vanilla until smooth.
- Step 9: Spread the filling on the flat side of one round and top with another round.
- Step 10: Enjoy your delicious Chocolate Gobs!
Notes
- Store in an airtight container at room temperature for up to 3 days.
- Freeze unfilled chocolate rounds for up to 3 months.
- Experiment with different fillings for unique flavors.