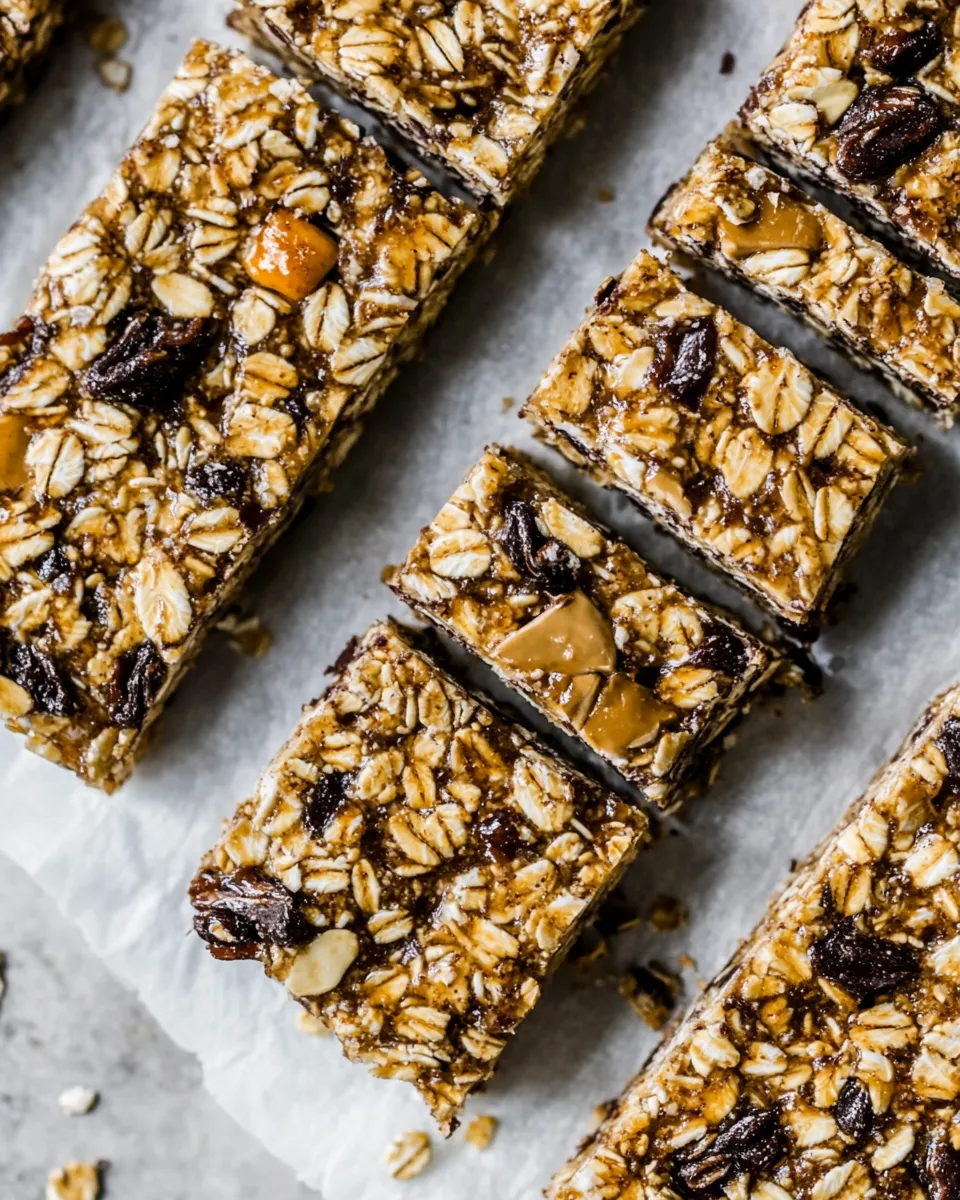
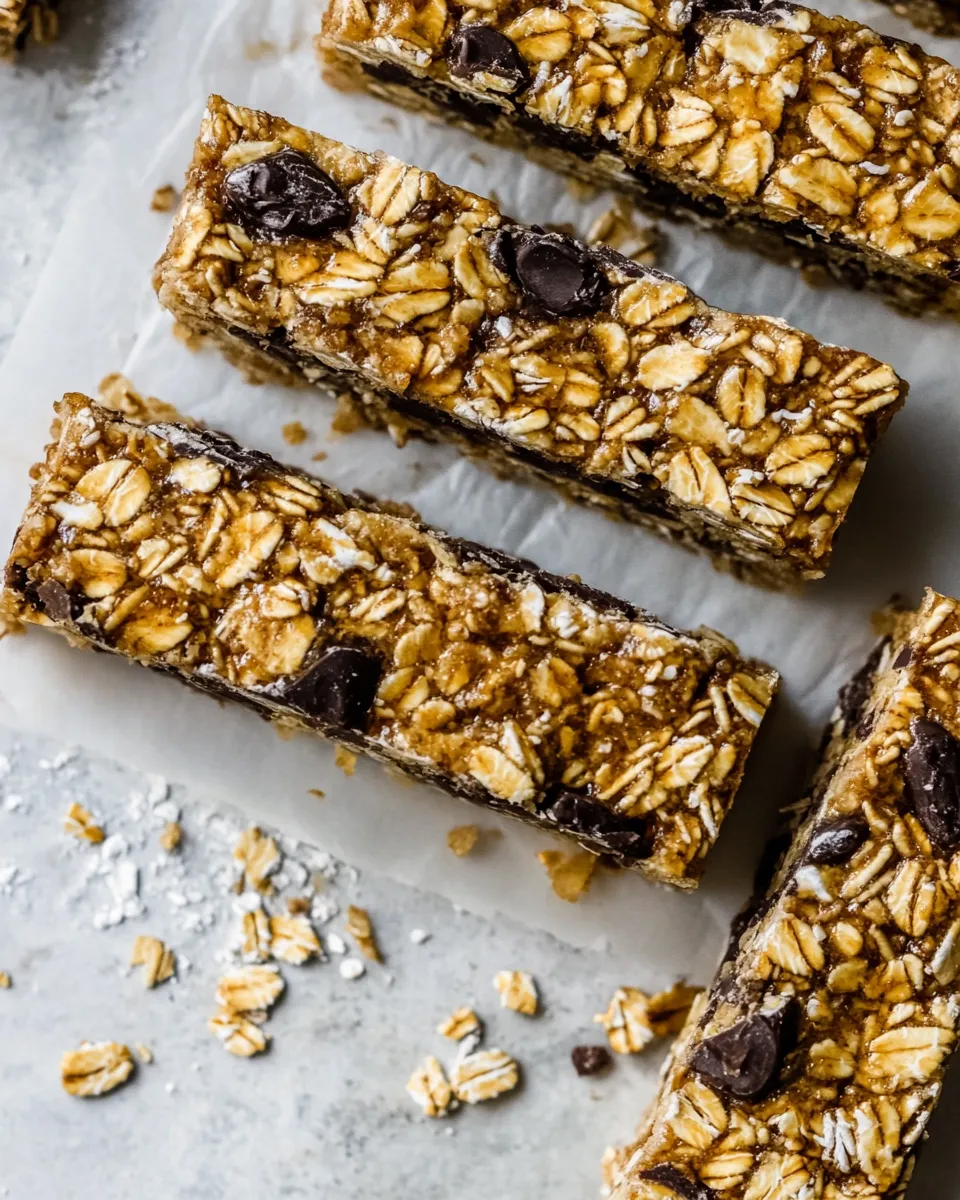
Chewy Granola Bars
When it comes to satisfying your sweet tooth while maintaining a healthy lifestyle, nothing beats homemade chewy granola bars. These delightful treats are not only perfect for a quick snack on the go, but they also provide a delightful balance of flavors and textures. Packed with wholesome ingredients, these chewy granola bars can be customized to your taste, making them a versatile option for everyone in the family. Imagine the warm, inviting aroma of oats and honey wafting through your kitchen as you prepare these delicious bars. Let’s dive into why you’ll love making these chewy granola bars at home.
Top Reasons to Make Chewy Granola Bars
- Control Over Ingredients: You can choose the best quality ingredients and avoid preservatives found in store-bought options.
- Customizable Flavors: Add your favorite nuts, seeds, or dried fruits to create a unique flavor combination.
- Budget-Friendly: Making your own granola bars is much more cost-effective than buying them pre-packaged.
- Kid-Friendly: These bars are a great way to get kids involved in the kitchen, allowing them to mix and match add-ins.
- Perfect for Meal Prep: Make a big batch on the weekend and have a quick snack ready for the week ahead.
What’s in the Bowl
To make these scrumptious chewy granola bars, you will need the following ingredients:
- 2 1/4 cups quick oats
- 1 1/2 cups crispy rice cereal (like Rice Krispies)
- 2 Tablespoons ground flaxseed
- 6 Tablespoons butter*
- 1/3 cup honey
- 3/4 cup packed light brown sugar
- 1 teaspoon vanilla extract
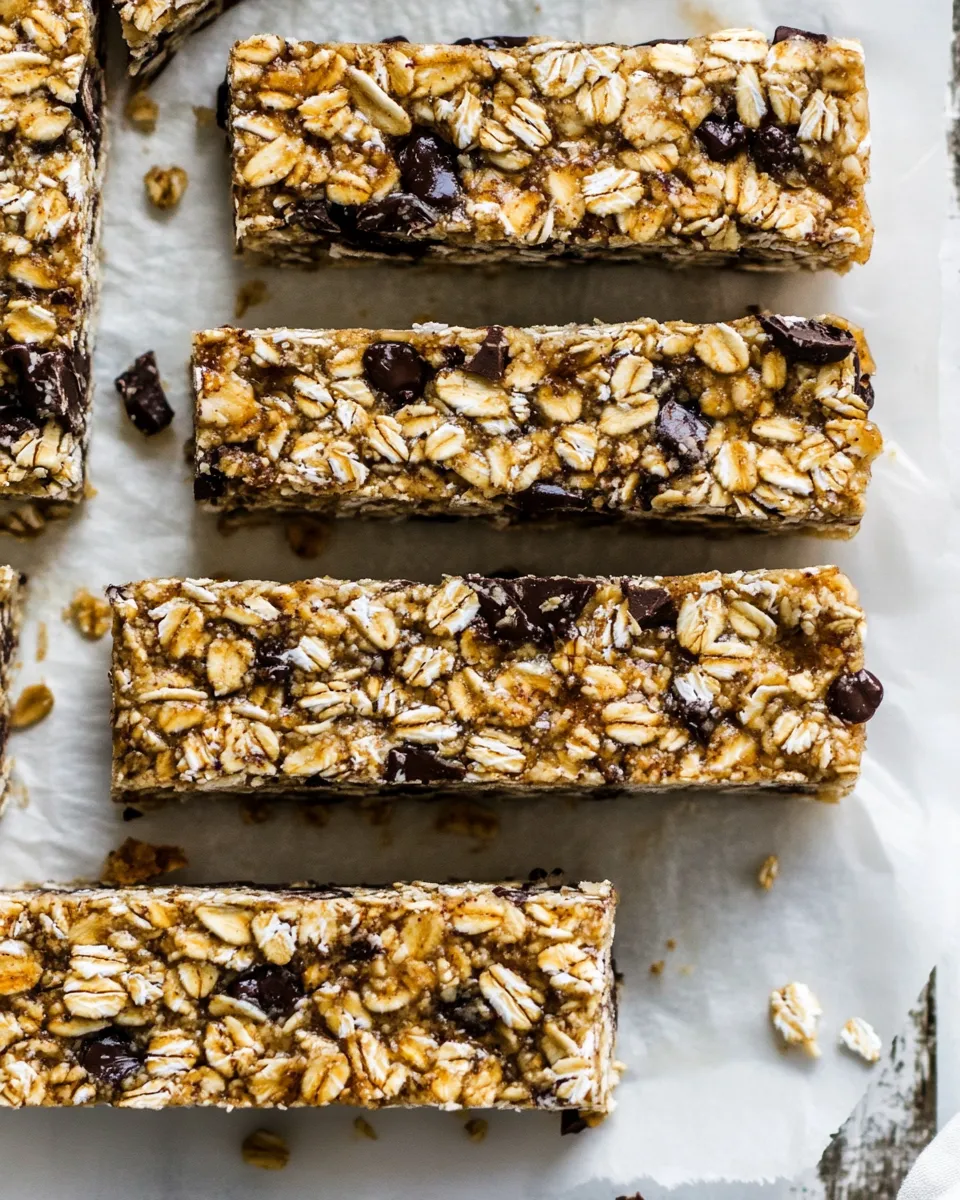
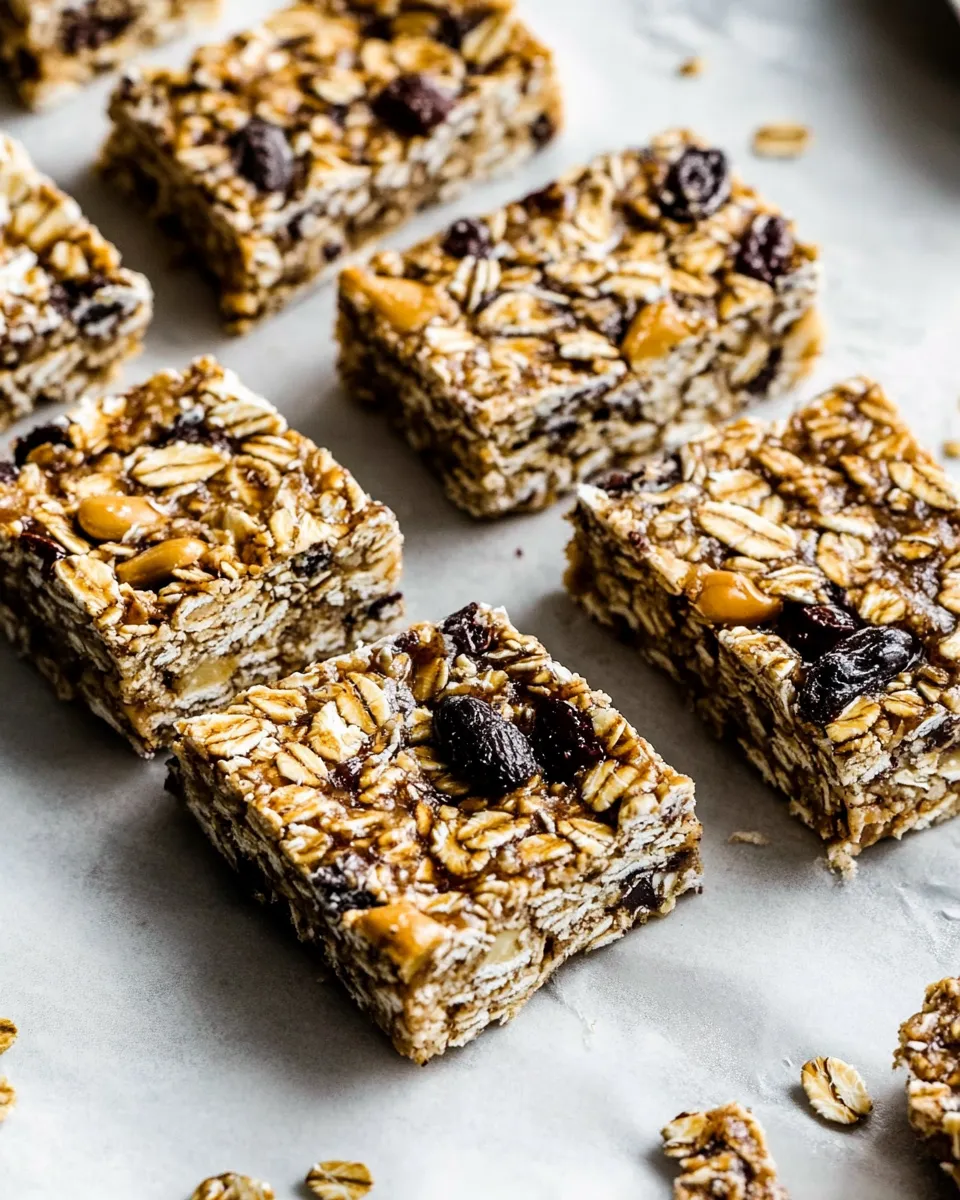
- 1/2 cup mini chocolate chips, or other favorite add-ins
Tools & Equipment Needed
Before you jump into the recipe, make sure you have the following tools ready:
- Mixing Bowl: A large bowl for combining dry ingredients.
- Small Saucepan: For melting butter, honey, and sugar.
- Spatula: To mix ingredients together thoroughly.
- Baking Dish: An 8×8-inch or 9×9-inch dish for shaping the granola bars.
- Parchment Paper: For easy removal and cleanup.
How to Prepare Chewy Granola Bars
Follow these simple steps to create your very own chewy granola bars.
Step 1: Prepare Your Baking Dish
Start by lining your baking dish with parchment paper, allowing some excess to hang over the edges. This will make it easier to lift the bars out once they’re cooled.
Step 2: Melt the Mixture
In a small saucepan over medium heat, combine the butter, honey, and brown sugar. Stir until the mixture is melted and smooth. Remove it from the heat and stir in the vanilla extract.
Step 3: Combine Dry Ingredients
In a large mixing bowl, combine the quick oats, crispy rice cereal, ground flaxseed, and any additional add-ins you desire. This could include nuts, seeds, or dried fruits.
Step 4: Mix Wet and Dry Ingredients
Pour the melted butter mixture into the bowl with the dry ingredients. Use a spatula to mix everything together until it’s evenly coated.
Step 5: Add Chocolate Chips
Gently fold in the mini chocolate chips or any other favorites you’ve chosen. Be careful not to over-mix, as you want to maintain the integrity of the add-ins.
Step 6: Press and Set
Transfer the mixture to your prepared baking dish. Use the spatula or your hands to press the mixture down firmly and evenly. This step is crucial for achieving chewy bars that hold together.
Step 7: Chill and Cut
Refrigerate the mixture for at least 2 hours to set. Once fully chilled, lift the bars out of the dish using the parchment paper. Cut them into squares or rectangles, depending on your preference.
Fit It to Your Goals
These chewy granola bars are incredibly versatile. Here are some ideas to make them fit your dietary needs:
- Nut-Free: Substitute sunflower seeds or pumpkin seeds for nuts.
- Vegan: Use coconut oil instead of butter and maple syrup in place of honey.
- Protein Boost: Add a scoop of your favorite protein powder to the dry mixture.
- Gluten-Free: Ensure you use certified gluten-free oats and cereal.
Behind-the-Scenes Notes
Creating your own chewy granola bars can be a fun experiment in the kitchen. Here are some tips to enhance your experience:
- Feel free to experiment with different add-ins—dried cranberries, coconut flakes, or even a sprinkle of sea salt on top can add a delightful twist.
- Storing the bars in an airtight container will help maintain their chewiness. If you live in a humid climate, consider refrigerating them to keep them fresh longer.
- These bars make great gifts! Wrap them in a cute package and surprise your friends or family.
Keep-It-Fresh Plan
To ensure your chewy granola bars stay fresh and delicious, follow these storage tips:
- Airtight Container: Store your bars in an airtight container at room temperature for up to one week.
- Refrigeration: For longer shelf life, keep them in the fridge, where they can last for up to two weeks.
- Freezing: You can freeze the bars for up to three months. Just wrap them individually in plastic wrap and store them in a freezer bag.
Ask & Learn
Can I use instant oats instead of quick oats?
While you can use instant oats, the texture may be slightly different. Quick oats provide the right chewiness for these bars.
What can I substitute for honey?
If you prefer not to use honey, agave syrup or maple syrup makes a great alternative, but keep in mind that the flavor will vary slightly.
How can I make these bars more nutritious?
Consider adding chia seeds or hemp seeds for additional fiber and protein, or substitute some of the oats for protein-rich nut flour.
Can I make these without a baking dish?
Yes! You can press the mixture into a parchment-lined baking sheet for thinner bars, but make sure to adjust the chilling time accordingly.
Ready, Set, Cook
Now that you have all the details to create your own chewy granola bars, it’s time to gather your ingredients and start cooking! These bars are a fantastic addition to your snack rotation, providing a perfect blend of sweetness and nutrition. Whether you enjoy them during a hike, as an afternoon pick-me-up, or even as a breakfast option on busy mornings, they are sure to delight. So roll up your sleeves and bring a little homemade goodness into your kitchen. Enjoy every chewy bite!
Chewy Granola Bars
Ingredients
Equipment
Method
- Start by lining your baking dish with parchment paper, allowing some excess to hang over the edges. This will make it easier to lift the bars out once they’re cooled.
- In a small saucepan over medium heat, combine the butter, honey, and brown sugar. Stir until the mixture is melted and smooth. Remove it from the heat and stir in the vanilla extract.
- In a large mixing bowl, combine the quick oats, crispy rice cereal, ground flaxseed, and any additional add-ins you desire. This could include nuts, seeds, or dried fruits.
- Pour the melted butter mixture into the bowl with the dry ingredients. Use a spatula to mix everything together until it's evenly coated.
- Gently fold in the mini chocolate chips or any other favorites you’ve chosen. Be careful not to over-mix, as you want to maintain the integrity of the add-ins.
- Transfer the mixture to your prepared baking dish. Use the spatula or your hands to press the mixture down firmly and evenly. This step is crucial for achieving chewy bars that hold together.
- Refrigerate the mixture for at least 2 hours to set. Once fully chilled, lift the bars out of the dish using the parchment paper. Cut them into squares or rectangles, depending on your preference.
Notes
- Feel free to experiment with different add-ins—dried cranberries, coconut flakes, or even a sprinkle of sea salt on top can add a delightful twist.
- Storing the bars in an airtight container will help maintain their chewiness. If you live in a humid climate, consider refrigerating them to keep them fresh longer.
- These bars make great gifts! Wrap them in a cute package and surprise your friends or family.