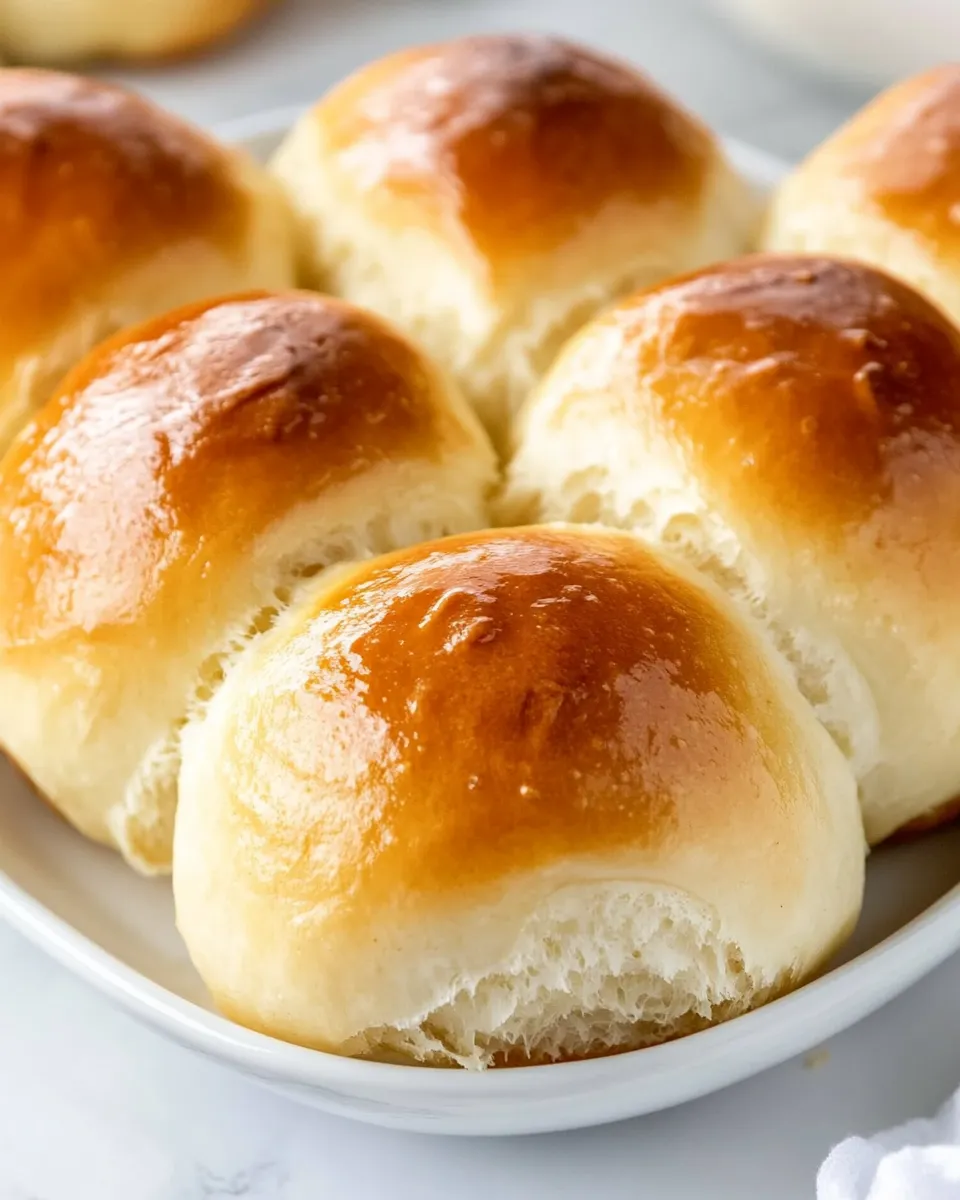
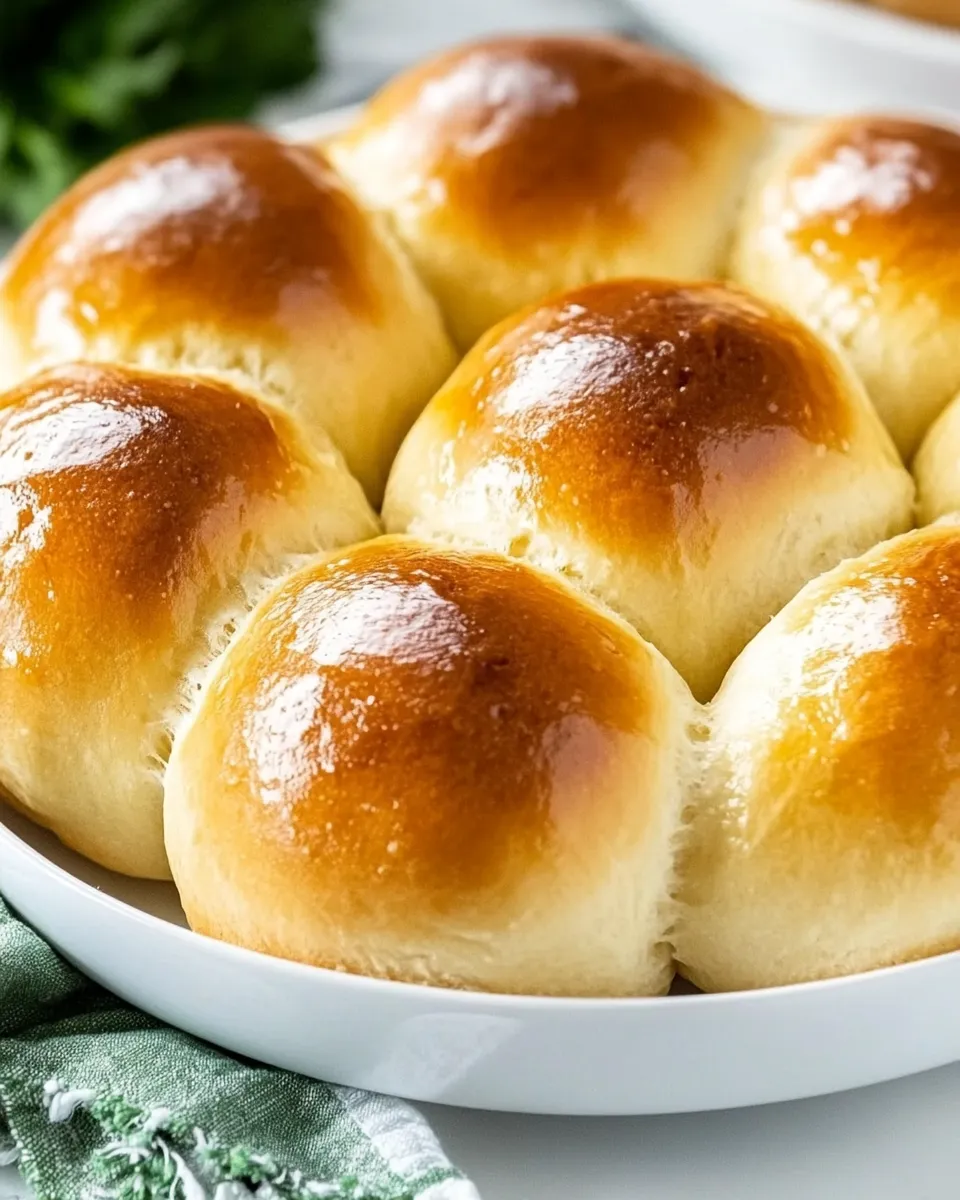
Brown and Serve Rolls
There’s nothing quite like the aroma of freshly baked bread wafting through your kitchen. Brown and Serve Rolls are the perfect combination of soft, fluffy goodness that can complement any meal or serve as a delightful snack on their own. These rolls are incredibly versatile, making them a fantastic addition to your dinner table, holiday feasts, or even as part of a cozy breakfast spread. Whether you’re a seasoned baker or just starting out, this recipe will guide you step-by-step to create rolls that are sure to impress.
Why This Recipe Works
The secret to perfect Brown and Serve Rolls lies in the use of instant yeast, which allows the dough to rise quickly without the need for prolonged proofing times. The combination of milk and water ensures a soft texture, while the addition of garlic and rosemary infuses each roll with irresistible flavor. This recipe is designed to be forgiving, making it ideal for both novice and experienced bakers alike. Plus, they can be prepared ahead of time and simply baked when you’re ready to serve, making them a fantastic option for busy days.
What You’ll Need
- 8 to 9 cups all-purpose flour
- 2 envelopes instant yeast (about 4 1/2 teaspoons)
- 1 cup granulated sugar
- 4 teaspoons fine sea salt
- 3 to 4 tablespoons minced fresh rosemary (optional)
- 4 to 5 large garlic cloves, minced
- 1 cup milk
- 1 cup water
- 1 cup unsalted butter
Must-Have Equipment
- Large mixing bowl – for combining your ingredients.
- Measuring cups and spoons – precision is key in baking.
- Rolling pin – to shape your dough into rolls.
- Baking sheets – for baking the rolls.
- Kitchen towel – to cover the dough while it rises.
- Oven – for baking to golden perfection.
Brown and Serve Rolls: From Prep to Plate
Step 1: Prepare the Dough
Begin by warming the milk and water in a small saucepan over low heat until it is warm to the touch but not boiling. Remove from heat and stir in the granulated sugar and instant yeast. Allow this mixture to sit for about 5 minutes until it becomes frothy.
Step 2: Combine Dry Ingredients
In a large mixing bowl, combine 6 cups of all-purpose flour, fine sea salt, minced garlic, and minced rosemary. Mix well to ensure that all the dry ingredients are evenly distributed.
Step 3: Mix the Wet and Dry Ingredients
Once the yeast mixture is frothy, make a well in the center of the dry ingredients and pour in the warm milk mixture. Stir with a wooden spoon or spatula until combined. Gradually add more flour, 1 cup at a time, until a soft dough begins to form.
Step 4: Knead the Dough
Transfer the dough to a floured surface and knead for about 8-10 minutes, adding more flour as necessary to prevent sticking. The dough should be smooth and elastic when finished.
Step 5: First Rise
Place the kneaded dough in a large greased bowl. Cover it with a kitchen towel and let it rise in a warm place until it doubles in size, about 1 to 1.5 hours.
Step 6: Shape the Rolls
Once the dough has risen, punch it down to release any air bubbles. Turn it out onto a floured surface and divide it into small pieces, shaping each piece into a ball. Place the rolls on greased baking sheets, leaving space between each.
Step 7: Second Rise
Cover the rolls with a kitchen towel and let them rise again for about 30 minutes, or until they puff up.
Step 8: Preheat the Oven
While the rolls are rising, preheat your oven to 375°F (190°C). This ensures that they will bake evenly once they are ready.
Step 9: Bake the Rolls
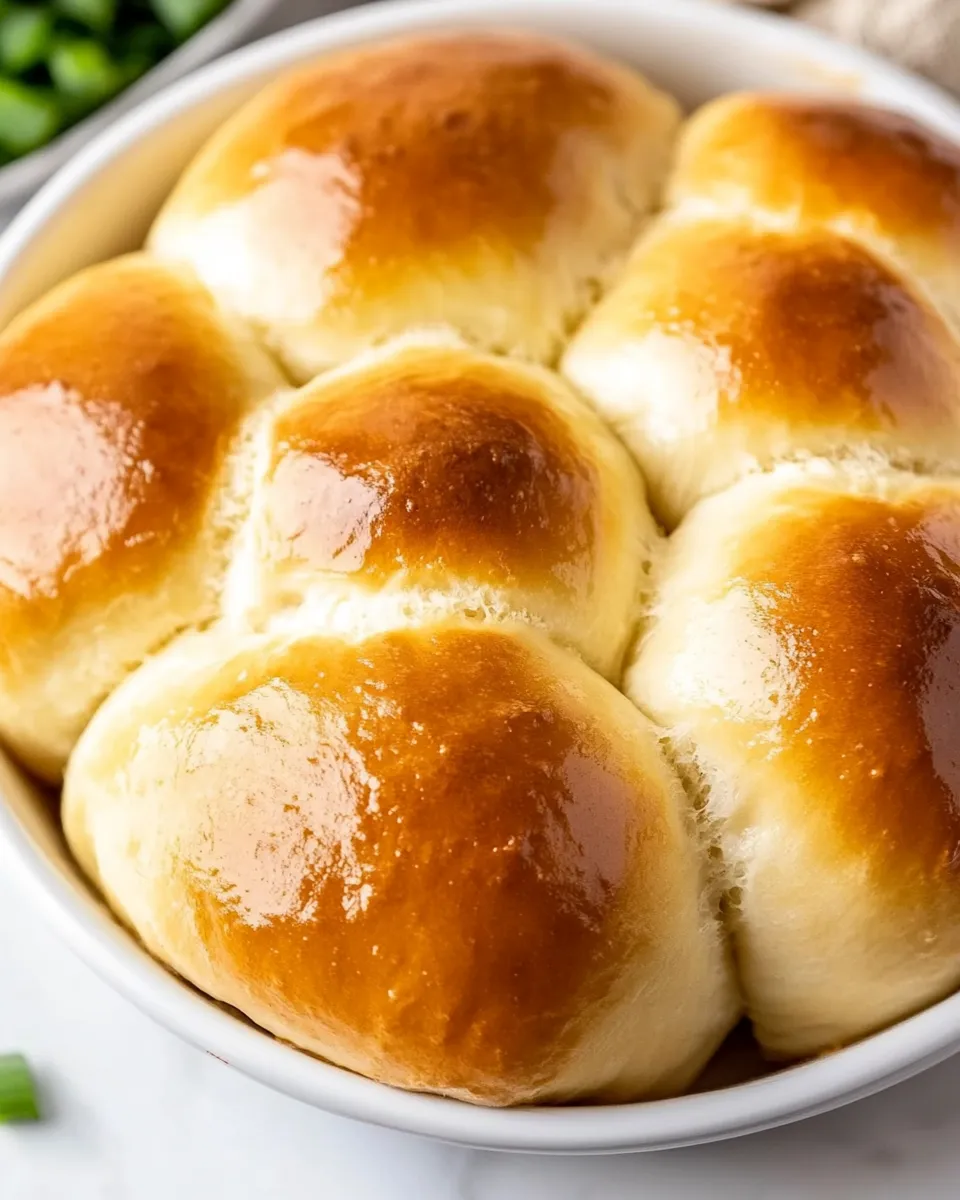
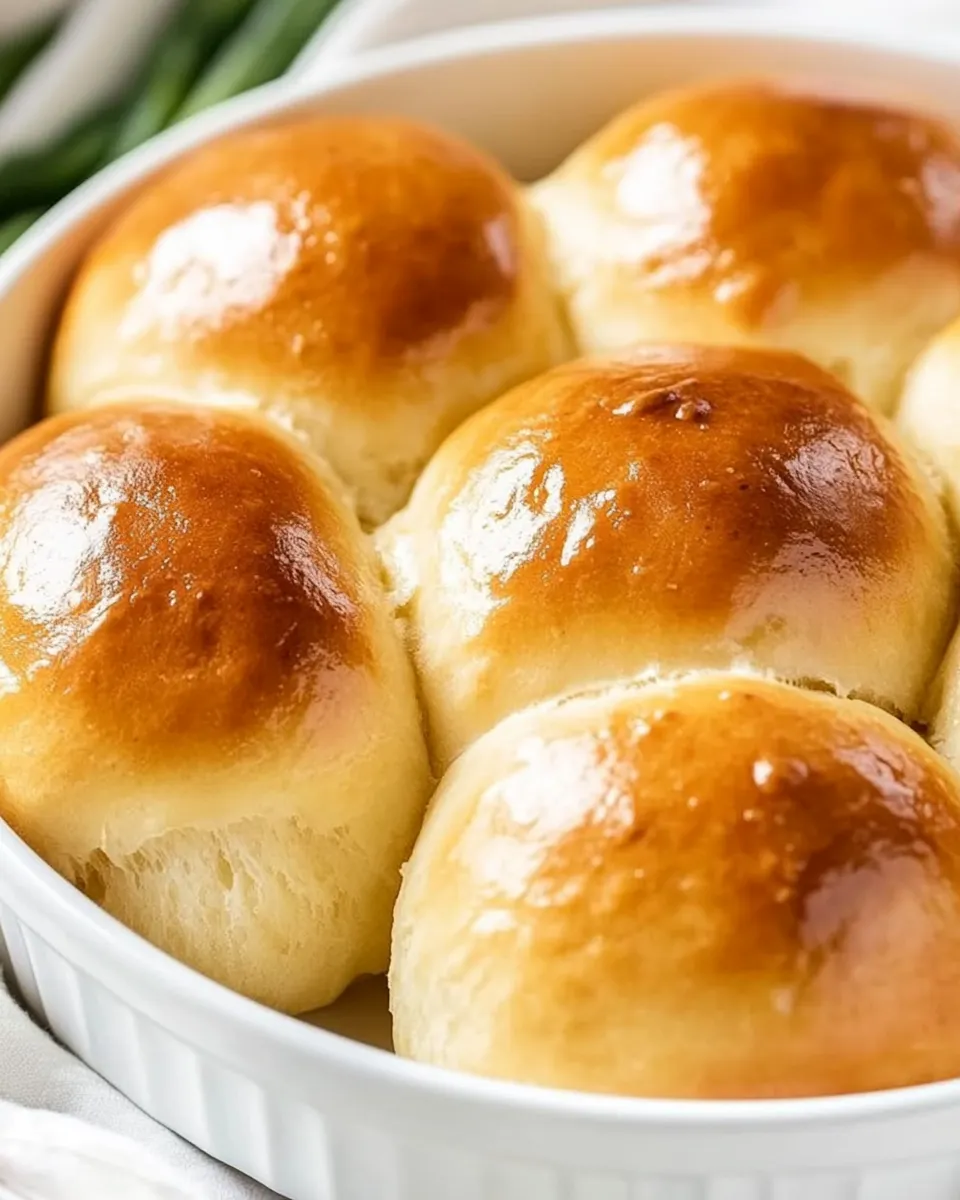
Once the rolls have risen, place them in the preheated oven and bake for approximately 15-20 minutes, or until they are golden brown on top.
Step 10: Cool and Serve
Remove the rolls from the oven and let them cool for a few minutes on a wire rack. Serve warm, or if you wish to prepare them ahead of time, follow the storage instructions below.
Warm & Cool Weather Spins
- Warm Weather: If your kitchen is warm, the dough will rise faster. Keep an eye on it to prevent over-proofing.
- Cool Weather: If it’s chilly, place the dough in a slightly warmed oven (turned off) to help it rise.
- Flavor Variations: Experiment with different herbs like thyme or sage, or add cheese for an extra burst of flavor.
- Make-Ahead Options: Prepare the rolls and freeze them before the second rise, then thaw and bake when you’re ready to enjoy.
Method to the Madness
To ensure that your Brown and Serve Rolls turn out perfectly, remember to measure your ingredients accurately and adjust the flour based on the humidity of your kitchen. Kneading the dough is crucial; it develops the gluten, giving the rolls their lovely texture. Be patient during the rising times; this is where the magic happens! If you notice that your dough isn’t rising well, check the freshness of your yeast, as old yeast can lead to flat rolls.
Meal Prep & Storage Notes
These rolls can be stored in an airtight container at room temperature for up to 3 days. For longer storage, place them in the freezer. To reheat, simply pop them in a warm oven for a few minutes. If you plan to make these rolls ahead of time, you can prepare the dough and freeze the shaped rolls before the second rise. Just thaw them overnight in the refrigerator and allow them to rise before baking.
Your Top Questions
Can I use bread flour instead of all-purpose flour?
Yes, bread flour can be used for a chewier texture, but you may need to adjust the liquid slightly as bread flour absorbs more moisture.
What if my dough doesn’t rise?
Ensure your yeast is fresh and that your liquids are at the right temperature. If it’s too cold, the yeast will not activate; if it’s too hot, it can kill the yeast.
Can I add cheese to the rolls?
Absolutely! Adding shredded cheese to the dough can give it a delicious flavor. Just be sure to reduce the amount of flour slightly to accommodate the moisture from the cheese.
How do I know when the rolls are done baking?
The rolls should be golden brown on top and sound hollow when tapped on the bottom. You can also use a thermometer; they should reach an internal temperature of about 190°F (88°C).
Serve & Enjoy
These Brown and Serve Rolls are not only a treat for the taste buds but also a feast for the eyes. Serve them alongside your favorite soups and salads, or simply enjoy them with a pat of butter and a sprinkle of sea salt. They are perfect for family gatherings, holiday dinners, or any occasion that calls for a touch of homemade goodness. Get ready to impress your loved ones with these delightful rolls, and watch them disappear from the breadbasket in no time!
With a little practice, you’ll master the art of making Brown and Serve Rolls, creating memories and delicious meals that will be cherished for years to come. So gather your ingredients, roll up your sleeves, and get baking!
Brown and Serve Rolls
Ingredients
Equipment
Method
- Begin by warming the milk and water in a small saucepan over low heat until it is warm to the touch but not boiling. Remove from heat and stir in the granulated sugar and instant yeast. Allow this mixture to sit for about 5 minutes until it becomes frothy.
- In a large mixing bowl, combine 6 cups of all-purpose flour, fine sea salt, minced garlic, and minced rosemary. Mix well to ensure that all the dry ingredients are evenly distributed.
- Once the yeast mixture is frothy, make a well in the center of the dry ingredients and pour in the warm milk mixture. Stir with a wooden spoon or spatula until combined. Gradually add more flour, 1 cup at a time, until a soft dough begins to form.
- Transfer the dough to a floured surface and knead for about 8-10 minutes, adding more flour as necessary to prevent sticking. The dough should be smooth and elastic when finished.
- Place the kneaded dough in a large greased bowl. Cover it with a kitchen towel and let it rise in a warm place until it doubles in size, about 1 to 1.5 hours.
- Once the dough has risen, punch it down to release any air bubbles. Turn it out onto a floured surface and divide it into small pieces, shaping each piece into a ball. Place the rolls on greased baking sheets, leaving space between each.
- Cover the rolls with a kitchen towel and let them rise again for about 30 minutes, or until they puff up.
- While the rolls are rising, preheat your oven to 375°F (190°C). This ensures that they will bake evenly once they are ready.
- Once the rolls have risen, place them in the preheated oven and bake for approximately 15-20 minutes, or until they are golden brown on top.
- Remove the rolls from the oven and let them cool for a few minutes on a wire rack. Serve warm, or if you wish to prepare them ahead of time, follow the storage instructions below.
Notes
- Store these rolls in an airtight container at room temperature for up to 3 days.
- For longer storage, freeze them and reheat in a warm oven.
- Feel free to add your favorite herbs or cheese for flavor variations!