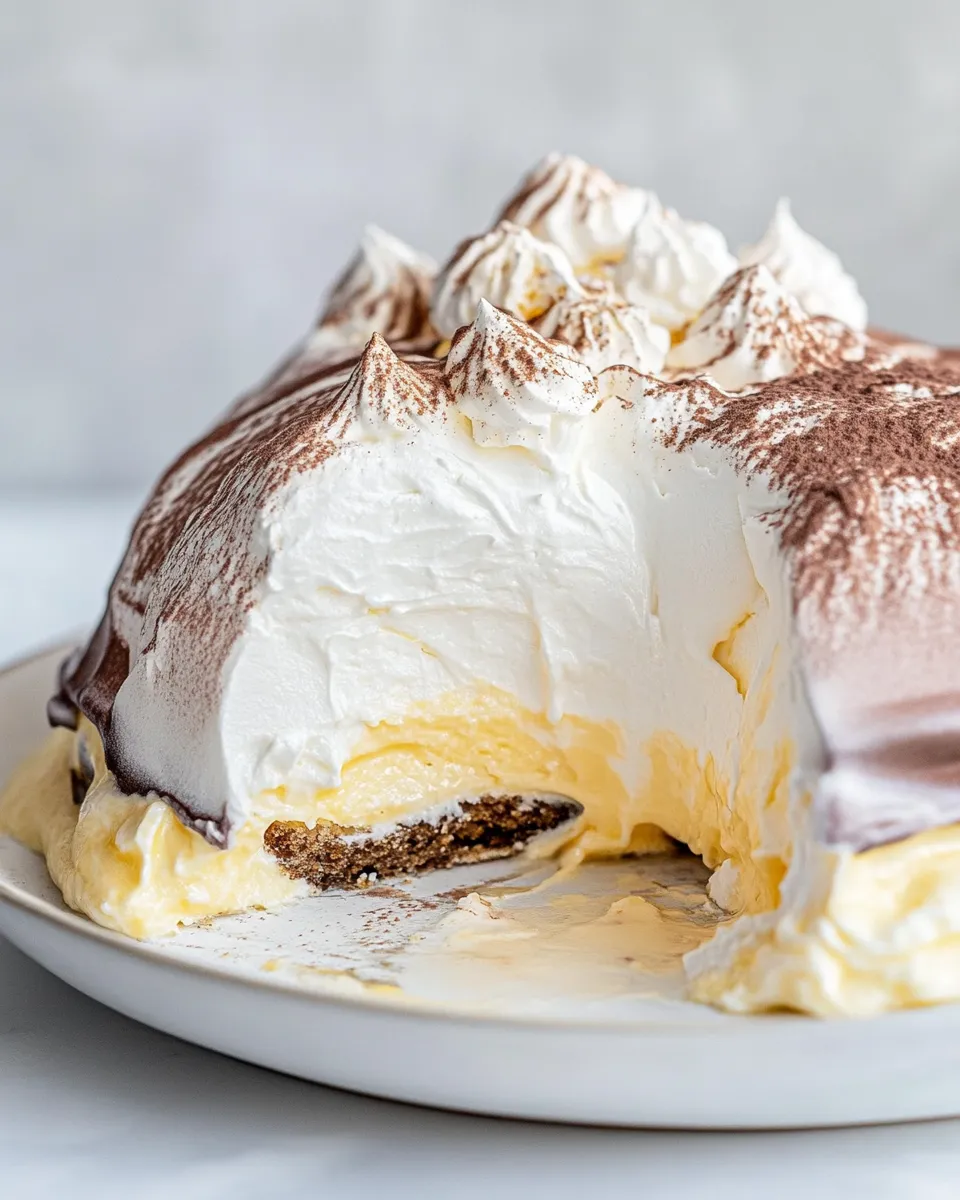
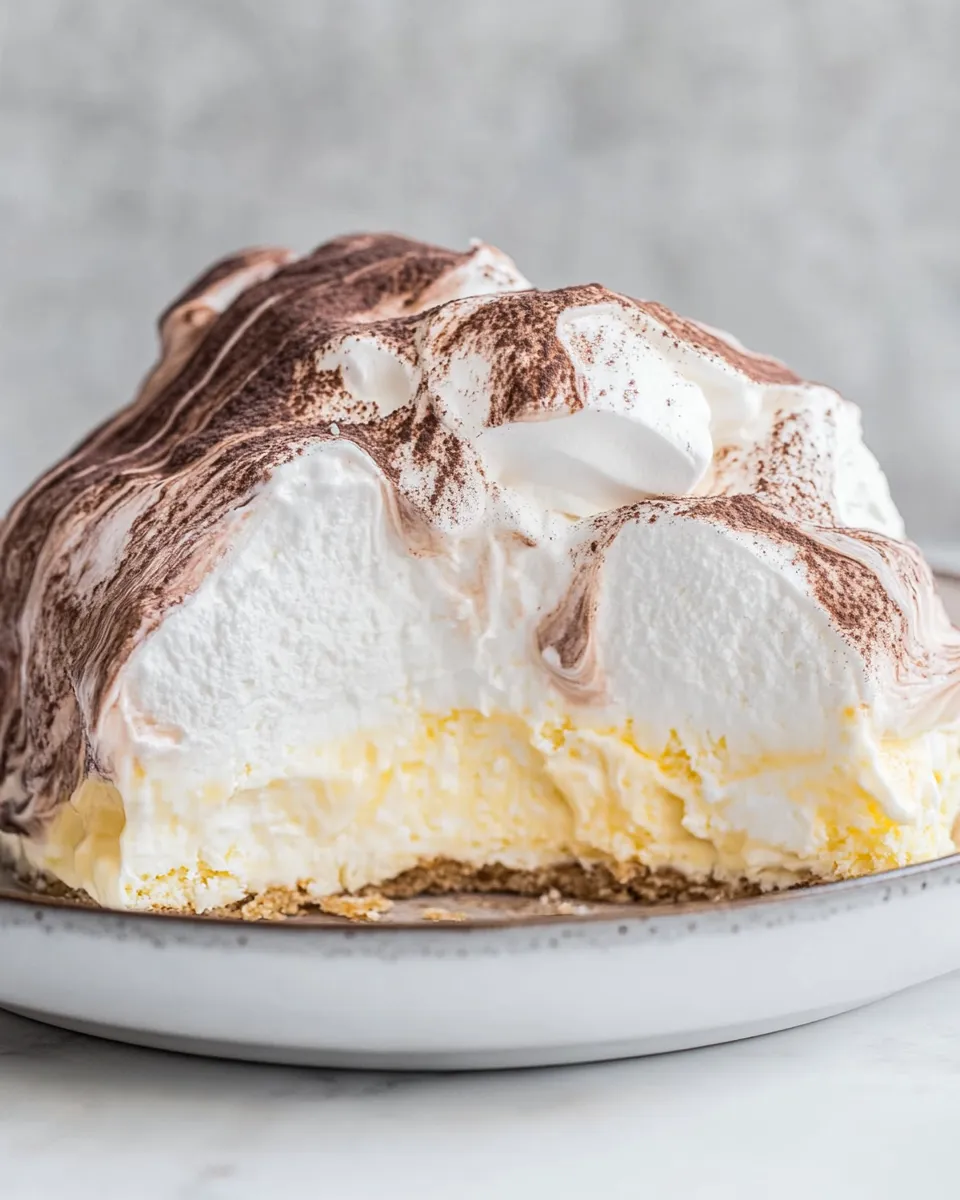
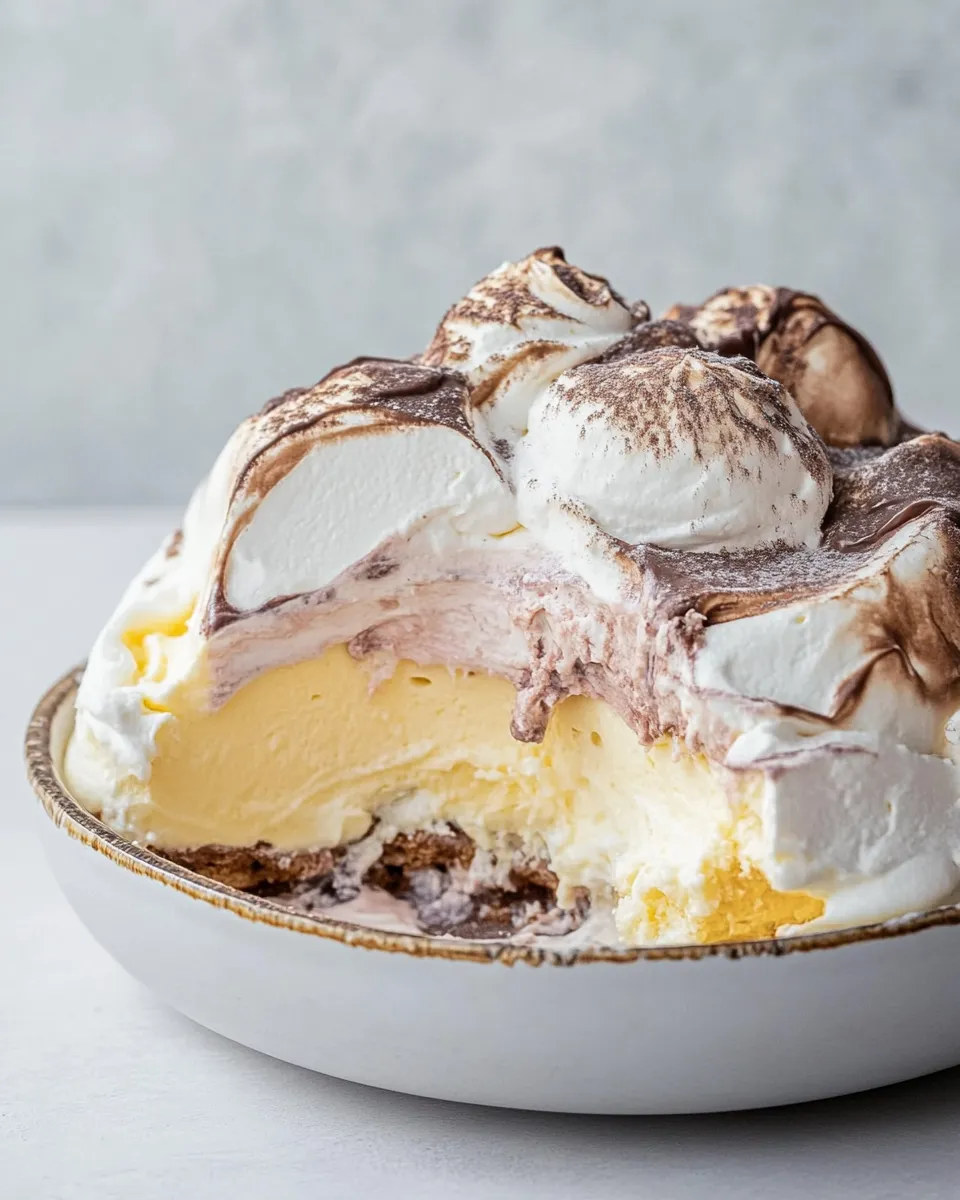
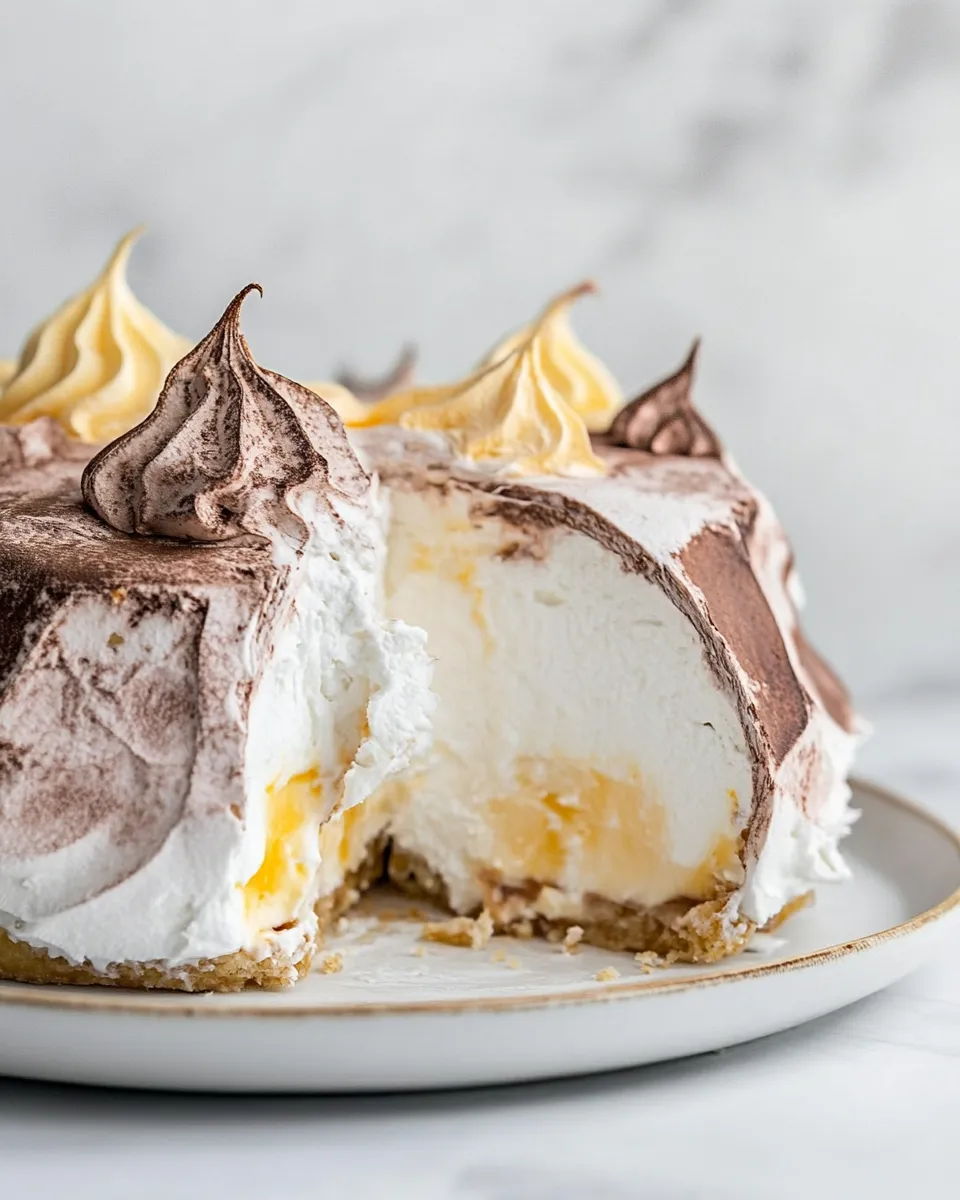
Baked Alaska
If you’re looking for a dessert that dazzles both the eyes and the palate, Baked Alaska is your answer. This classic dessert combines layers of cake, ice cream, and meringue, all baked to perfection. It’s a showstopper that’s surprisingly easy to make at home, perfect for impressing guests at dinner parties or celebrating special occasions. The warm toasted meringue encasing cold ice cream is a delightful contrast that is sure to leave everyone craving more. Let’s delve into the magic of Baked Alaska and learn how to create this stunning dessert yourself!
Why Cooks Rave About It
Baked Alaska has a special allure that keeps it a favorite among home bakers and professional chefs alike. Here are a few reasons why cooks rave about it:
- Visual Appeal: Its towering structure and golden-brown meringue make it a feast for the eyes.
- Flavor Explosion: The combination of cake, ice cream, and meringue creates a melange of flavors and textures.
- Customizable: You can mix and match flavors of ice cream and cake to suit any occasion or preference.
- Impressive Presentation: It’s a dessert that’s sure to impress guests and spark conversations.
- Easy to Prepare: Although it looks complex, the steps are straightforward, and it can be made ahead of time.
Ingredient Breakdown
To create the perfect Baked Alaska, you’ll need the following ingredients:
- 1 prepared cake round: You can use any flavor you desire, like chocolate, vanilla, or even a fruit-flavored cake.
- 3-4 pints ice cream: Choose your favorite flavors, such as chocolate, vanilla, strawberry, or mint. Make sure they are firm enough to hold their shape.
- 8 large egg whites: These will be whipped into a luscious meringue. Ensure they are at room temperature for best results.
- 1 pinch cream of tartar: This stabilizes the egg whites and helps them whip up beautifully.
- 1 cup granulated sugar: Sweetens the meringue and gives it that glossy finish.
Equipment Breakdown
Before you get started, gather the necessary equipment to streamline your baking process:
- Mixing Bowls: Use a large bowl for whipping the egg whites and a separate one for mixing any additional ingredients.
- Hand Mixer or Stand Mixer: A powerful mixer is essential for achieving stiff peaks in your meringue.
- Spatula: Handy for spreading the meringue evenly over the ice cream.
- Baking Sheet: Used for baking the meringue-covered dessert.
- Kitchen Torch (optional): For toasting the meringue if you prefer a charred finish; alternatively, you can use an oven.
The Method for Baked Alaska
Now, let’s walk through the steps to create your own Baked Alaska.
Step 1: Prepare the Cake Base
Begin by baking your chosen cake round according to the recipe. Once it has cooled completely, place it on a serving platter suitable for the freezer.
Step 2: Layer the Ice Cream
Scoop the ice cream of your choice and spread it evenly on top of the cooled cake. You can create multiple layers of different flavors if you like. Once layered, place the assembled cake and ice cream back in the freezer for at least 2 hours to firm up.
Step 3: Make the Meringue
In a clean mixing bowl, start whipping the egg whites using your mixer on medium speed. Once they become frothy, add a pinch of cream of tartar. Gradually add the granulated sugar, a tablespoon at a time, while continuing to beat until the mixture forms glossy stiff peaks. This process should take about 5-7 minutes.
Step 4: Assemble the Baked Alaska
Remove the cake and ice cream from the freezer. Spoon the meringue over the ice cream, making sure to cover it completely, sealing the edges to prevent ice crystals from forming. Use a spatula to create swirls and peaks for a decorative effect.
Step 5: Bake or Torch the Meringue
Preheat your oven to 500°F (260°C). Place the assembled Baked Alaska in the oven for about 3-5 minutes, or until the meringue is golden brown. Alternatively, use a kitchen torch to achieve the desired browning.
Step 6: Serve and Enjoy
Remove from the oven and let it cool for a minute before slicing. Serve immediately to enjoy the contrast of warm meringue and cold ice cream.
Spring–Summer–Fall–Winter Ideas
Baked Alaska is a versatile dessert that can be adapted for any season:
- Spring: Use lemon or berry-flavored ice cream with a light vanilla cake for a fresh, seasonal twist.
- Summer: Opt for tropical flavors like coconut or mango paired with a coconut cake.
- Fall: Pumpkin spice or apple pie ice cream atop a spiced cake brings the flavors of autumn to life.
- Winter: Rich flavors like peppermint or hot chocolate ice cream make for a cozy holiday treat.
Flavor Logic
Creating a well-balanced Baked Alaska involves understanding the interplay of flavors:
- Contrast: The warm meringue contrasts with the cold ice cream, creating a delightful temperature play.
- Balance: Pair sweet ice cream with a less sweet cake, or vice versa, to maintain equilibrium.
- Complement: Use complementary flavors, such as chocolate cake with mint ice cream or vanilla cake with berry ice cream.
- Texture: The soft meringue, creamy ice cream, and dense cake all contribute to an enjoyable mouthfeel.
Make-Ahead & Storage
Baked Alaska can be made ahead of time, making it a fantastic dessert for gatherings:
You can fully assemble the dessert and freeze it for up to a week before baking. Just remember to cover it well with plastic wrap or aluminum foil. When you’re ready to serve, simply bake or torch the meringue and enjoy! However, it’s best served immediately after baking for the optimal contrast in temperatures and textures.
Ask the Chef
Can I use store-bought cake and ice cream for Baked Alaska?
Absolutely! Using store-bought components can save time and still yield a delicious result. Just choose high-quality products for the best flavor.
How do I prevent the meringue from weeping?
To prevent weeping, ensure that your egg whites are whipped to stiff peaks and that the meringue fully covers the ice cream to create a barrier. Baking it right after assembling also helps seal in moisture.
What if I don’t have a kitchen torch?
No worries! You can easily bake the meringue in the oven until golden brown. Just keep a close eye on it to prevent burning.
Can I make Baked Alaska in advance?
Yes, you can prepare the Baked Alaska and freeze it before baking the meringue. Just be sure to cover it properly to avoid freezer burn.
Let’s Eat
There you have it! Your guide to creating a stunning Baked Alaska that will wow your friends and family. As you slice into this dessert, the layers reveal themselves in a beautiful display of colors and textures. Serve it at your next gathering, and watch as everyone savors each bite, enchanted by the warm meringue and cool ice cream. Whether you’re celebrating a birthday, holiday, or just a casual dinner, Baked Alaska is sure to make the occasion special.
Now, roll up your sleeves and get ready to create a dessert masterpiece that’s as delightful to make as it is to eat!
Baked Alaska
Ingredients
Equipment
Method
- Step 1: Prepare the Cake Base - Bake your chosen cake round and place on a serving platter suitable for the freezer.
- Step 2: Layer the Ice Cream - Spread ice cream evenly on cooled cake and freeze for at least 2 hours.
- Step 3: Make the Meringue - Whip egg whites, add cream of tartar, and gradually mix in sugar until stiff peaks form.
- Step 4: Assemble the Baked Alaska - Cover ice cream with meringue, sealing edges to prevent ice crystals.
- Step 5: Bake or Torch the Meringue - Bake at 500°F for 3-5 minutes or use a kitchen torch to brown the meringue.
- Step 6: Serve and Enjoy - Cool slightly, slice, and serve immediately to enjoy the contrast of warm and cold.
Notes
- Make sure to let the cake cool completely before layering with ice cream.
- Use high-quality ice cream for the best flavor and texture.
- Cover the assembled Baked Alaska well before freezing to prevent freezer burn.