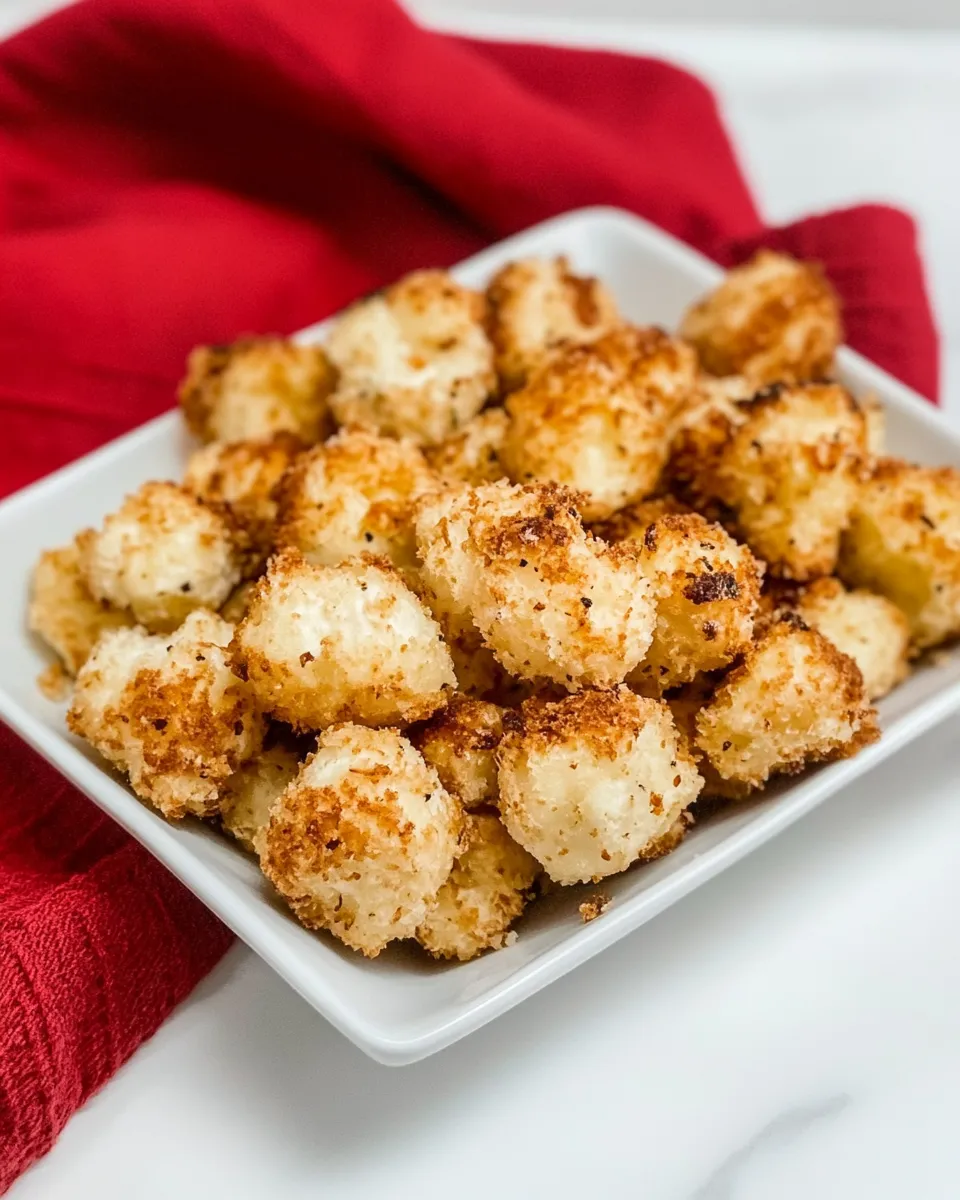
Air-Fryer Cheese Curds
If you’re a fan of cheesy snacks that are crispy on the outside and gooey on the inside, then these Air-Fryer Cheese Curds are about to become your new favorite treat. They’re perfect for game days, movie nights, or just a delightful afternoon snack. The beauty of air-frying is that you can achieve that coveted crunch without the need for deep-frying, making it a healthier option while still being irresistibly delicious. Let’s dive into this cheesy adventure and get ready to impress your taste buds!
Why Cooks Rave About It

Air-Fryer Cheese Curds have taken the culinary world by storm for several reasons:
- Healthier Alternative: Air-frying uses significantly less oil compared to traditional frying, which means you can enjoy a guilt-free indulgence.
- Quick & Easy: These cheese curds come together in a matter of minutes, making them a go-to for spontaneous snack cravings.
- Customizable: You can easily tweak the seasonings and coatings to match your personal preferences.
- Impressive Presentation: Golden and crispy, these cheese curds are sure to wow your family and friends.
Ingredient Breakdown
To make these delightful Air-Fryer Cheese Curds, you will need the following ingredients:
- 12 ounces cheese curds, cut into 1 1/2 inch pieces
- 1 1/2 cups panko breadcrumbs
- 1 tablespoon minced fresh parsley
- 1/2 teaspoon Italian seasoning
- 1/2 teaspoon salt
- 1/4 teaspoon black pepper
- 3 large eggs
- 1/4 cup all-purpose flour
- 1/2 cup grated Parmesan cheese
These ingredients work together to create a flavor-packed, crispy exterior that perfectly complements the soft and gooey cheese inside.
Equipment & Tools
Before we get started, make sure you have the following equipment on hand:
- Air Fryer: The star of the show! A reliable air fryer will ensure even cooking and perfect crispiness.
- Mixing Bowls: You’ll need a couple of bowls for the breading process.
- Whisk or Fork: For beating the eggs.
- Measuring Cups and Spoons: To ensure accurate ingredient measurements.
- Spatula: For flipping the cheese curds if necessary.
Build Air-Fryer Cheese Curds Step by Step
Now that you have all your ingredients and tools ready, let’s get cooking!
Step 1: Prepare the Cheese Curds
Start by cutting your cheese curds into 1 1/2 inch pieces if they aren’t already. This size is perfect for achieving that gooey center while still getting a good crunch on the outside.
Step 2: Set Up Your Breading Station
In three separate bowls, prepare your breading station.
- In the first bowl, add the all-purpose flour.
- In the second bowl, crack the eggs and whisk them until well combined.
- In the third bowl, mix together the panko breadcrumbs, grated Parmesan cheese, minced parsley, Italian seasoning, salt, and black pepper.
Step 3: Bread the Cheese Curds
Take a piece of cheese curd and start the breading process:
- First, coat it in flour, shaking off any excess.
- Next, dip the floured cheese curd into the beaten eggs, ensuring it’s fully coated.
- Finally, roll it in the breadcrumb mixture, pressing lightly to ensure the crumbs stick well.
Repeat this process for all the cheese curds.
Step 4: Preheat the Air Fryer
Preheat your air fryer to 375°F (190°C). This helps to ensure that your cheese curds cook evenly and get that perfect golden brown color.
Step 5: Arrange in the Air Fryer
Lightly spray the air fryer basket with cooking spray to prevent sticking. Arrange the breaded cheese curds in a single layer, making sure they’re not overcrowded. This allows for optimal air circulation, resulting in a better crunch.
Step 6: Air Fry
Air-fry the cheese curds for about 6-8 minutes, flipping them halfway through for even cooking. Keep an eye on them, as cooking times may vary depending on your air fryer model. You want them to be golden brown and crispy!
Step 7: Serve & Enjoy!
Once they’re done, remove the cheese curds from the air fryer and serve immediately. They’re best enjoyed fresh and hot, with your favorite dipping sauce on the side.
Make It Year-Round

You can enjoy Air-Fryer Cheese Curds any time of year. Here are some ideas to keep this recipe fresh and exciting:
- Seasonal Variations: Experiment with different herbs and spices, such as smoked paprika for a smoky flavor or chili powder for a kick.
- Different Cheeses: Swap out the cheese curds for other types of cheese like mozzarella or cheddar for a different taste.
- Festive Dips: Pair with seasonal dips like cranberry sauce during the holidays or a tangy buffalo sauce for a summer barbecue.
- Game Day Appetizer: Perfect for parties, simply double or triple the recipe for larger gatherings.
Author’s Commentary
As a cheese enthusiast, I can confidently say that these Air-Fryer Cheese Curds are a game changer. The combination of crispy breadcrumbs and melty cheese creates a snack that’s hard to resist. I often find myself making these for casual get-togethers or even just a cozy night in, paired with a nice cold drink. Don’t be surprised if they disappear in minutes!
Cooling, Storing & Rewarming
To ensure the best flavor and texture, follow these tips for cooling, storing, and reheating:
- Cooling: Allow the cheese curds to cool for a few minutes after air frying to let the cheese set slightly.
- Storing: Store any leftovers in an airtight container in the refrigerator for up to 2 days.
- Rewarming: Reheat in the air fryer at 350°F (175°C) for about 3-5 minutes to regain that crispy texture.
Questions People Ask
Can I use other types of cheese instead of cheese curds?
Yes! While cheese curds give the best texture, you can use mozzarella or cheddar. Just be aware that the melting point may vary.
Can I make these cheese curds ahead of time?
Yes! You can prepare the breaded cheese curds ahead of time and store them in the refrigerator until you’re ready to cook them. Just add a couple of extra minutes to the cooking time if they’re cold.
What dipping sauces go well with Air-Fryer Cheese Curds?
These cheese curds pair wonderfully with marinara sauce, ranch dressing, or a spicy buffalo sauce for those who enjoy a little heat.
Can I freeze the breaded cheese curds?
Yes, you can freeze them before cooking. Place them in a single layer on a baking sheet, freeze until solid, then transfer to a freezer bag. Cook from frozen, adding a few extra minutes to the cooking time.
Before You Go
Are you ready to indulge in the cheesy goodness of Air-Fryer Cheese Curds? This recipe is not only simple but also a fantastic way to impress your friends and family with your culinary skills. The crunch combined with the melty cheese creates a delightful snack that is sure to be a hit! Whether you’re making these for a gathering or a cozy night at home, you’ll love how easy they are to whip up. Happy cooking!
If you enjoyed this recipe, consider sharing it with your friends or trying out some of my other delicious recipes. Your taste buds will thank you!

Air-Fryer Cheese Curds
Ingredients
Equipment
Method
- Start by cutting your cheese curds into 1 1/2 inch pieces if they aren’t already.
- In three separate bowls, prepare your breading station: In the first bowl, add the all-purpose flour. In the second bowl, crack the eggs and whisk them until well combined. In the third bowl, mix together the panko breadcrumbs, grated Parmesan cheese, minced parsley, Italian seasoning, salt, and black pepper.
- Take a piece of cheese curd and coat it in flour, shaking off any excess. Dip it into the beaten eggs, ensuring it’s fully coated. Finally, roll it in the breadcrumb mixture, pressing lightly to ensure the crumbs stick well.
- Preheat your air fryer to 375°F (190°C).
- Lightly spray the air fryer basket with cooking spray. Arrange the breaded cheese curds in a single layer, ensuring they’re not overcrowded.
- Air-fry the cheese curds for about 6-8 minutes, flipping them halfway through for even cooking.
- Once done, remove the cheese curds from the air fryer and serve immediately.
Notes
- Allow the cheese curds to cool for a few minutes after air frying to let the cheese set slightly.
- Store any leftovers in an airtight container in the refrigerator for up to 2 days.
- Reheat in the air fryer at 350°F (175°C) for about 3-5 minutes to regain that crispy texture.