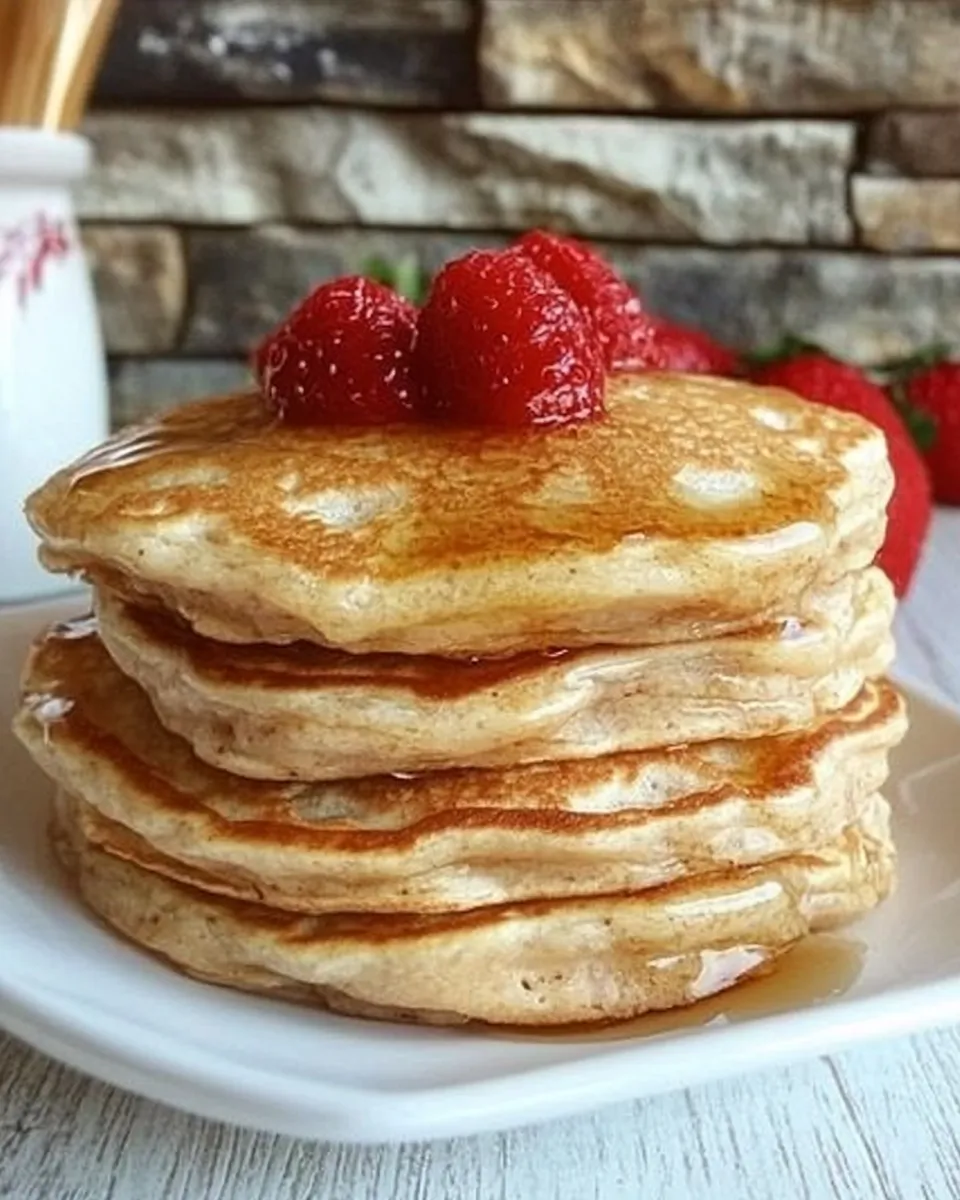
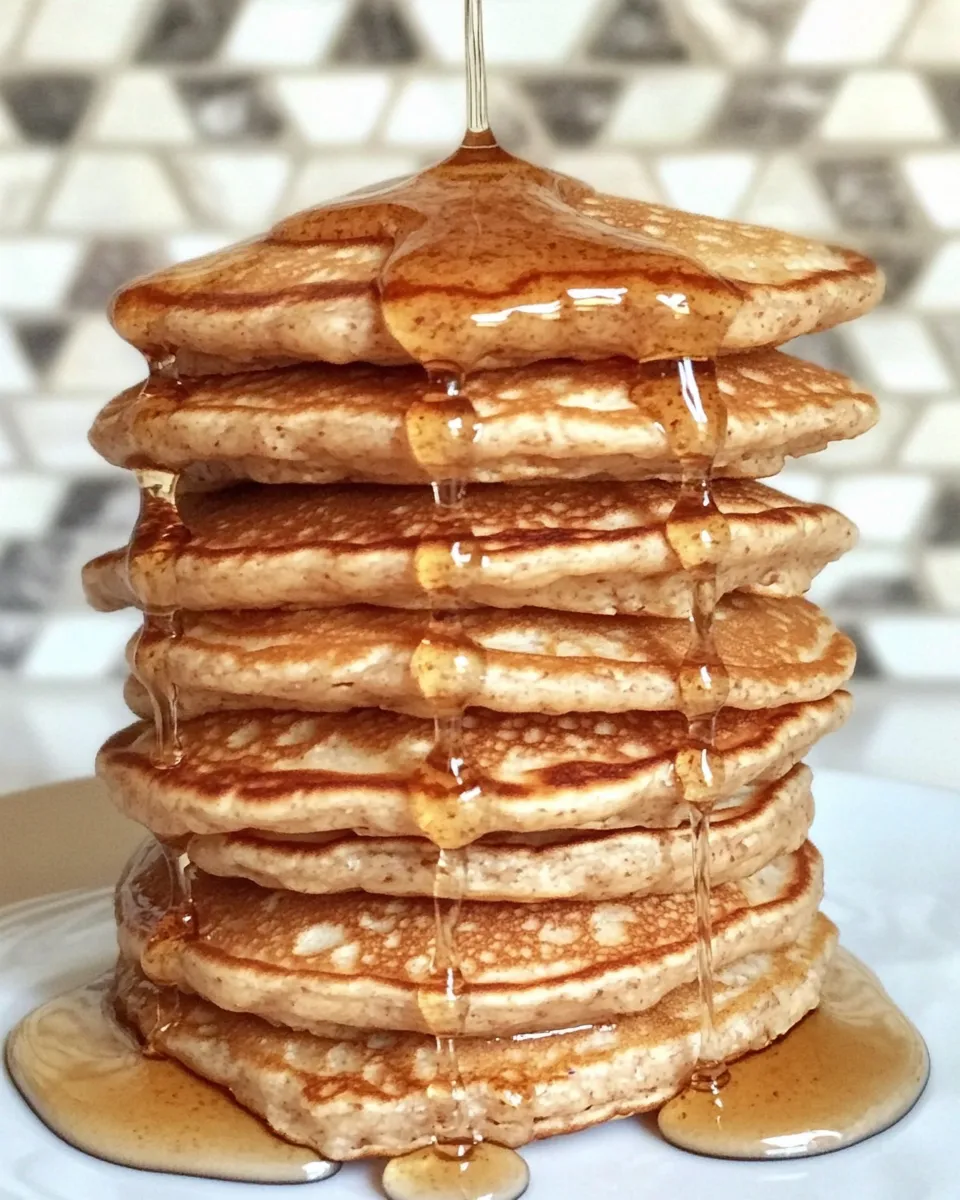
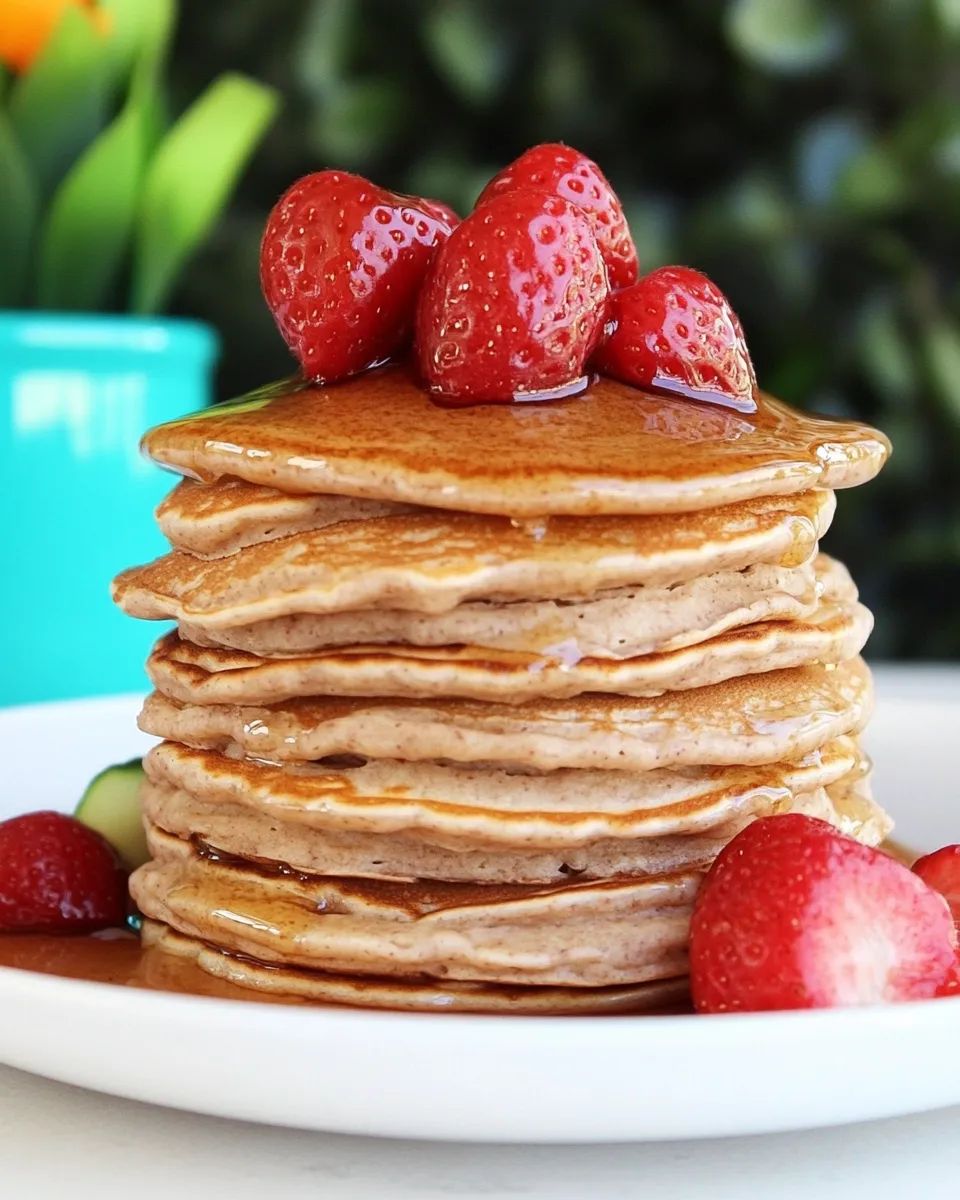
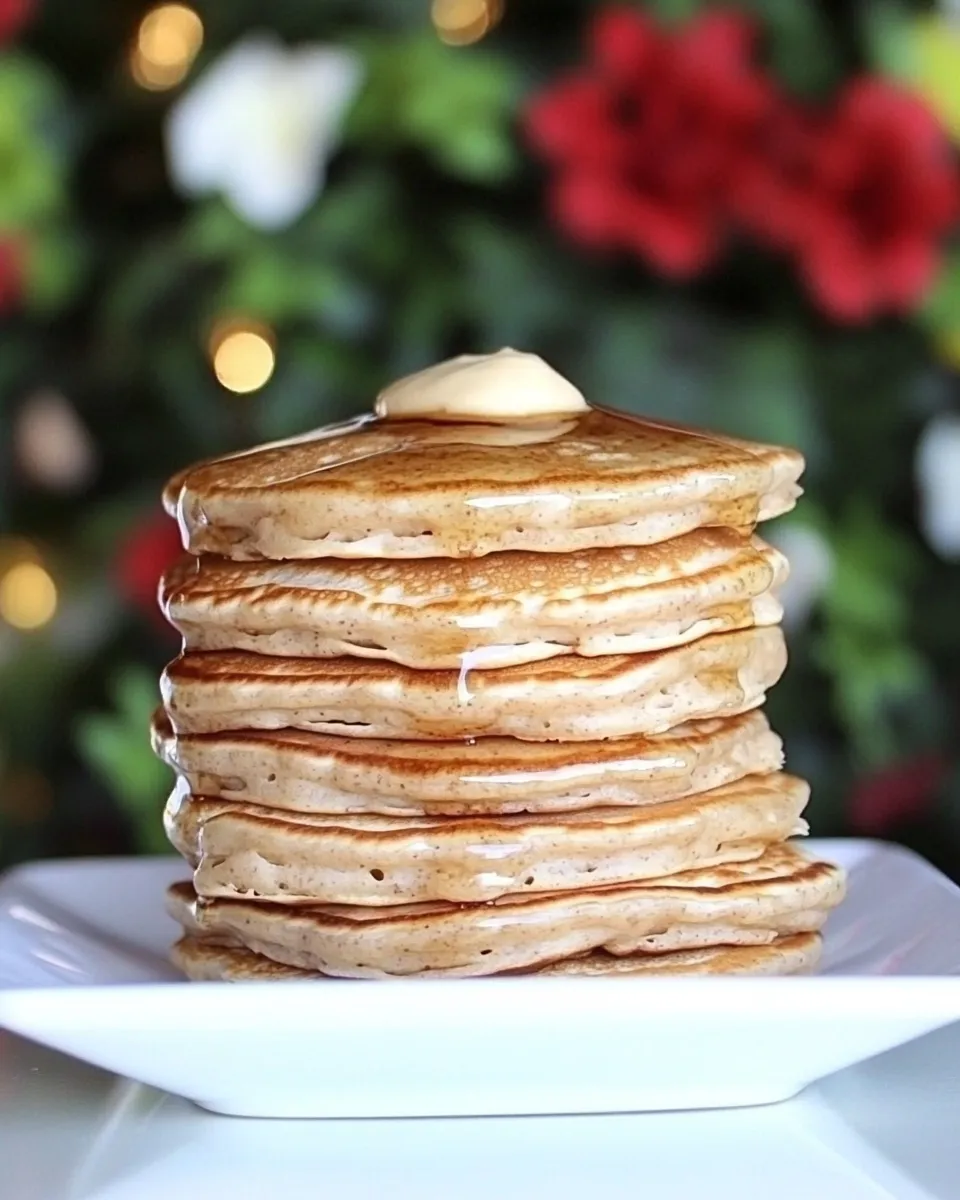
Whole Wheat Buttermilk Silver Dollar Pancakes
When it comes to breakfast, few things can compete with the delightful charm of pancakes. Fluffy, golden, and often drizzled with syrup, they warm the soul and start the day on a delicious note. Today, we’re diving into a recipe that not only pleases the palate but also incorporates wholesome ingredients: Whole Wheat Buttermilk Silver Dollar Pancakes. These mini pancakes are light, airy, and a fantastic way to enjoy the nutritional benefits of whole wheat flour while still indulging in the classic pancake experience. Let’s get flipping!
Why This Whole Wheat Buttermilk Silver Dollar Pancakes Stands Out
This recipe for Whole Wheat Buttermilk Silver Dollar Pancakes stands out for several reasons. First, the combination of whole wheat and all-purpose flour gives these pancakes a hearty texture and a nutty flavor, making them not only delicious but also more nutritious than your average pancake. The buttermilk adds a tangy richness that balances the sweetness of the sugar, resulting in a flavor profile that’s both comforting and refreshing. Plus, their silver dollar size makes them perfect for stacking, sharing, or enjoying solo. Whether you’re cooking for a crowd or just for yourself, these pancakes are sure to impress!
What’s in the Bowl
To create these delightful pancakes, you’ll need a few simple ingredients. Here’s what you’ll be gathering:
- 3/4 cup whole wheat flour – for added fiber and nutrition
- 3/4 cup all-purpose flour – for lightness and texture
- 3 tablespoons sugar – to sweeten the batter
- 1 1/2 teaspoons baking powder – for fluffiness
- 1/2 teaspoon baking soda – to react with the buttermilk for extra lift
- 1/2 teaspoon salt – to enhance flavor
- 1/8 teaspoon nutmeg (optional) – for a hint of warmth and spice
- 1 1/2 cups buttermilk – for moisture and tang
- 2 eggs – to bind the ingredients together
- 3 tablespoons unsalted butter (melted and cooled slightly) – for richness
- 1 teaspoon vanilla – for a touch of sweetness and aroma
Kitchen Gear Checklist
Before you start whipping up these delicious pancakes, make sure you have the following kitchen essentials:
- Mixing bowls – for combining dry and wet ingredients
- Whisk – to ensure your batter is smooth and lump-free
- Griddle or non-stick skillet – for perfectly cooked pancakes
- Measuring cups and spoons – accuracy is key in baking
- Spatula – for flipping your pancakes with ease
- Serving plates – to present your fluffy creations
Stepwise Method: Whole Wheat Buttermilk Silver Dollar Pancakes
Now, let’s dive into the step-by-step process of making these delightful pancakes.
Step 1: Mix the Dry Ingredients
In a large mixing bowl, combine the whole wheat flour, all-purpose flour, sugar, baking powder, baking soda, salt, and nutmeg (if using). Whisk together until well combined. This step ensures that your leavening agents are evenly distributed, leading to uniformly fluffy pancakes.
Step 2: Combine the Wet Ingredients
In a separate bowl, whisk together the buttermilk, eggs, melted butter, and vanilla extract until fully blended. The buttermilk adds moisture and a tangy flavor that make these pancakes truly special.
Step 3: Combine Wet and Dry Ingredients
Pour the wet mixture into the bowl with the dry ingredients. Gently stir until just combined. Be careful not to overmix; it’s okay if there are a few lumps. Overmixing can lead to tough pancakes, and we want them to be light and fluffy!
Step 4: Heat the Griddle
Preheat your griddle or non-stick skillet over medium heat. To check for readiness, sprinkle a few drops of water on the surface. If they sizzle and evaporate quickly, you’re good to go! Lightly grease the surface with butter or oil to prevent sticking.
Step 5: Pour the Batter
Using a tablespoon or a small measuring cup, pour small rounds of batter onto the griddle. Remember, these pancakes are meant to be silver dollar-sized, so don’t go too big! Leave some space between each pancake to allow them to spread slightly.
Step 6: Cook Until Bubbly
Cook the pancakes until you see bubbles forming on the surface and the edges look set, about 2-3 minutes. This is a great time to enjoy the delightful aroma wafting through your kitchen!
Step 7: Flip and Finish Cooking
Carefully flip the pancakes using your spatula and cook for another 1-2 minutes until golden brown. Remove them from the griddle and keep warm while you repeat with the remaining batter.
Step 8: Serve and Enjoy!
Serve your Whole Wheat Buttermilk Silver Dollar Pancakes warm, stacked high, and topped with your favorite accompaniments. Maple syrup, fresh fruit, or a sprinkle of powdered sugar would be perfect!
Warm & Cool Weather Spins
These pancakes are versatile and can be enjoyed year-round. Here are some variations to consider:
- Warm Weather Spin: Add fresh blueberries or sliced bananas to the batter for a fruity twist that’s perfect for summer mornings.
- Cool Weather Spin: Incorporate spices like cinnamon or even pumpkin puree for a cozy fall flavor. You can also serve them with warm apple compote or caramelized bananas.
Steer Clear of These
To ensure your pancake experience is delightful, consider avoiding the following:
- Overmixing the batter, which can lead to tough pancakes.
- Cooking at too high a temperature, which can cause the outside to burn while leaving the inside raw.
- Using expired baking powder or baking soda, as this can affect the fluffiness of your pancakes.
- Skipping the resting period (if you choose to let the batter sit), which can enhance the texture of the pancakes.
Storage & Reheat Guide
If you find yourself with leftover pancakes, don’t worry! Here’s how to store and reheat them:
To store, let the pancakes cool completely, then stack them with parchment paper in between to prevent sticking. Place them in an airtight container and refrigerate for up to 3 days or freeze for up to 2 months.
To reheat, simply pop them in a toaster, microwave, or warm them in a skillet over low heat until heated through. Add a little butter or syrup when reheating for an extra touch of flavor!
Your Top Questions
Can I use all whole wheat flour instead of a mix?
Yes, you can substitute all the all-purpose flour with whole wheat flour, but note that the pancakes may be denser. Adjusting the liquid slightly can help achieve the desired texture.
What can I use instead of buttermilk?
If you don’t have buttermilk on hand, you can make a substitute by mixing 1 tablespoon of vinegar or lemon juice with enough milk to make 1 1/2 cups. Let it sit for about 5 minutes before using.
Can I make these pancakes vegan?
Absolutely! You can replace the eggs with flax eggs (1 tablespoon flaxseed meal mixed with 2.5 tablespoons water per egg) and substitute the buttermilk with a plant-based milk mixed with a little vinegar or lemon juice.
How do I make these pancakes gluten-free?
To make these pancakes gluten-free, use a gluten-free all-purpose flour blend in place of the whole wheat and all-purpose flours. Ensure that your baking powder is gluten-free as well.
In Closing
Whether you’re preparing breakfast for your family or enjoying a quiet morning alone, these Whole Wheat Buttermilk Silver Dollar Pancakes are a delightful choice. They’re easy to make, adaptable to your taste, and absolutely delicious. The combination of whole wheat and buttermilk not only enhances the flavor but also adds a nutritious twist to your classic pancake experience. So grab your mixing bowls and get ready to flip your way to breakfast bliss! Enjoy every bite!
Whole Wheat Buttermilk Silver Dollar Pancakes
Ingredients
Equipment
Method
- Step 1: Mix the Dry Ingredients - In a large mixing bowl, combine the whole wheat flour, all-purpose flour, sugar, baking powder, baking soda, salt, and nutmeg (if using). Whisk together until well combined.
- Step 2: Combine the Wet Ingredients - In a separate bowl, whisk together the buttermilk, eggs, melted butter, and vanilla extract until fully blended.
- Step 3: Combine Wet and Dry Ingredients - Pour the wet mixture into the bowl with the dry ingredients. Gently stir until just combined.
- Step 4: Heat the Griddle - Preheat your griddle or non-stick skillet over medium heat. Lightly grease the surface with butter or oil.
- Step 5: Pour the Batter - Using a tablespoon or small measuring cup, pour small rounds of batter onto the griddle.
- Step 6: Cook Until Bubbly - Cook the pancakes until you see bubbles forming on the surface, about 2-3 minutes.
- Step 7: Flip and Finish Cooking - Carefully flip the pancakes using your spatula and cook for another 1-2 minutes until golden brown.
- Step 8: Serve and Enjoy! - Serve warm, stacked high, and topped with your favorite accompaniments.
Notes
- For extra fluffiness, let the batter rest for a few minutes before cooking.
- Feel free to add your favorite fruits to the batter for a fun twist!
- Store leftovers in an airtight container in the refrigerator for up to 3 days.