Starbucks Cake Pop Recipe
If you’ve ever walked into a Starbucks and found yourself mesmerized by the colorful array of cake pops, you’re not alone. These delightful treats have become a staple for coffee lovers and dessert enthusiasts alike. With their bite-sized appeal and charming presentation, they’re perfect for any occasion. Today, I’m thrilled to share a homemade version of the beloved Starbucks Cake Pop Recipe that is simple, satisfying, and oh-so-delicious!
Why Cooks Rave About It
There’s something special about cake pops that makes them irresistible. They combine the best of cake and frosting into a fun little ball, making them the perfect treat for parties, celebrations, or even just a cozy coffee break at home. Cooks rave about this recipe because it captures the essence of the Starbucks cake pops while allowing for personal touches and variations. Plus, they’re incredibly easy to make, requiring minimal ingredients and equipment. Once you taste one, you’ll understand why they’ve become a favorite!
What Goes Into Starbucks Cake Pop Recipe
To create these delightful cake pops, you’ll need the following ingredients:
- 15.25 oz Vanilla Cake Mix: This is the base of your cake pops, providing a rich and moist texture.
- 3 Large Eggs: Eggs help bind the ingredients together and give the cake its lift.
- 1/2 Cup Vegetable Oil: This adds moisture and richness to the cake.
- 1 1/4 Cups Water: Essential for mixing with the dry ingredients to create the cake batter.
- 1 Cup Vanilla Frosting: Use store-bought or homemade frosting to add sweetness and moisture to the cake mix.
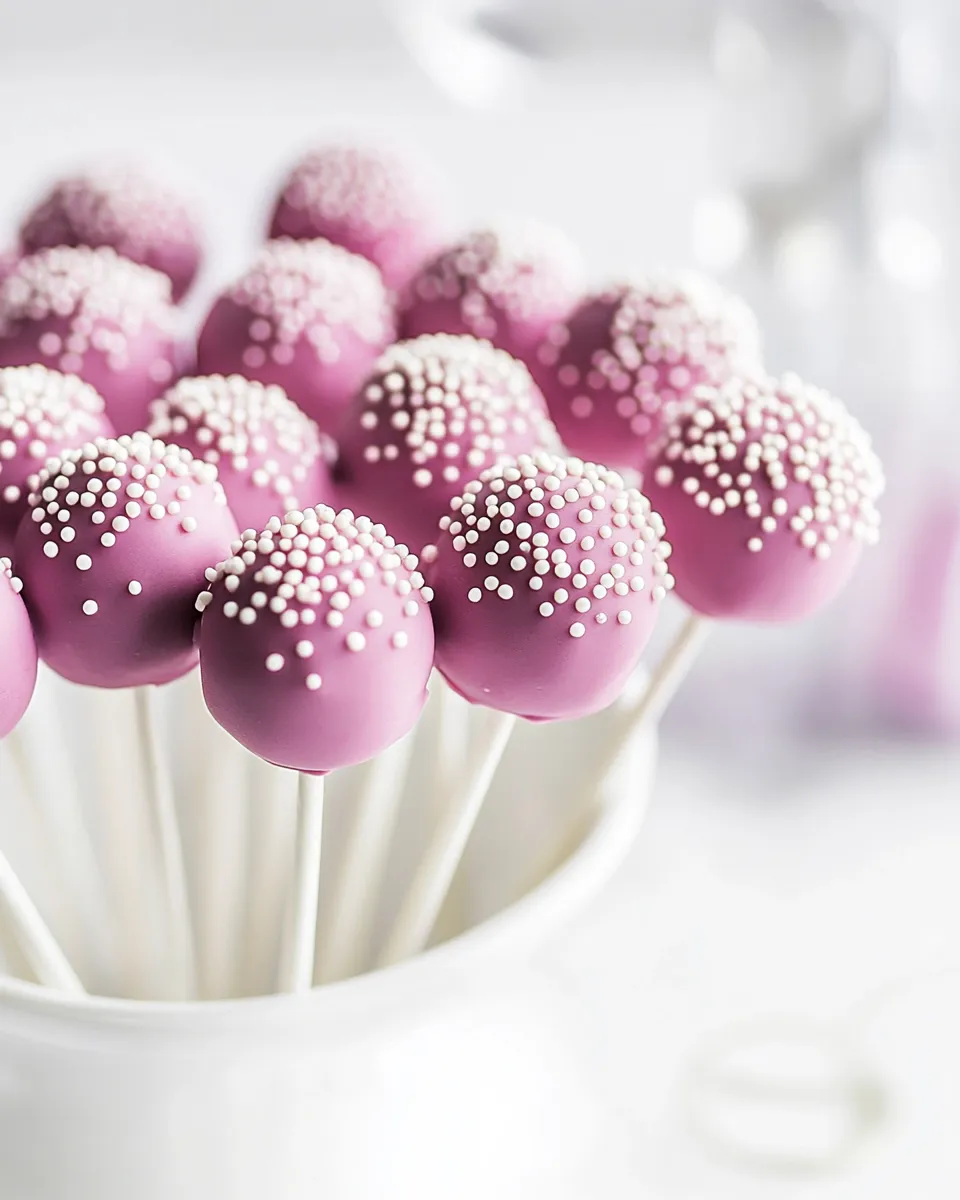
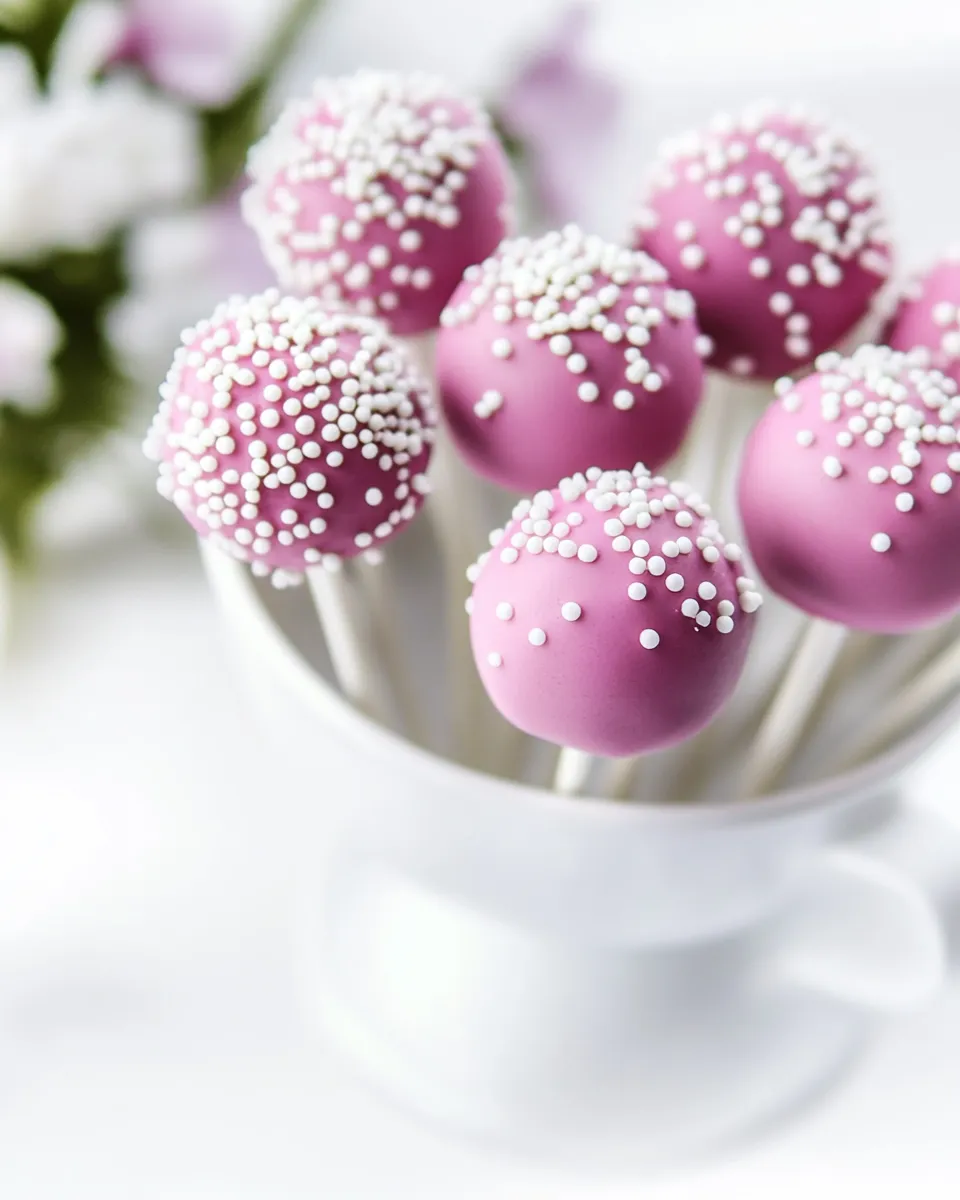
- 10 oz Light Pink Chocolate Melting Wafers: These will be used for coating the cake pops, giving them that signature glossy finish.
- White Nonpareils Sprinkles: These tiny balls add a fun texture and decorative touch to your cake pops.
What’s in the Gear List
To make your cake pops, you’ll need a few essential tools:
- Mixing Bowls: For combining your cake ingredients.
- Electric Mixer: This makes mixing the cake batter a breeze.
- Baking Pan: A 9×13 inch pan works well for baking the cake.
- Cookie Scoop or Tablespoon: For portioning out the cake mixture into balls.
- Lollipop Sticks: These are essential for turning your cake balls into cake pops.
- Microwave-Safe Bowl: To melt the chocolate wafers.
- Wax Paper: For cooling the cake pops after dipping.
Starbucks Cake Pop Recipe, Made Easy
Now, let’s dive into the step-by-step process of creating your very own Starbucks Cake Pops!
Step 1: Bake the Cake
Preheat your oven to 350°F (175°C). In a large mixing bowl, combine the vanilla cake mix, eggs, vegetable oil, and water. Beat with an electric mixer on medium speed for about 2 minutes until smooth and well combined. Pour the batter into a greased 9×13 inch baking pan.
Step 2: Cool the Cake
Bake in the preheated oven for 30-35 minutes or until a toothpick inserted into the center comes out clean. Once baked, remove the cake from the oven and allow it to cool completely in the pan.
Step 3: Crumble the Cake
Once the cake is cool, crumble it into a large mixing bowl using your hands. Aim for a fine crumb texture that resembles sand.
Step 4: Mix in the Frosting
Add 1 cup of vanilla frosting to the crumbled cake. Using your hands, mix until all the cake crumbs are evenly coated and the mixture holds together when pressed.
Step 5: Form the Cake Balls
Using a cookie scoop or tablespoon, portion out the cake mixture and roll it into balls, about 1 inch in diameter. Place the cake balls on a baking sheet lined with wax paper.
Step 6: Chill the Cake Balls
Refrigerate the cake balls for at least 30 minutes to firm up. This will make them easier to dip in chocolate.
Step 7: Melt the Chocolate Wafers
While the cake balls are chilling, melt the light pink chocolate melting wafers in a microwave-safe bowl. Heat in 30-second intervals, stirring in between until smooth and fully melted.
Step 8: Dip the Cake Pops
Remove the cake balls from the refrigerator. Dip the tip of a lollipop stick into the melted chocolate, then insert it into the center of a cake ball. This helps the stick adhere to the ball. Dip the entire cake ball into the melted chocolate, making sure it’s fully coated.
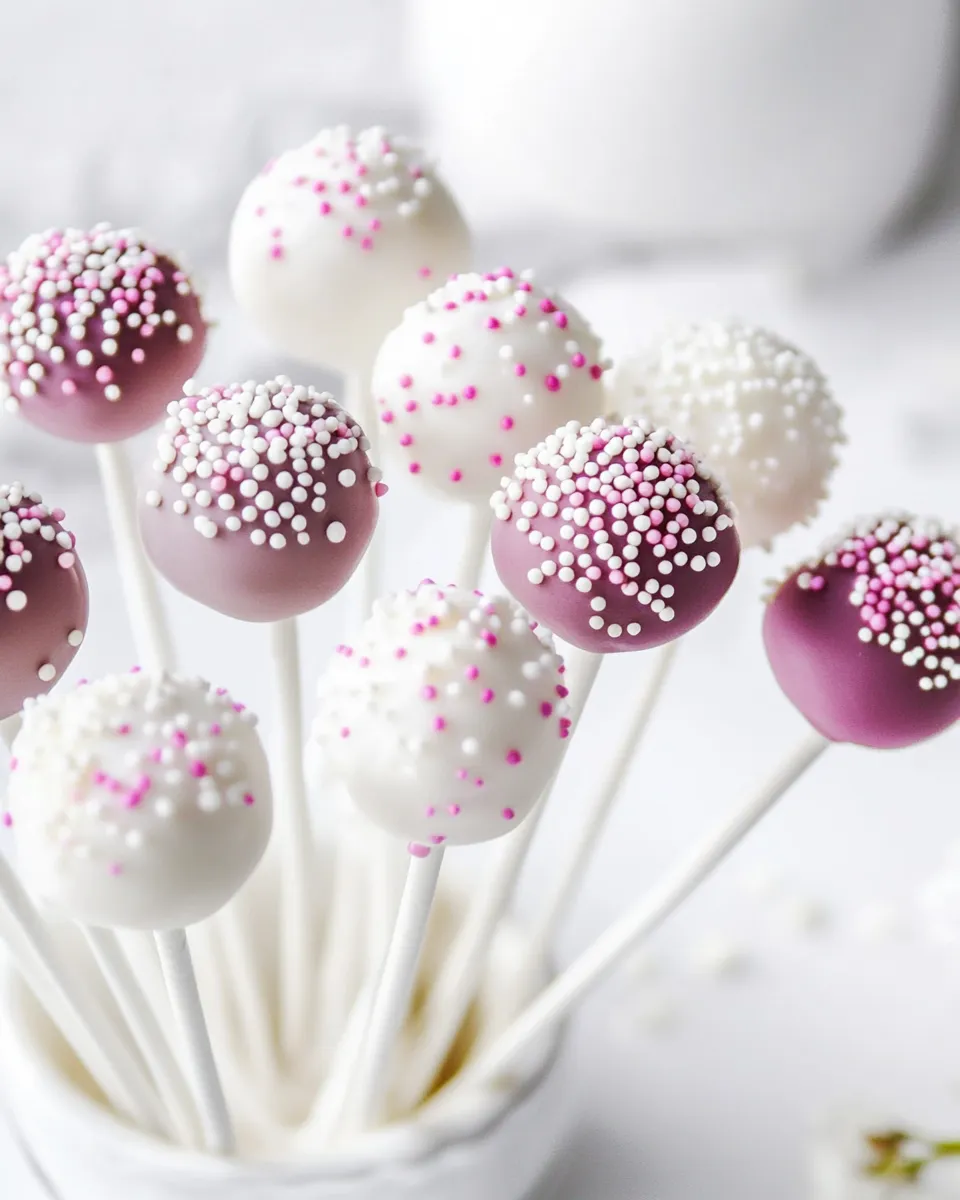
Step 9: Add Sprinkles
Before the chocolate sets, sprinkle the white nonpareils on top of the coated cake pops. This adds that beautiful finishing touch that makes them so appealing.
Step 10: Let Them Set
Place the dipped cake pops upright in a cake pop stand or styrofoam block to allow the chocolate to set completely. Once set, your Starbucks Cake Pops are ready to enjoy!
Seasonal Spins
One of the best things about cake pops is their versatility! Here are some fun seasonal spins you can try:
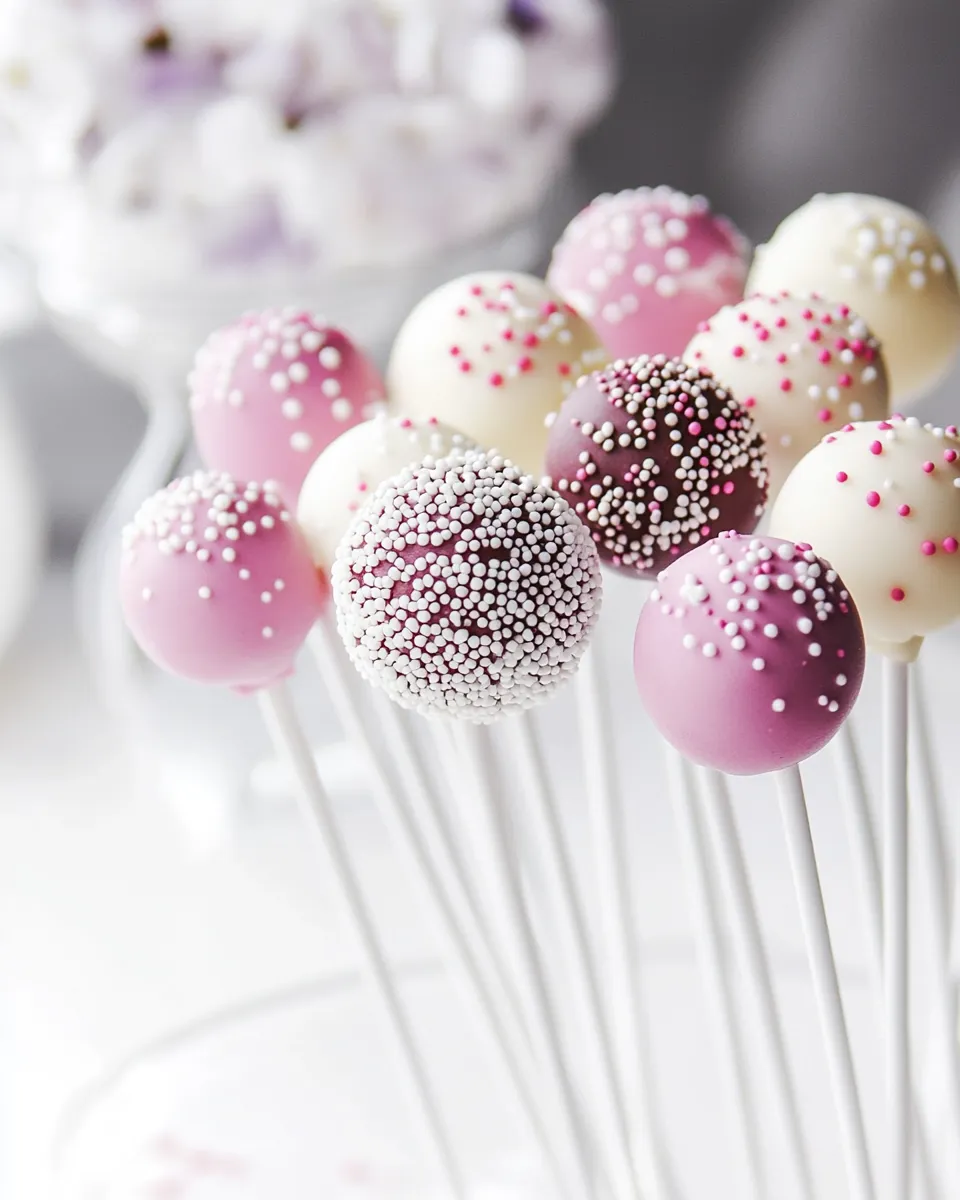
- Halloween: Use orange and black chocolate melts and top with pumpkin-shaped sprinkles.
- Christmas: Use red and green chocolate melts, and decorate with festive sprinkles or edible glitter.
- Valentine’s Day: Create red velvet cake pops and dip them in white chocolate, adding heart-shaped sprinkles.
- Birthday: Use rainbow sprinkles and colorful chocolate melts for a fun birthday celebration treat.
Missteps & Fixes
Even the best bakers can encounter challenges. Here are some common missteps and how to fix them:
- Too Crumbly: If the cake mixture is too dry and crumbly, add a little more frosting to help bind it together.
- Chocolate Not Coating Well: If the chocolate is too thick, add a tiny bit of vegetable oil to thin it out for easier dipping.
- Sticks Falling Out: Make sure to dip the stick in chocolate before inserting it into the cake ball; this helps it stay in place.
- Chocolate Setting Too Fast: Work quickly when dipping, or keep the melted chocolate warm to manage the dipping process smoothly.
Keep-It-Fresh Plan
To ensure your delicious cake pops stay fresh and tasty, follow these tips:
- Storage: Keep cake pops in an airtight container in the refrigerator for up to a week.
- Freezing: You can freeze uncoated cake balls for up to 2 months. Just thaw before dipping in chocolate.
- Serving: Allow cake pops to sit at room temperature for a few minutes before serving for the best texture.
Top Questions & Answers
Can I use a different cake mix flavor?
Absolutely! While vanilla is classic, feel free to experiment with chocolate, red velvet, or any flavor cake mix you love.
What can I use instead of lollipop sticks?
If you don’t have lollipop sticks, you can use pretzel rods or even mini forks for a fun twist.
How do I prevent melting chocolate from hardening too quickly?
Keep the melted chocolate warm by placing it over a pot of simmering water or reheat in short intervals as needed.
Can I decorate the cake pops differently?
Yes! Get creative with different types of sprinkles, edible glitter, or even drizzling different colored chocolate on top.
The Last Word
Creating your own Starbucks Cake Pops at home is a rewarding experience that not only satisfies your sweet cravings but also impresses family and friends. The process is straightforward, and the result is a delightful treat that can be customized to suit any occasion. Whether you’re celebrating a special event or just looking for a sweet treat to accompany your coffee, these cake pops are sure to bring smiles all around. So roll up your sleeves, gather your ingredients, and get ready to indulge in the magic of homemade cake pops!
Starbucks Cake Pop Recipe
Ingredients
Equipment
Method
- Preheat your oven to 350°F (175°C). In a large mixing bowl, combine the vanilla cake mix, eggs, vegetable oil, and water. Beat with an electric mixer on medium speed for about 2 minutes until smooth and well combined. Pour the batter into a greased 9x13 inch baking pan.
- Bake in the preheated oven for 30-35 minutes or until a toothpick inserted into the center comes out clean. Once baked, remove the cake from the oven and allow it to cool completely in the pan.
- Once the cake is cool, crumble it into a large mixing bowl using your hands. Aim for a fine crumb texture that resembles sand.
- Add 1 cup of vanilla frosting to the crumbled cake. Using your hands, mix until all the cake crumbs are evenly coated and the mixture holds together when pressed.
- Using a cookie scoop or tablespoon, portion out the cake mixture and roll it into balls, about 1 inch in diameter. Place the cake balls on a baking sheet lined with wax paper.
- Refrigerate the cake balls for at least 30 minutes to firm up. This will make them easier to dip in chocolate.
- While the cake balls are chilling, melt the light pink chocolate melting wafers in a microwave-safe bowl. Heat in 30-second intervals, stirring in between until smooth and fully melted.
- Remove the cake balls from the refrigerator. Dip the tip of a lollipop stick into the melted chocolate, then insert it into the center of a cake ball. This helps the stick adhere to the ball. Dip the entire cake ball into the melted chocolate, making sure it's fully coated.
- Before the chocolate sets, sprinkle the white nonpareils on top of the coated cake pops. This adds that beautiful finishing touch that makes them so appealing.
- Place the dipped cake pops upright in a cake pop stand or styrofoam block to allow the chocolate to set completely. Once set, your Starbucks Cake Pops are ready to enjoy!
Notes
- Store cake pops in an airtight container in the refrigerator for up to a week.
- Freeze uncoated cake balls for up to 2 months; just thaw before dipping in chocolate.
- Allow cake pops to sit at room temperature for a few minutes before serving for the best texture.