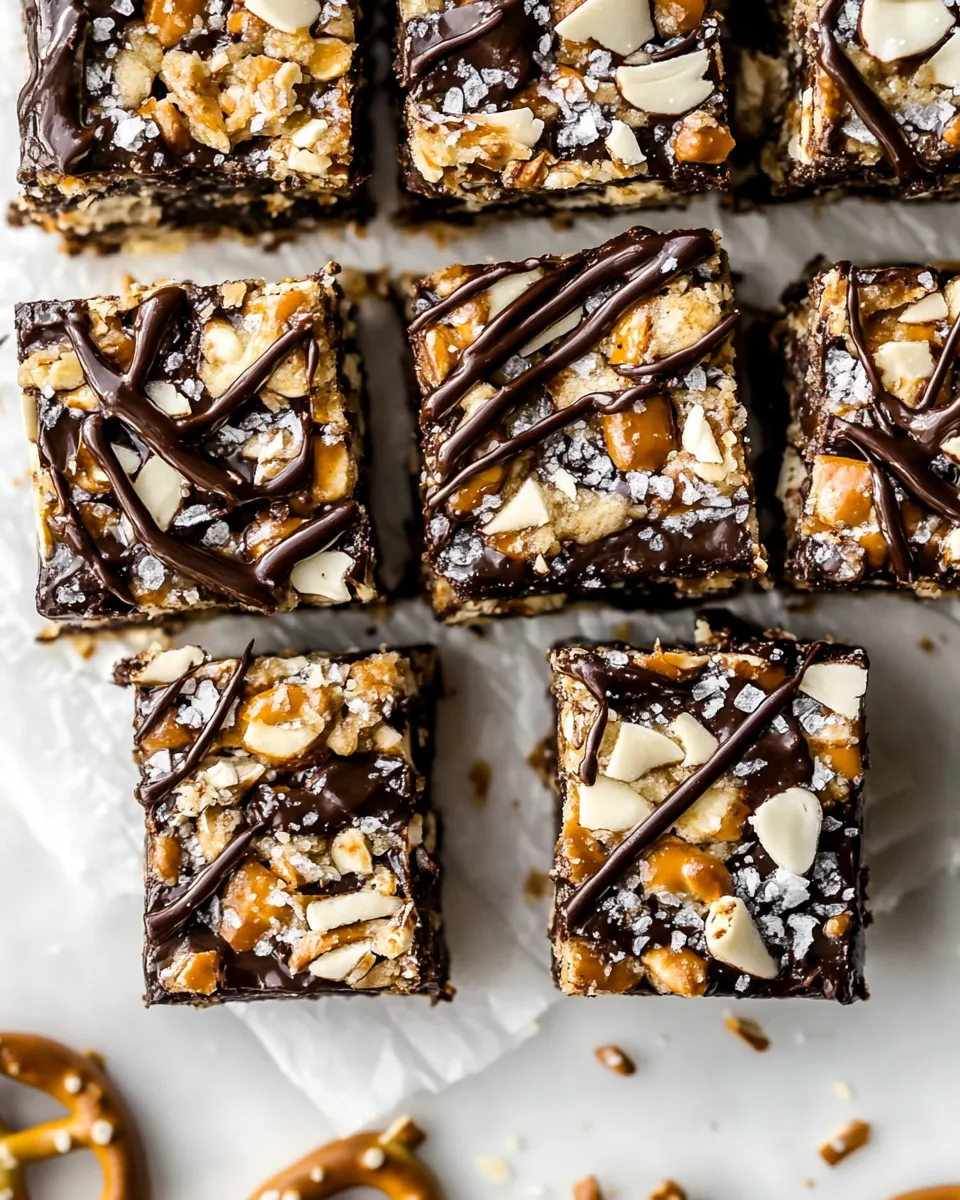
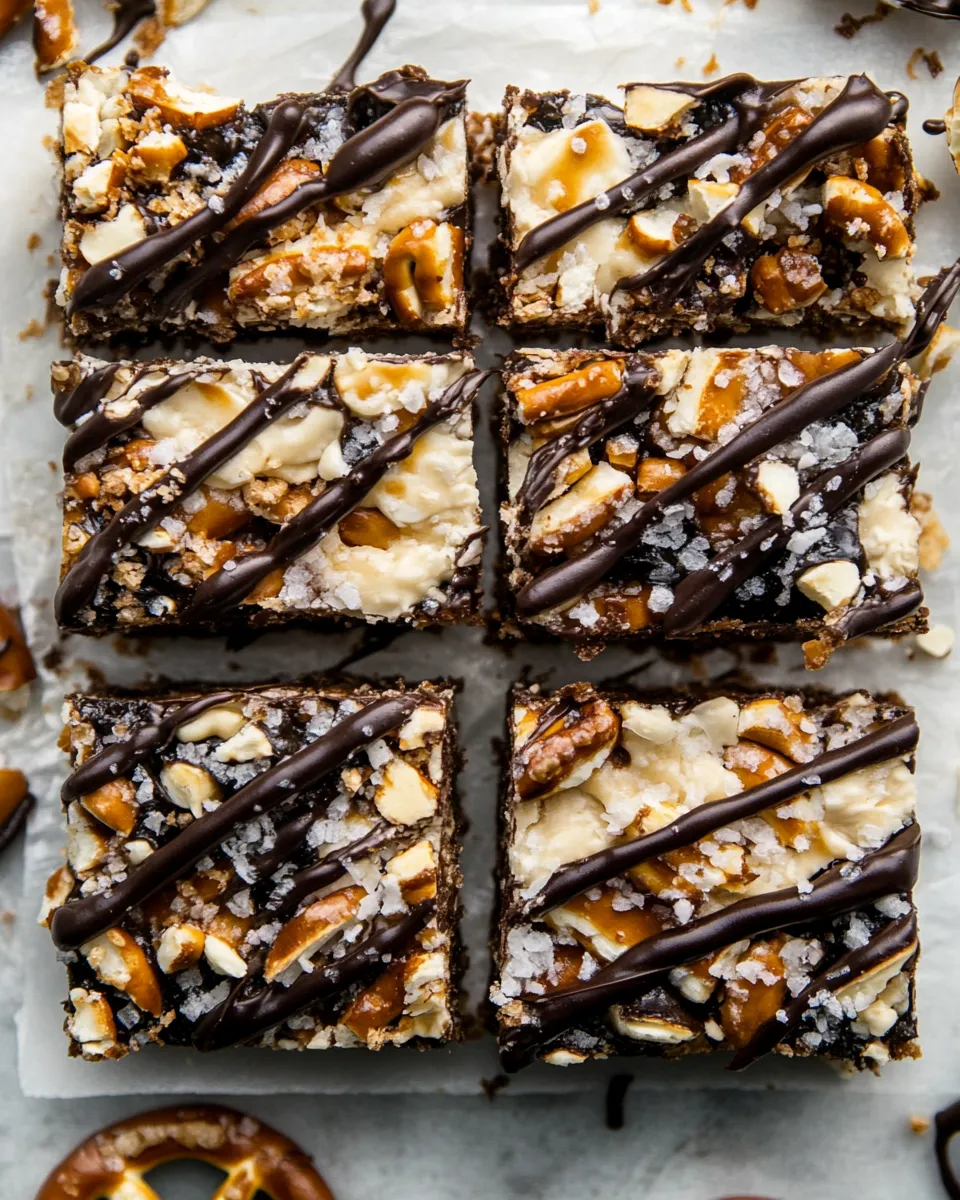
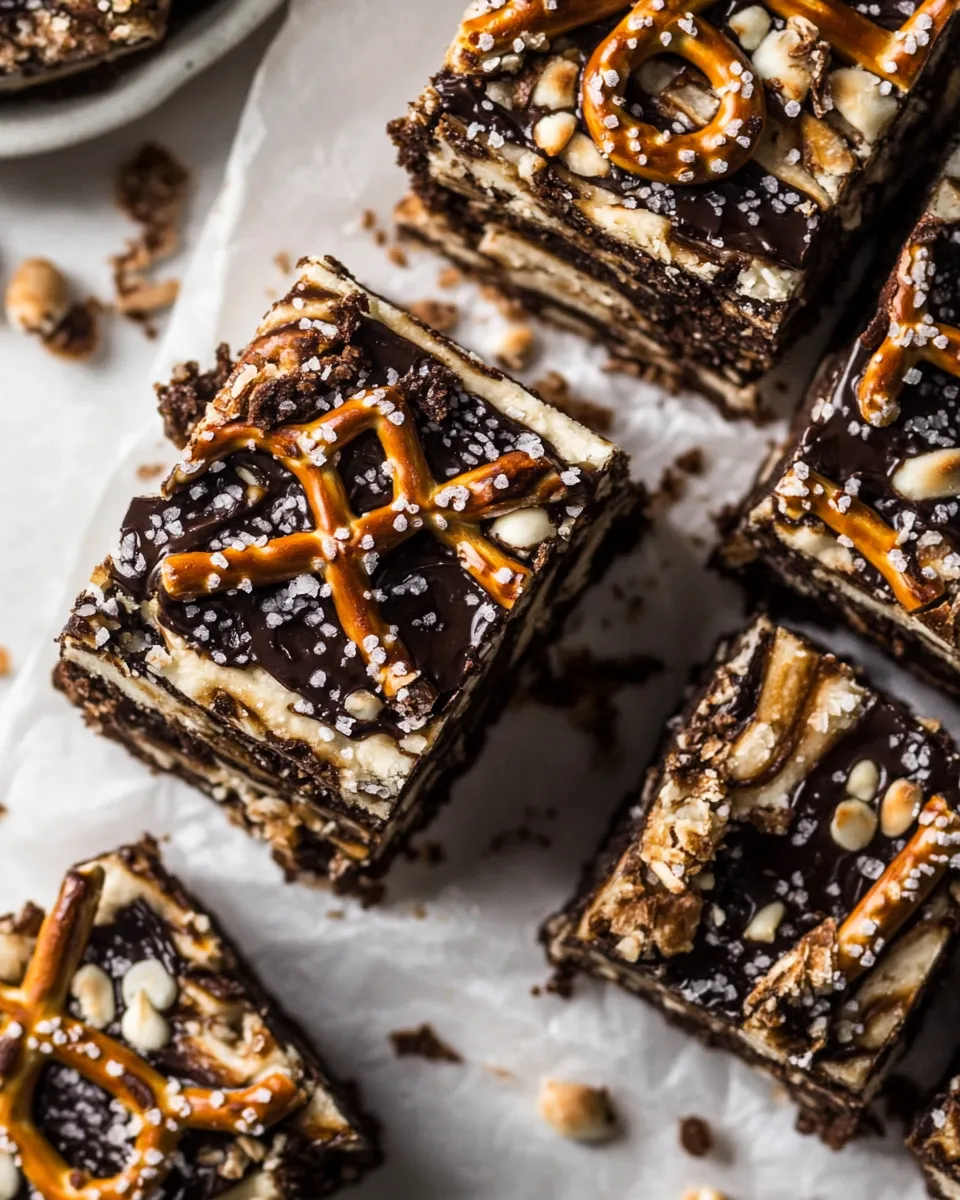
Salted Pretzel Magic Bars.
Imagine a dessert that perfectly balances sweet and salty, crunchy and chewy. Enter the magical world of Salted Pretzel Magic Bars. These bars are an irresistible blend of pretzel crumbs, chocolate chips, coconut flakes, and roasted peanuts, all topped with a sprinkle of flaky sea salt. If you’re looking for a crowd-pleasing treat that’s easy to whip up, these bars are just what you need. They embody the spirit of indulgence while offering a unique twist that will make your taste buds dance.
With just a handful of ingredients and minimal prep time, Salted Pretzel Magic Bars are a delightful addition to any dessert table, potluck, or cozy night in. Let’s dive into why this recipe deserves a special place in your rotation.
Why This Recipe Belongs in Your Rotation
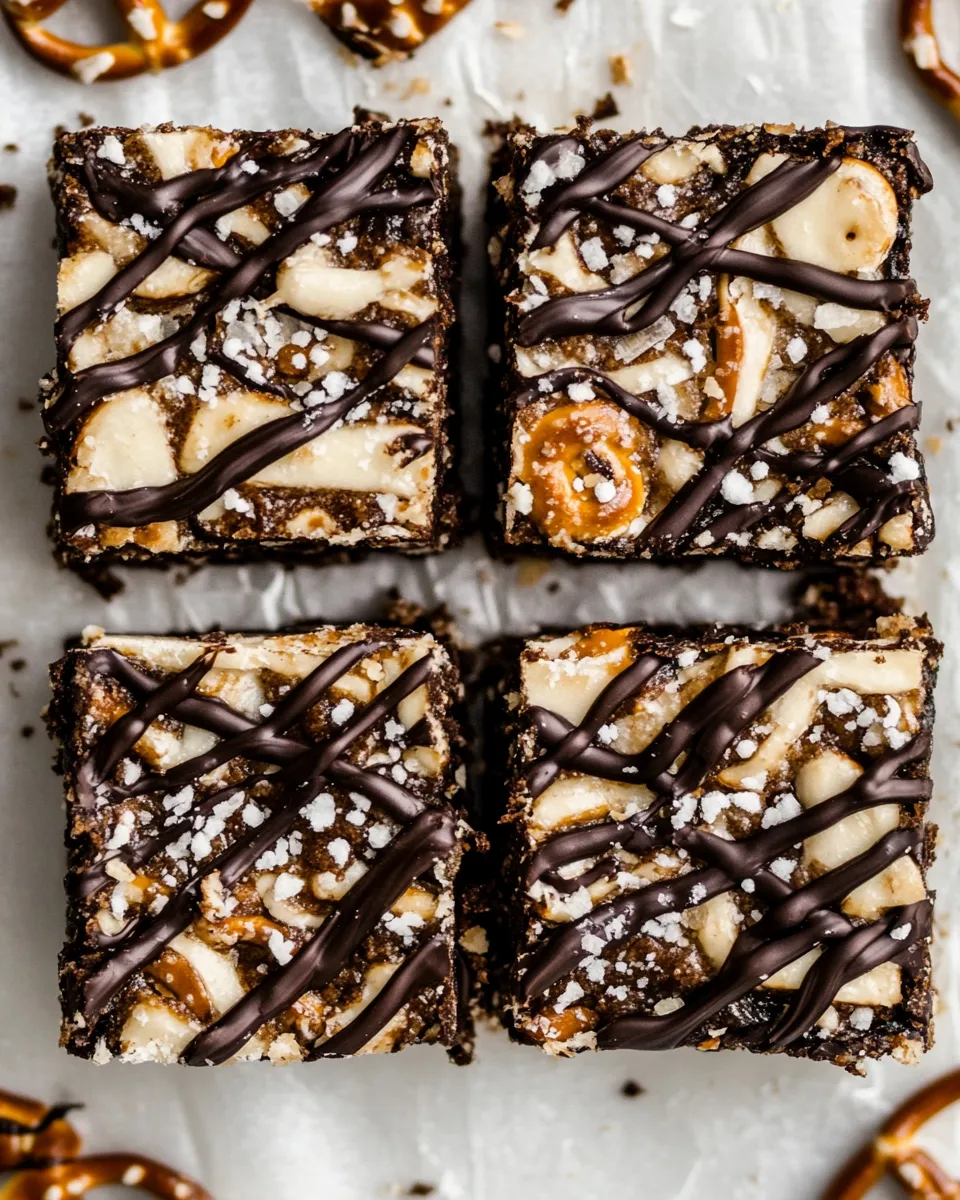
These bars are not only delicious but also versatile. Whether you’re hosting a party, celebrating a birthday, or just craving something sweet, they fit the bill. The combination of sweetened condensed milk and chocolate chips creates a luscious base, while the pretzel crumbs add a satisfying crunch. Plus, who can resist the allure of that sprinkle of flaky sea salt on top? The balance of flavors and textures in Salted Pretzel Magic Bars makes them a go-to recipe that will have everyone coming back for seconds.
Ingredient List
- 1 1/2 cups pretzel crumbs (plus extra pretzels for topping)
- 1/2 cup butter, melted
- 2 teaspoons vanilla extract
- 1 (14 ounce) can sweetened condensed milk
- 2 1/2 cups semi-sweet chocolate chips
- 1 1/2 cups sweetened or unsweetened coconut flakes
- 1 cup roasted peanuts (or any other toasted nut)
- Melted chocolate, for drizzling (optional)
- Flaky sea salt for topping
Prep & Cook Tools
- 9×13 inch baking pan – for baking your bars.
- Mixing bowls – for combining ingredients.
- Whisk or spatula – for mixing the melted butter and pretzel crumbs.
- Measuring cups and spoons – for accurately measuring ingredients.
- Oven – for baking the bars until golden and bubbly.
Cooking Salted Pretzel Magic Bars.: The Process
Step 1: Preheat and Prepare
Start by preheating your oven to 350°F (175°C). Grease your 9×13 inch baking pan or line it with parchment paper for easy removal.
Step 2: Make the Pretzel Crust
In a mixing bowl, combine the melted butter with the pretzel crumbs. Stir until the crumbs are evenly coated. Press this mixture firmly into the bottom of the prepared baking pan to form the crust.
Step 3: Layer the Ingredients
Pour the sweetened condensed milk evenly over the pretzel crust. Sprinkle the chocolate chips, coconut flakes, and roasted peanuts on top. Make sure to distribute them as evenly as possible for a uniform flavor in every bite.
Step 4: Bake
Place the baking pan in the preheated oven and bake for 25-30 minutes, or until the top is golden brown and the chocolate chips are melted.
Step 5: Cool and Finish
Once baked, remove the pan from the oven and let it cool completely. Drizzle melted chocolate over the top if desired, and sprinkle with flaky sea salt. Allow the chocolate to set before cutting into squares.
How to Make It Lighter
- Use light butter instead of regular butter to reduce calories.
- Substitute coconut cream for sweetened condensed milk for a lighter alternative.
- Opt for dark chocolate chips which typically contain less sugar.
- Reduce the amount of peanuts or use a lighter nut option such as almonds.
Pro Tips & Notes
- For a gluten-free version, replace pretzels with gluten-free pretzel crumbs.
- Experiment with different nuts like almonds or pecans for a unique twist.
- Store any leftovers in an airtight container to maintain freshness.
- Allow the bars to cool completely for easier cutting.
Best Ways to Store
To keep your Salted Pretzel Magic Bars fresh, store them in an airtight container at room temperature for up to a week. If you want to extend their shelf life, you can refrigerate them for up to two weeks. For longer storage, consider freezing the bars. Simply wrap them in plastic wrap and place them in a freezer-safe container. They can be frozen for up to three months. When you’re ready to enjoy, just thaw them at room temperature.
Your Top Questions
Can I use different types of nuts in the recipe?
Absolutely! While roasted peanuts are delicious, feel free to substitute them with almonds, walnuts, or any other toasted nut of your choice.
What can I use instead of sweetened condensed milk?
If you’re looking for a lighter alternative, you can use coconut cream or homemade condensed milk made from plant-based milk and sweetener.
How do I know when the bars are done baking?
The bars are done when the top is golden brown and the chocolate is melted. A toothpick inserted into the center should come out mostly clean, with a few moist crumbs.
Can I make these bars ahead of time?
Yes! Salted Pretzel Magic Bars can be made a day or two in advance. Just store them in an airtight container to keep them fresh.
Bring It to the Table
When you serve Salted Pretzel Magic Bars, you’re not just presenting a dessert; you’re sharing a delightful experience. The moment you cut into these bars, the rich chocolate mingles with the crunch of pretzels and the sweetness of coconut, creating a symphony of flavors. Whether you’re enjoying them at a family gathering or sharing them with friends, these bars will undoubtedly become a favorite.
With their simple preparation and delightful results, Salted Pretzel Magic Bars are sure to be a recipe you turn to time and again. They offer a perfect balance of flavors, making them a standout treat that everyone will love. So gather your ingredients, preheat your oven, and get ready to indulge in these magical bars that are sure to impress!
Salted Pretzel Magic Bars.
Ingredients
Equipment
Method
- Step 1: Preheat your oven to 350°F (175°C). Grease your 9x13 inch baking pan or line it with parchment paper for easy removal.
- Step 2: In a mixing bowl, combine the melted butter with the pretzel crumbs. Stir until the crumbs are evenly coated. Press this mixture firmly into the bottom of the prepared baking pan to form the crust.
- Step 3: Pour the sweetened condensed milk evenly over the pretzel crust. Sprinkle the chocolate chips, coconut flakes, and roasted peanuts on top. Make sure to distribute them as evenly as possible for a uniform flavor in every bite.
- Step 4: Place the baking pan in the preheated oven and bake for 25-30 minutes, or until the top is golden brown and the chocolate chips are melted.
- Step 5: Once baked, remove the pan from the oven and let it cool completely. Drizzle melted chocolate over the top if desired, and sprinkle with flaky sea salt. Allow the chocolate to set before cutting into squares.
Notes
- For a gluten-free version, replace pretzels with gluten-free pretzel crumbs.
- Experiment with different nuts like almonds or pecans for a unique twist.
- Store any leftovers in an airtight container to maintain freshness.
- Allow the bars to cool completely for easier cutting.