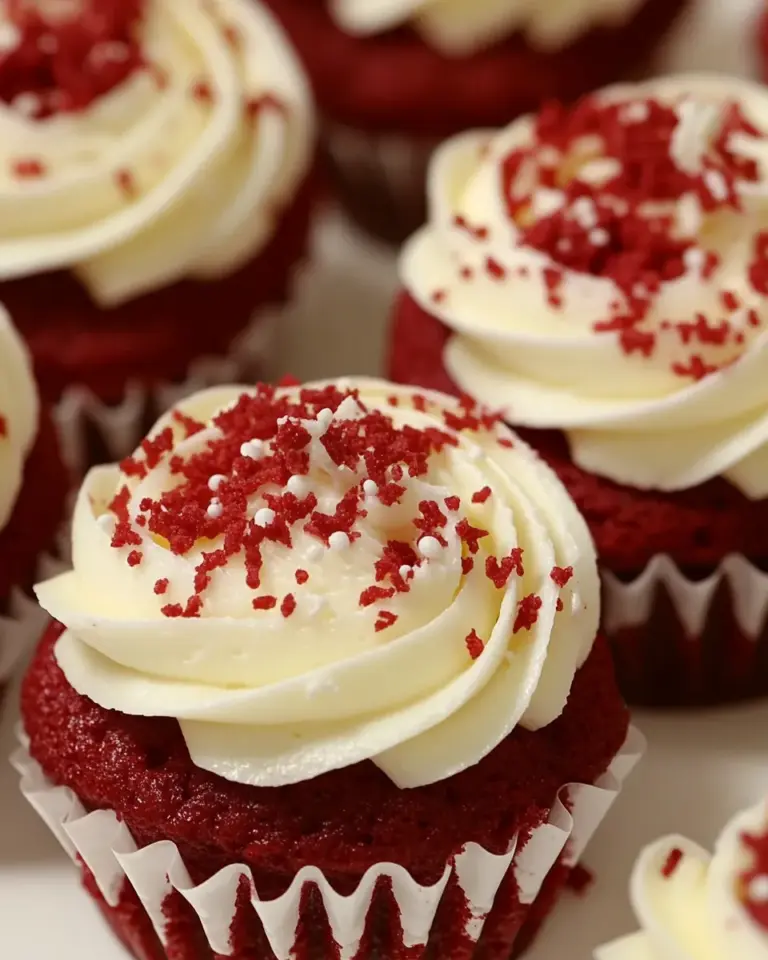
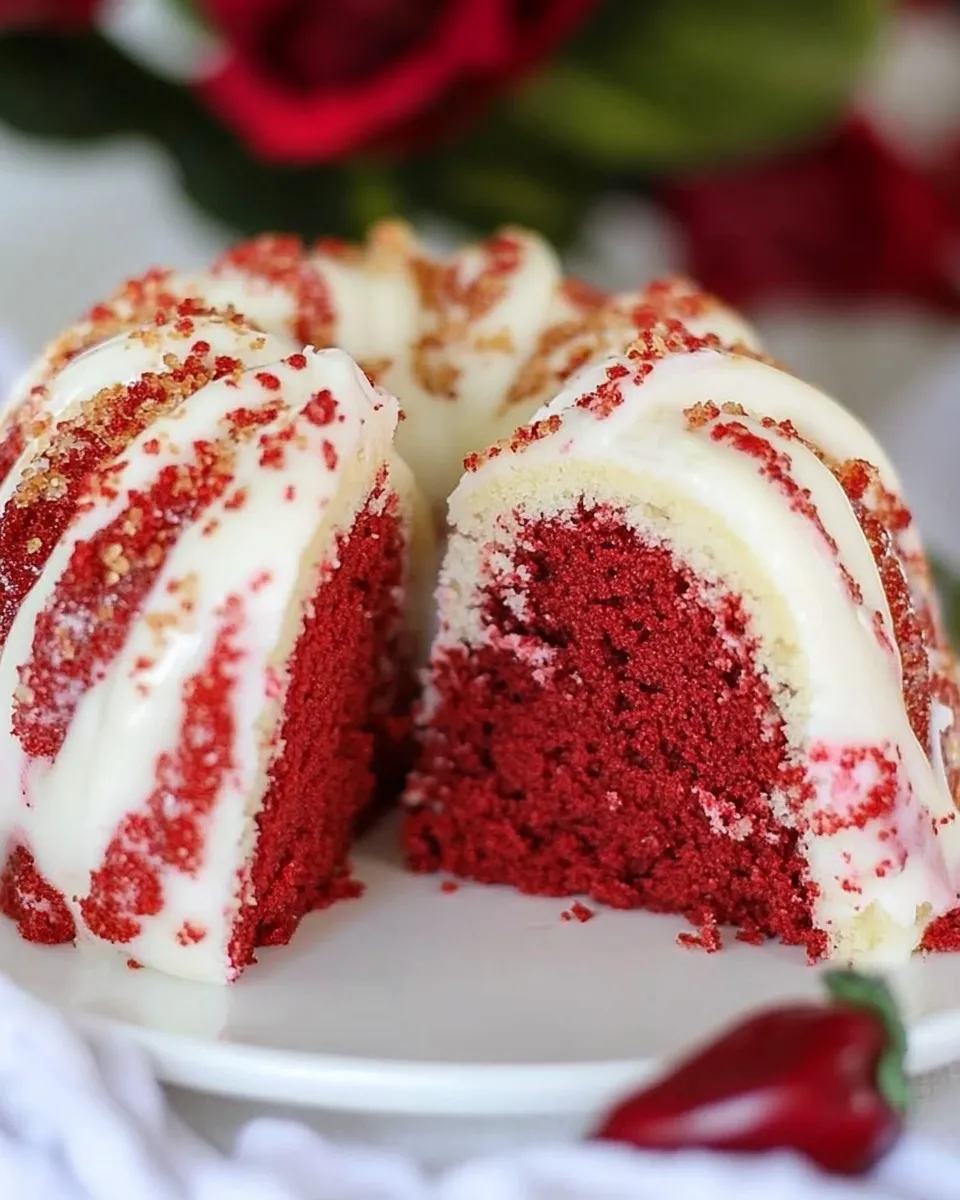
Red Velvet Marble Bundt Cake
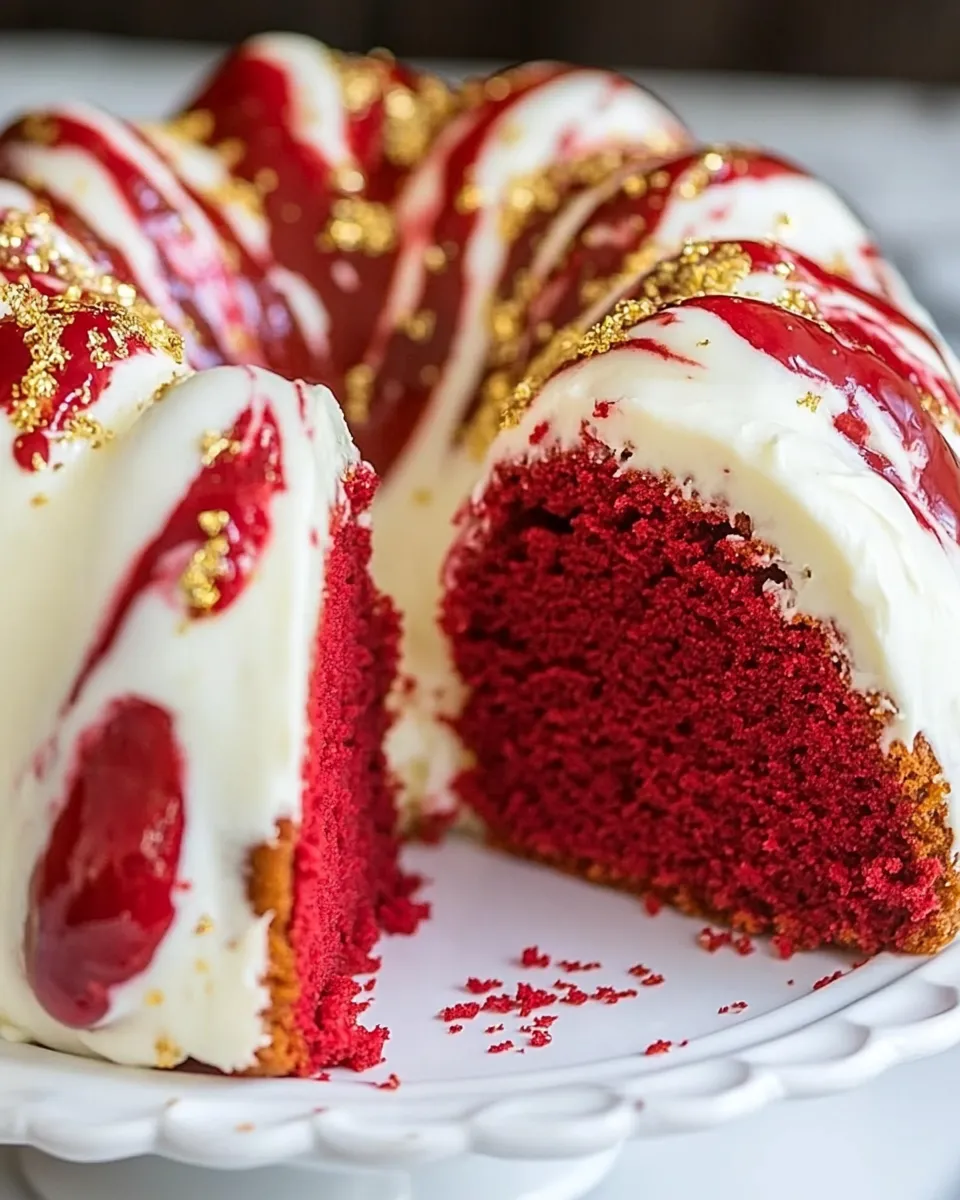
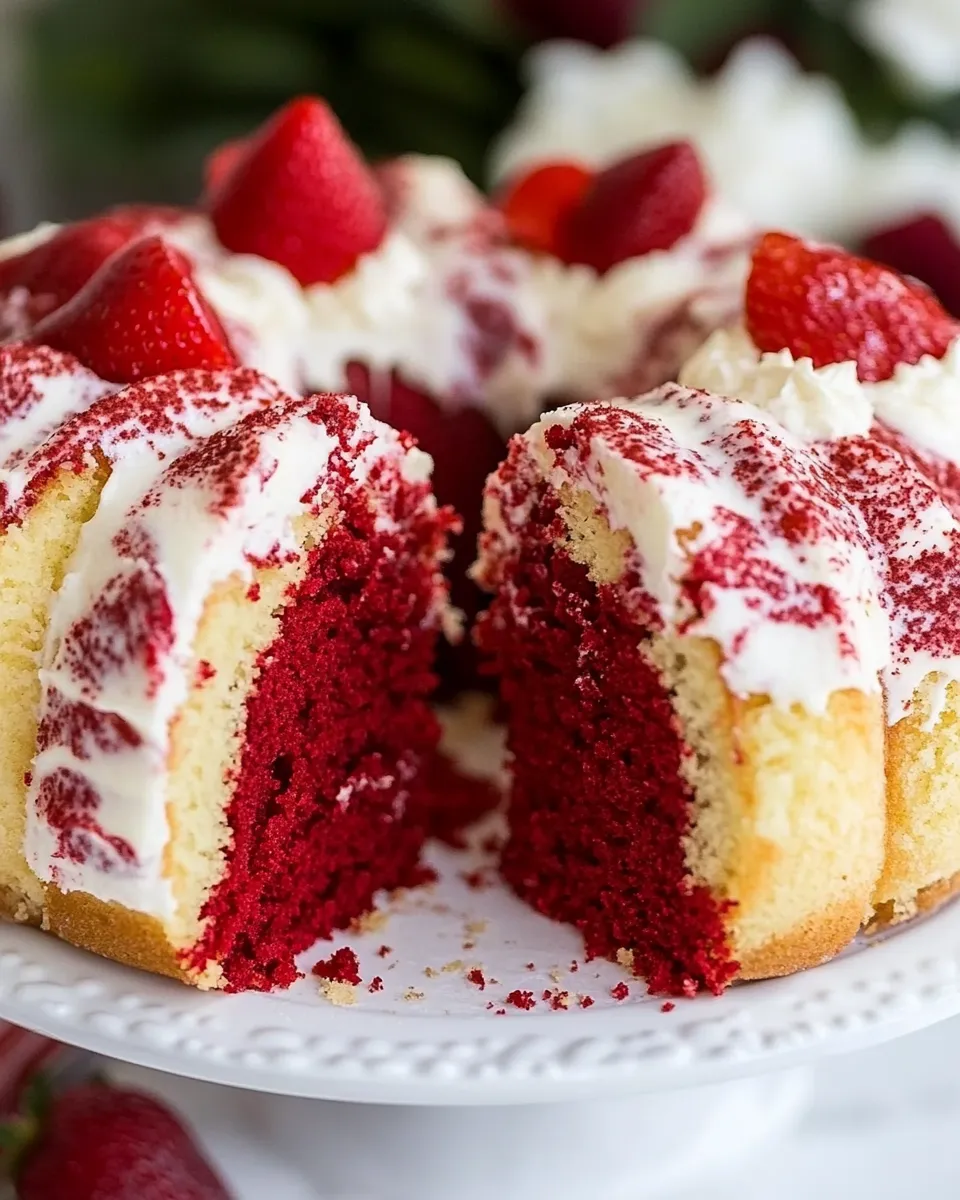
If you’re on the hunt for a show-stopping dessert that combines beauty and taste, look no further than this sumptuous Red Velvet Marble Bundt Cake. A delightful mixture of rich red velvet and classic vanilla flavors, this cake is as stunning to behold as it is delicious. The moist crumb and tender texture will have your family and friends coming back for seconds, while the striking marbled appearance makes it perfect for any occasion. Whether it’s a festive gathering or a simple family dinner, this cake is sure to impress!
The Upside of Red Velvet Marble Bundt Cake

There’s something irresistibly charming about a Bundt cake, especially one that features the classic and beloved red velvet flavor. This Red Velvet Marble Bundt Cake offers the best of both worlds: the rich, buttery taste of traditional cake and the eye-catching marbled design that elevates it to a true centerpiece. The velvety texture and slight tang from the buttermilk create a moist cake, while the cocoa powder adds depth to the flavor profile. Plus, it’s surprisingly easy to make, which means you can whip it up even on a busy day without sacrificing flavor or style.
What You’ll Gather
In order to create this beautiful Red Velvet Marble Bundt Cake, you’ll need the following ingredients:
- 1 cup butter, softened
- 1/2 cup shortening
- 2 1/2 cups sugar
- 6 large eggs, room temperature
- 3 cups all-purpose flour
- 1 teaspoon baking powder
- 1/2 teaspoon salt
- 3/4 cup milk
- 1 teaspoon vanilla extract
- 1 tablespoon unsweetened cocoa powder
- 1 tablespoon liquid red food coloring
- 2 1/2 cups powdered sugar
- 3 tablespoons milk
- 1 teaspoon vanilla extract
Toolbox for This Recipe
Before you start baking, make sure you have the following tools on hand:
- Bundt pan: A classic choice for this cake, it helps create the lovely shape.
- Mixing bowls: You’ll need a few for combining ingredients.
- Electric mixer: For easy creaming of butter and sugar.
- Measuring cups and spoons: Accurate measurements are key to a successful cake.
- Rubber spatula: Perfect for scraping down the sides of your bowls.
- Cooling rack: To help the cake cool evenly.
Red Velvet Marble Bundt Cake: From Prep to Plate
Now that you have your ingredients and tools ready, let’s get started on making the Red Velvet Marble Bundt Cake!
Step 1: Preheat the Oven
Begin by preheating your oven to 350°F (175°C). This ensures that your cake bakes evenly.
Step 2: Prepare the Bundt Pan
Grease your Bundt pan thoroughly with butter or non-stick cooking spray. Make sure to get into all the nooks and crannies for easy release after baking.
Step 3: Cream the Butter and Shortening
In a large mixing bowl, combine the softened butter and shortening. Using an electric mixer, beat them together on medium speed until the mixture is light and fluffy.
Step 4: Add Sugar
Gradually add the sugar to the creamed mixture, continuing to beat until it’s well combined and fluffy, about 3 to 5 minutes.
Step 5: Incorporate the Eggs
Add the eggs one at a time, mixing well after each addition. Be sure that each egg is fully incorporated before adding the next.
Step 6: Combine Dry Ingredients
In a separate bowl, whisk together the all-purpose flour, baking powder, and salt. This helps distribute the leavening agents evenly throughout the cake.
Step 7: Alternate Adding Dry Ingredients and Milk
With the mixer on low speed, gradually add the dry mixture to the creamed mixture, alternating with the milk. Start and end with the flour mixture. Mix until just combined.
Step 8: Add Vanilla Extract
Stir in the vanilla extract until well incorporated.
Step 9: Divide the Batter
Divide the batter into two bowls. In one bowl, mix in the cocoa powder and red food coloring until fully combined, creating your red velvet batter.
Step 10: Layer the Batter
Spoon alternating layers of the vanilla and red velvet batters into the prepared Bundt pan. Use a knife or skewer to gently swirl the two batters together for a marbled effect.
Step 11: Bake
Place the Bundt pan in the preheated oven and bake for 60 to 70 minutes, or until a toothpick inserted into the center comes out clean.
Step 12: Cool the Cake
Once baked, remove the cake from the oven and allow it to cool in the pan for about 15 minutes. Then, invert it onto a cooling rack to cool completely.
Step 13: Prepare the Glaze
In a bowl, whisk together the powdered sugar, milk, and vanilla extract until smooth. Adjust the consistency as needed by adding more milk or sugar.
Step 14: Glaze the Cake
Once the cake is completely cooled, drizzle the glaze over the top, allowing it to cascade down the sides for a beautiful finish.
Dietary Customizations
If you’d like to customize this recipe to suit specific dietary needs, consider the following options:
- Dairy-Free: Substitute the butter with a dairy-free alternative and use almond or oat milk in place of regular milk.
- Gluten-Free: Use a gluten-free all-purpose flour blend instead of regular flour.
- Reduced Sugar: Replace some of the sugar with a sugar substitute that measures cup-for-cup.
- Vegan: Use flax eggs instead of regular eggs and dairy-free butter and milk.
Testing Timeline
To ensure your Red Velvet Marble Bundt Cake turns out perfectly, consider the following timeline:
- Preparation Time: 20 minutes
- Baking Time: 60 to 70 minutes
- Cooling Time: 30 minutes (in pan) + 30 minutes (on rack)
- Glazing Time: 10 minutes
- Total Time: Approximately 2 hours
Save for Later: Storage Tips
To keep your Red Velvet Marble Bundt Cake fresh and delicious for days to come, follow these storage tips:
- Store in an airtight container at room temperature for up to 3 days.
- For longer storage, wrap the cake tightly in plastic wrap and refrigerate for up to a week.
- To freeze, wrap the cooled cake in plastic wrap and aluminum foil, then store in the freezer for up to 2 months. Thaw in the refrigerator before serving.
Handy Q&A
Can I make this cake ahead of time?
Absolutely! This cake can be made ahead of time and stored in an airtight container. It stays fresh for several days, making it a great option for parties or gatherings.
What can I use instead of liquid red food coloring?
If you prefer a natural alternative, you can use beet juice or pomegranate juice to achieve a similar red hue, although it may slightly alter the flavor.
How do I ensure my cake doesn’t stick to the pan?
Thoroughly greasing the Bundt pan is key. You can also dust it with a little flour after greasing, which can help prevent sticking.
Can I add frosting instead of glaze?
Yes! If you’d like a richer dessert, feel free to frost the cake with cream cheese frosting for that classic red velvet experience.
Bring It to the Table
When it comes to serving, this Red Velvet Marble Bundt Cake is not just a treat for the taste buds but also a feast for the eyes. Imagine slicing into this beauty to reveal the gorgeous red and white swirls, all while the rich aroma wafts through the air. Serve it plain for a simple yet elegant dessert, or pair it with a scoop of vanilla ice cream for a delightful contrast. This cake is perfect for birthdays, holidays, or just because you deserve a little indulgence.
Whether you’re a seasoned baker or a novice in the kitchen, this Red Velvet Marble Bundt Cake will surely become a favorite in your recipe repertoire. With its stunning appearance and mouthwatering flavor, it’s a cake that will be remembered long after the last slice is gone. So gather your ingredients, roll up your sleeves, and get ready to impress everyone with this delightful creation!
Red Velvet Marble Bundt Cake
Ingredients
Equipment
Method
- Step 1: Preheat the Oven - Begin by preheating your oven to 350°F (175°C). This ensures that your cake bakes evenly.
- Step 2: Prepare the Bundt Pan - Grease your Bundt pan thoroughly with butter or non-stick cooking spray.
- Step 3: Cream the Butter and Shortening - In a large mixing bowl, combine the softened butter and shortening. Beat until light and fluffy.
- Step 4: Add Sugar - Gradually add the sugar to the creamed mixture, beating until fluffy, about 3 to 5 minutes.
- Step 5: Incorporate the Eggs - Add the eggs one at a time, mixing well after each addition.
- Step 6: Combine Dry Ingredients - In a separate bowl, whisk together the flour, baking powder, and salt.
- Step 7: Alternate Adding Dry Ingredients and Milk - Gradually add the dry mixture to the creamed mixture, alternating with the milk.
- Step 8: Add Vanilla Extract - Stir in the vanilla extract until well incorporated.
- Step 9: Divide the Batter - Divide the batter into two bowls. Mix cocoa powder and red food coloring into one bowl.
- Step 10: Layer the Batter - Spoon alternating layers of the vanilla and red velvet batters into the prepared Bundt pan.
- Step 11: Bake - Place the Bundt pan in the preheated oven and bake for 60 to 70 minutes.
- Step 12: Cool the Cake - Allow it to cool in the pan for about 15 minutes, then invert onto a cooling rack.
- Step 13: Prepare the Glaze - Whisk together the powdered sugar, milk, and vanilla extract until smooth.
- Step 14: Glaze the Cake - Drizzle the glaze over the cooled cake, allowing it to cascade down the sides.
Notes
- Store in an airtight container at room temperature for up to 3 days.
- Wrap tightly in plastic wrap for up to a week in the refrigerator.
- Freeze for up to 2 months; thaw in the refrigerator before serving.