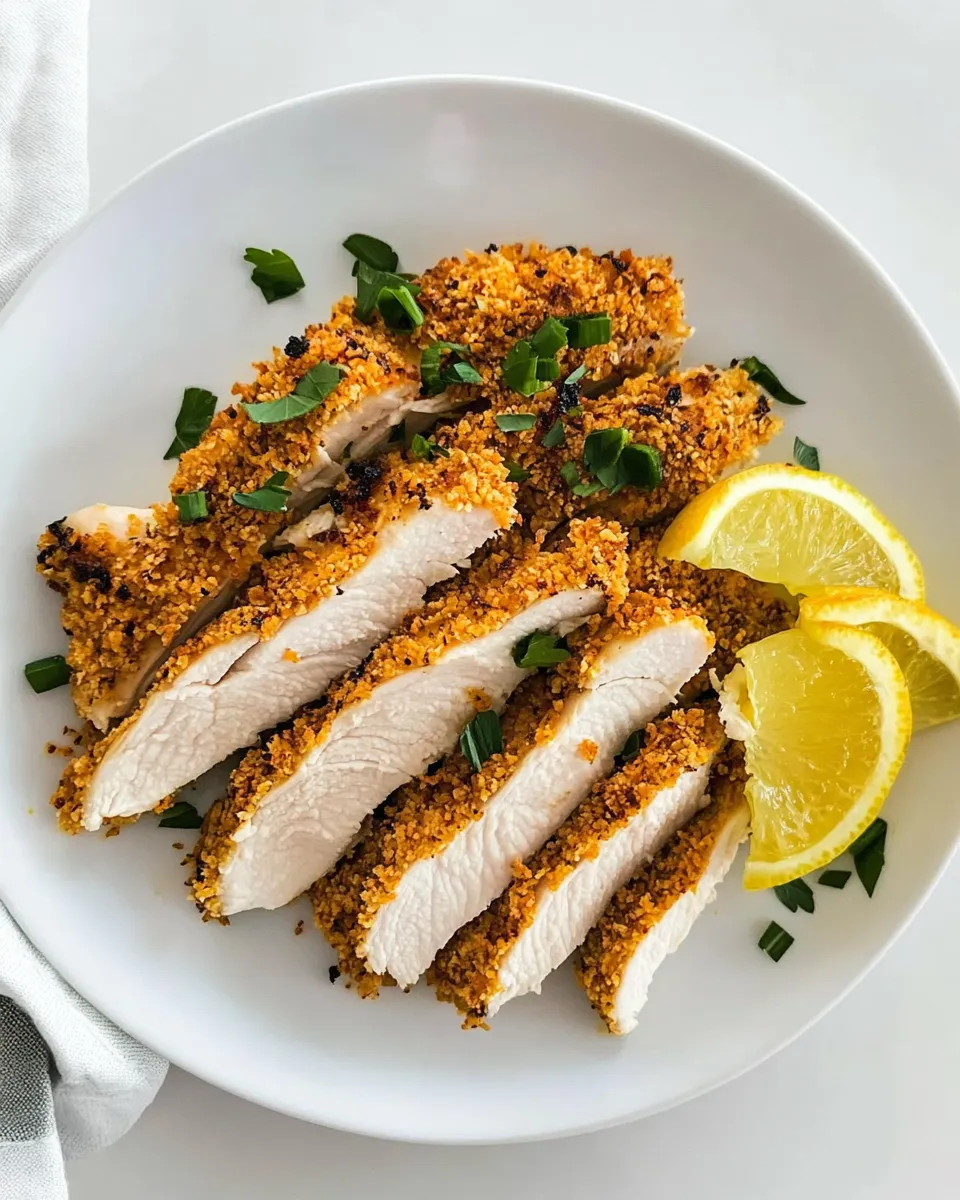
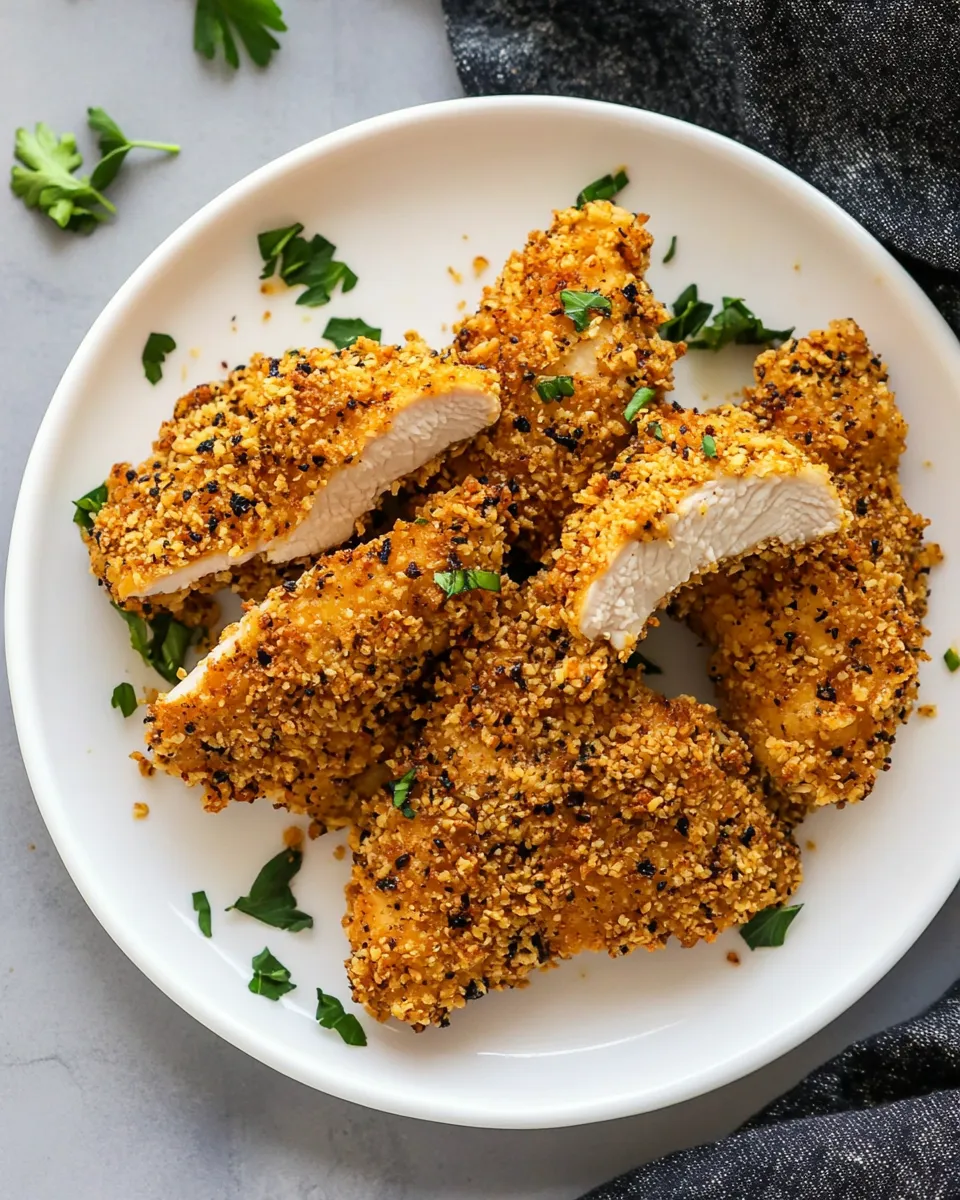
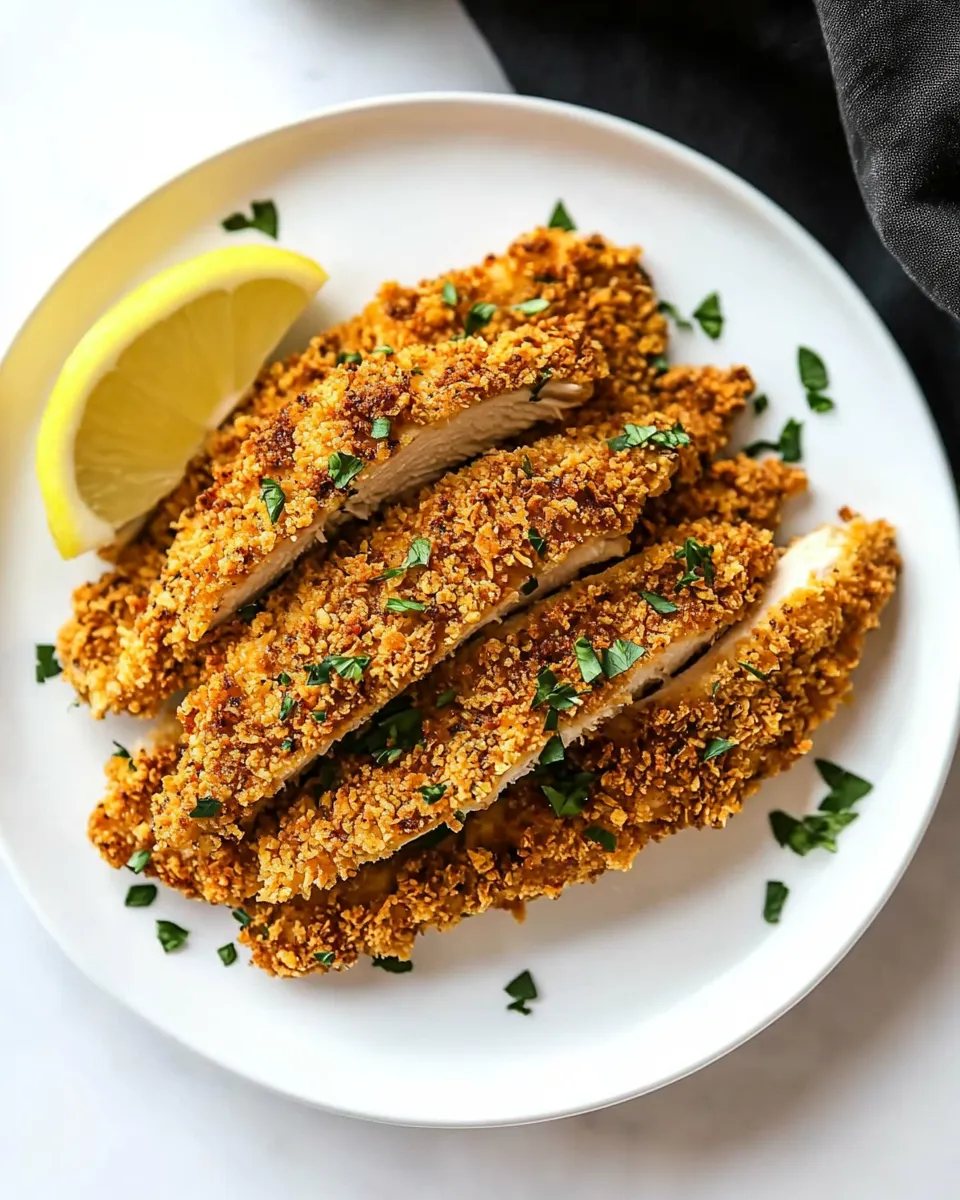
Panko Chicken
There’s something truly delightful about a crispy, golden-brown piece of chicken that’s juicy on the inside and crunchy on the outside. This Panko Chicken recipe is a game changer in the kitchen, offering a simple yet delicious way to elevate your weeknight dinners. With its crunchy panko coating and savory flavor profile, it’s sure to become a household favorite.
The beauty of Panko Chicken lies in its versatility. Whether served alongside a fresh salad, nestled in a sandwich, or paired with hearty sides, this dish is not only satisfying but also incredibly easy to make. Let’s dive into why this recipe is a reliable choice for any home cook.
Why This Recipe Is Reliable
This Panko Chicken recipe is straightforward, requiring minimal ingredients while delivering maximum flavor. The use of panko breadcrumbs provides a lighter, airier crunch compared to traditional breadcrumbs, making each bite irresistible. Additionally, the flavorful seasoning blend ensures that every piece of chicken is packed with taste. It’s a dish that can be whipped up quickly, perfect for busy weeknights or when entertaining guests. Plus, it’s adaptable to suit various palates, allowing you to customize the flavors to your liking.
What You’ll Need
To create this delicious Panko Chicken, gather the following ingredients:
- 3 tablespoons unsalted butter
- 1 cup panko breadcrumbs
- 2 boneless, skinless chicken breasts
- ½ cup all-purpose flour
- Kosher salt and freshly ground black pepper to taste
- 2 large eggs
- 2 teaspoons Dijon mustard
- 1-2 dashes hot sauce (optional)
- ½ cup freshly grated Parmesan cheese
- 1 tablespoon Italian seasoning
- ½ teaspoon garlic powder
- ½ teaspoon ground paprika
Cook’s Kit
Before you start cooking, make sure you have the following kitchen essentials on hand:
- Large mixing bowls: For preparing the flour, egg, and breadcrumb mixtures.
- Whisk: For blending the eggs and mustard smoothly.
- Meat mallet or rolling pin: To pound the chicken breasts to an even thickness for consistent cooking.
- Baking sheet: To hold the chicken while it bakes or cooks.
- Non-stick spray or parchment paper: To prevent sticking and make cleanup easier.
- Meat thermometer: To ensure your chicken reaches the perfect internal temperature.
Stepwise Method: Panko Chicken

Step 1: Prepare the Chicken
Start by preheating your oven to 400°F (200°C). Take the boneless, skinless chicken breasts and place them between two sheets of plastic wrap. Using a meat mallet or rolling pin, gently pound the chicken to an even thickness of about ½ inch. This helps the chicken cook evenly and stay juicy.
Step 2: Set Up the Dredging Station
In one bowl, add the all-purpose flour and season with kosher salt and freshly ground black pepper. In a second bowl, whisk together the eggs, Dijon mustard, and hot sauce (if using). In a third bowl, combine the panko breadcrumbs, grated Parmesan cheese, Italian seasoning, garlic powder, and ground paprika.
Step 3: Coat the Chicken
First, dip each chicken breast into the seasoned flour, ensuring it’s fully coated. Shake off any excess flour before dipping it into the egg mixture, making sure it’s completely covered. Finally, press the chicken into the panko mixture, pressing firmly to adhere the breadcrumbs to the chicken.
Step 4: Bake the Chicken
Place the coated chicken breasts on a baking sheet that has been lined with parchment paper or sprayed with non-stick spray. Melt the unsalted butter and drizzle it over the chicken for added flavor and to help with browning. Bake in the preheated oven for 20-25 minutes, or until the chicken is golden brown and cooked through, reaching an internal temperature of 165°F (75°C).
Step 5: Serve and Enjoy
Once baked, remove the Panko Chicken from the oven and let it rest for a few minutes before slicing. Serve with your favorite sides, such as a fresh salad, roasted vegetables, or even a creamy pasta. Enjoy the satisfying crunch and savor every bite!
Fresh Takes Through the Year
Panko Chicken is a versatile dish that can be adapted with seasonal ingredients and flavors. Here are some fresh takes to try throughout the year:
- Spring: Serve Panko Chicken with a vibrant asparagus and lemon salad for a light and refreshing meal.
- Summer: Pair with a fresh corn salad and avocado for a delicious summer feast.
- Fall: Incorporate pumpkin puree into the egg mixture for a subtle sweetness, and serve with roasted Brussels sprouts.
- Winter: Add some crushed red pepper flakes to the panko mixture for a spicy kick and serve with creamy mashed potatoes.
Avoid These Mistakes
When making Panko Chicken, it’s important to avoid common pitfalls that can affect the outcome of your dish. Here are some tips:
- Don’t skip the pounding step: This ensures even cooking and prevents dry, tough chicken.
- Ensure your oil or butter is hot: This helps achieve that perfect crispy texture. If you’re frying, the oil should be shimmering.
- Be generous with the seasoning: Don’t be shy with salt and pepper; this is crucial for flavor.
- Don’t overcrowd the baking sheet: Give your chicken enough space to cook evenly and get crispy.
Storing, Freezing & Reheating
Panko Chicken is great for meal prep and leftovers. Here’s how to store and reheat it properly:
To store, let the chicken cool completely, then place it in an airtight container in the refrigerator for up to 3 days. For longer storage, freeze the chicken in a single layer on a baking sheet until frozen solid, then transfer to a freezer-safe bag or container. It can be frozen for up to 3 months.
When reheating, the best method is to use the oven to maintain the crispiness. Preheat the oven to 375°F (190°C) and place the chicken on a baking sheet. Heat for about 10-15 minutes, or until warmed through. You can also microwave it, but this may result in a softer texture.
Quick Questions
Can I use chicken thighs instead of breasts?
Absolutely! Chicken thighs will add more flavor and juiciness, but the cooking time may vary slightly. Ensure they reach the proper internal temperature of 165°F (75°C).
Can I make Panko Chicken in advance?
Yes, you can prepare the chicken and coat it in breadcrumbs ahead of time. Just keep it in the refrigerator until you’re ready to bake it.
What can I serve with Panko Chicken?
Panko Chicken pairs well with a variety of sides, including roasted vegetables, mashed potatoes, or a simple green salad. Feel free to get creative with your pairings!
Can I bake Panko Chicken instead of frying it?
Yes! Baking is a healthier option and still yields a crispy result when done correctly. Just follow the baking instructions provided in the recipe.
Hungry for More?
If you’re craving more delicious chicken recipes, be sure to check out our other favorites, such as Garlic Butter Chicken, Lemon Herb Grilled Chicken, or our One-Pan Chicken and Veggies. Each dish is crafted with love and simple ingredients that will please your palate!
Panko Chicken is not just a recipe; it’s an experience that you can share with family and friends. With a few simple ingredients and steps, you can create a meal that feels special without spending hours in the kitchen. So roll up your sleeves, gather your ingredients, and get ready to enjoy the delightful crunch of Panko Chicken!
Panko Chicken
Ingredients
Equipment
Method
- Preheat your oven to 400°F (200°C). Pound the chicken breasts between plastic wrap to an even thickness of about ½ inch.
- In one bowl, add the flour and season with salt and pepper. In another bowl, whisk together the eggs, Dijon mustard, and hot sauce. In a third bowl, combine the panko breadcrumbs, Parmesan, Italian seasoning, garlic powder, and paprika.
- Coat each chicken breast in flour, dip in the egg mixture, and then press into the panko mixture to coat.
- Place the coated chicken on a parchment-lined baking sheet. Melt the butter and drizzle over the chicken. Bake for 20-25 minutes until golden brown and cooked to an internal temperature of 165°F (75°C).
- Let the chicken rest for a few minutes before slicing. Serve with your favorite sides and enjoy!
Notes
- For extra flavor, season the flour generously.
- Try different spices in the panko mix for variety.
- Store leftovers in an airtight container in the fridge for up to 3 days.