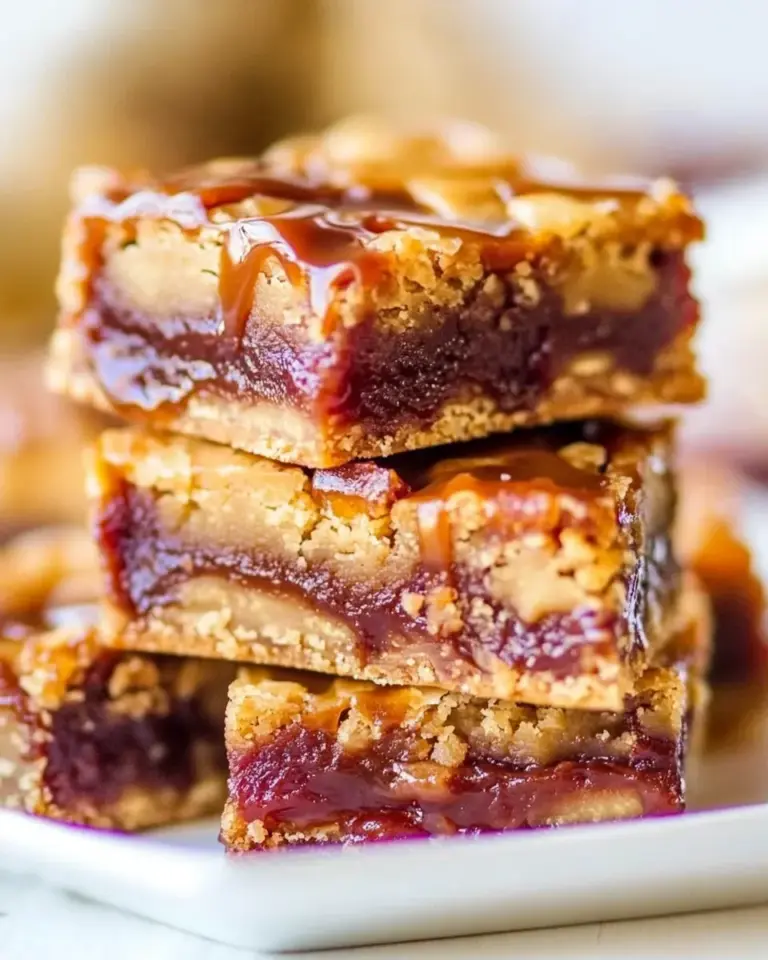
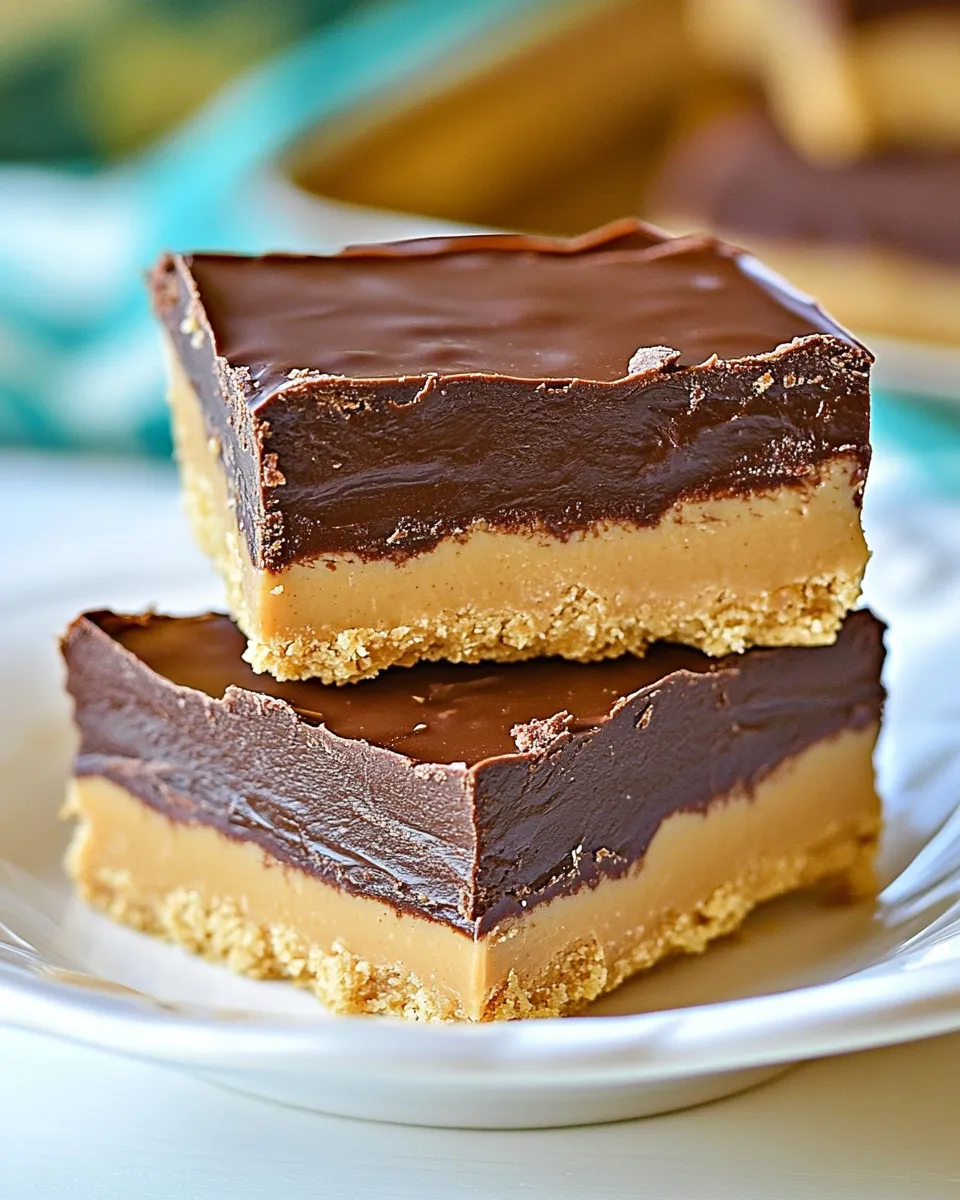
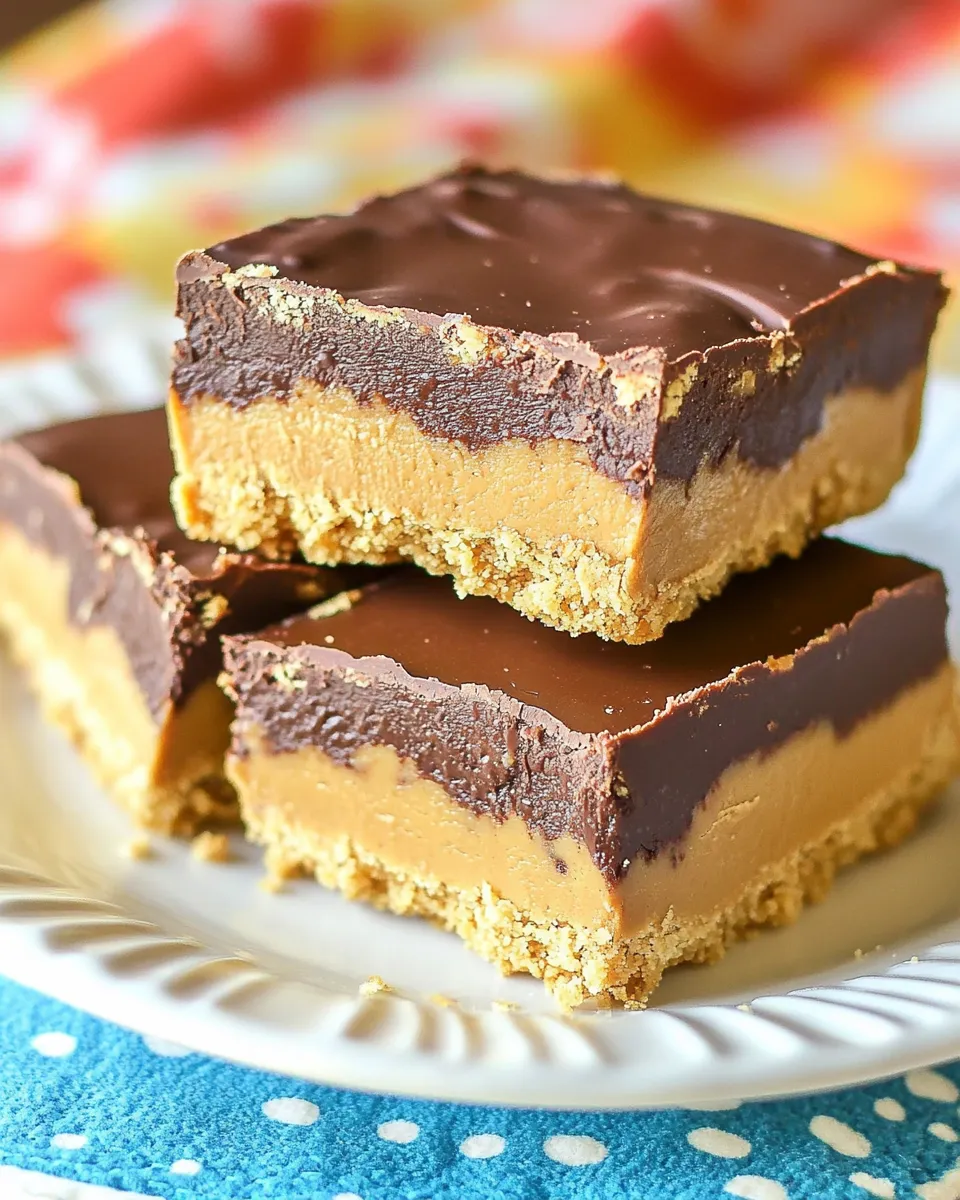
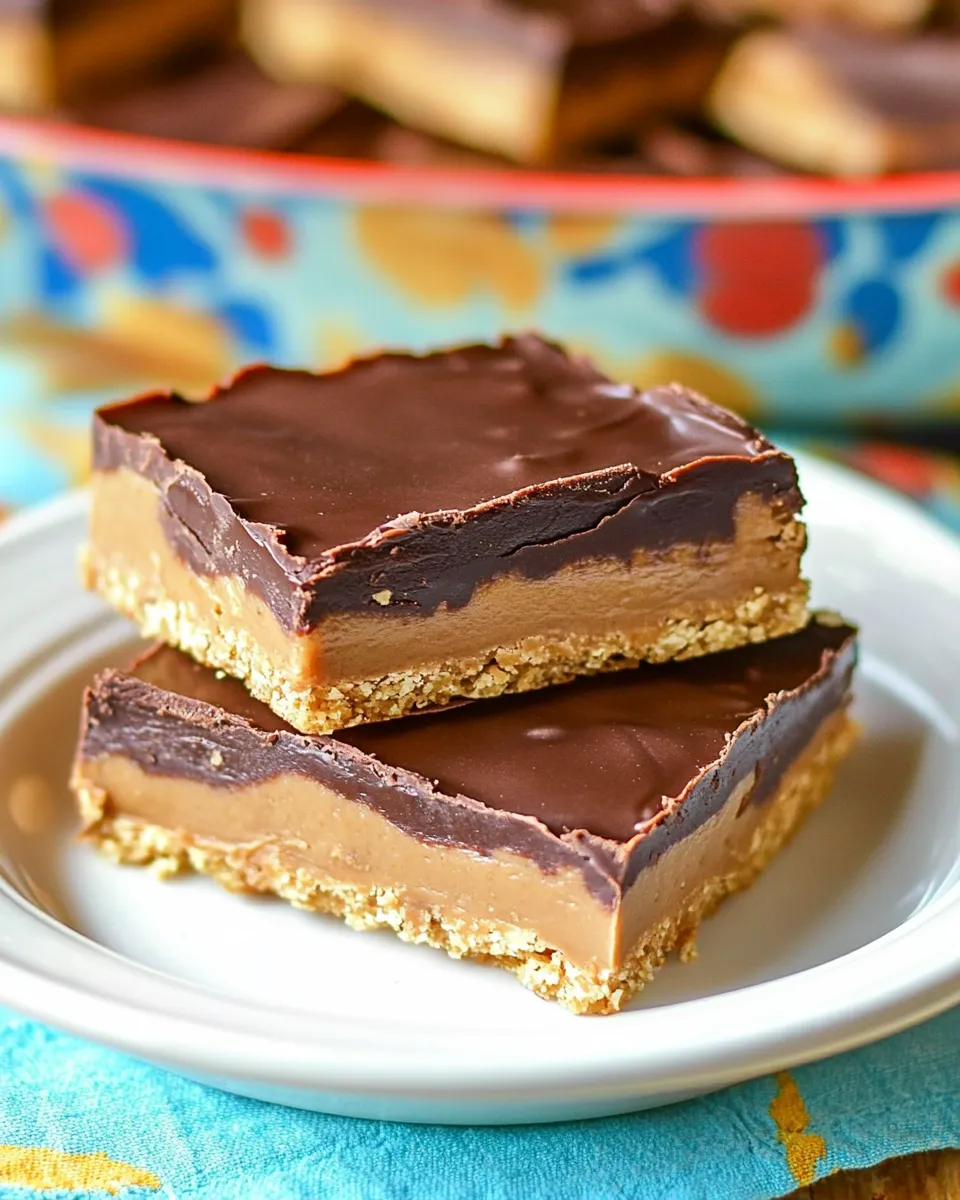
No-Bake Chocolate Peanut Butter Bars
There’s something undeniably satisfying about a dessert that requires no baking at all, and these No-Bake Chocolate Peanut Butter Bars are the perfect example. With a luscious blend of creamy peanut butter, rich chocolate, and a satisfying crunch from Rice Krispies, this recipe is a crowd-pleaser that comes together in just a few simple steps. Whether you’re looking for a quick treat for a family gathering or a sweet indulgence for yourself, these bars will hit the spot!
Why You’ll Love This Recipe
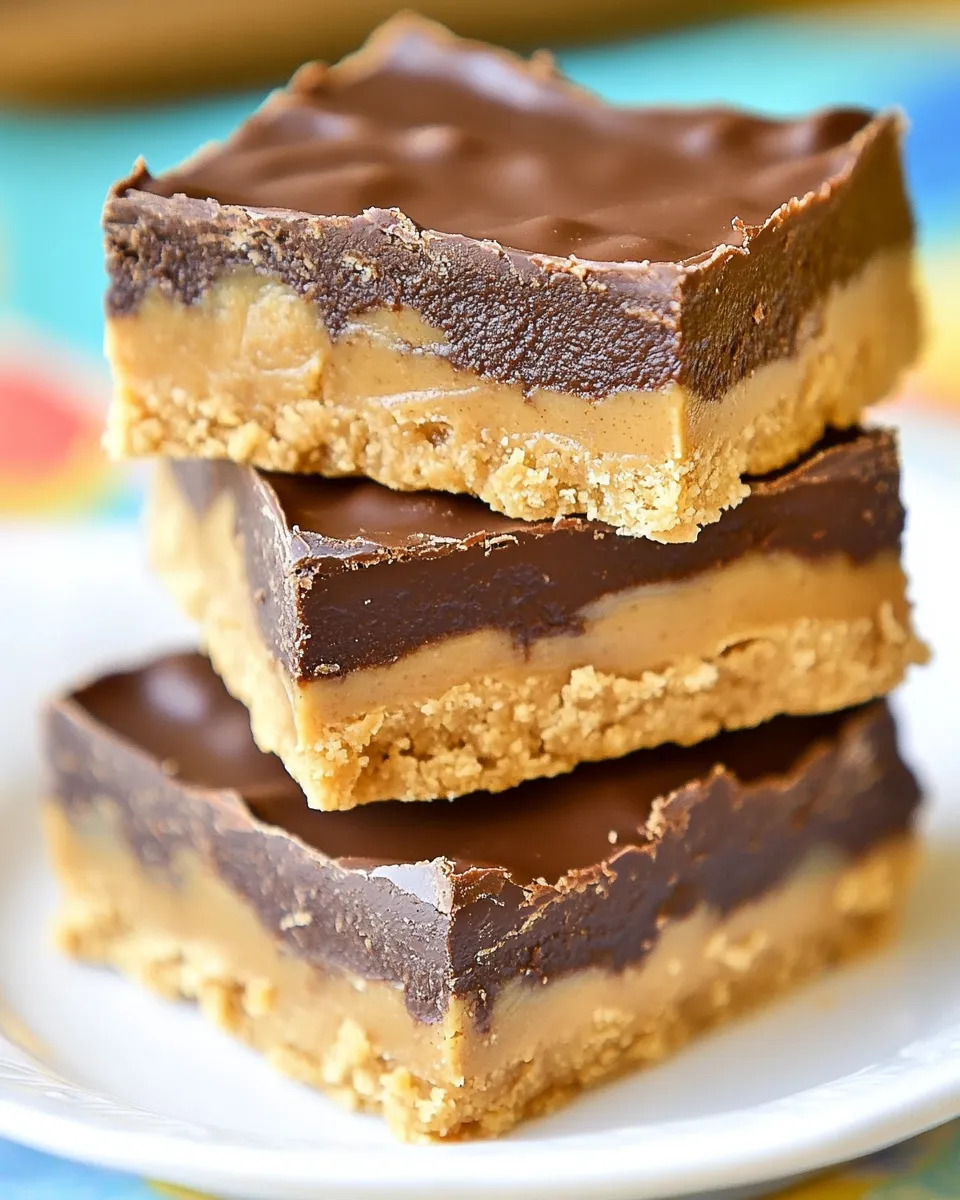
These No-Bake Chocolate Peanut Butter Bars are not only incredibly easy to make, but they also deliver a delightful combination of flavors and textures. The smooth, creamy peanut butter layer is perfectly complemented by the rich, chocolate topping, while the graham cracker crumbs and Rice Krispies add a satisfying crunch. Plus, there’s no need to turn on the oven, making this recipe perfect for warm days or when you’re short on time. You can whip them up in under an hour and have a delicious treat ready to enjoy!
What You’ll Need
- 1 cup unsalted butter, melted
- 2 cups graham cracker crumbs
- 2 cups powdered sugar
- 2 cups creamy peanut butter, divided
- 1/2 teaspoon salt
- 2 cups semisweet chocolate chips
- 1 1/2 cups rice crispy cereal
Appliances & Accessories
- Mixing bowl: For combining the ingredients smoothly.
- 9×13-inch baking dish: Ideal for setting your bars.
- Spatula: Perfect for spreading mixtures evenly.
- Microwave or double boiler: For melting chocolate and butter.
No-Bake Chocolate Peanut Butter Bars — Do This Next
Step 1: Prepare Your Baking Dish
Start by greasing a 9×13-inch baking dish with a little butter or lining it with parchment paper for easy removal later.
Step 2: Make the Peanut Butter Base
In a large mixing bowl, combine the melted butter, graham cracker crumbs, powdered sugar, 1 cup of creamy peanut butter, and salt. Mix until well combined and smooth. The mixture should be thick but manageable.
Step 3: Add the Crunch
Gently fold in the Rice Krispies until they are evenly distributed throughout the mixture. This will add a delightful crunch to your bars.
Step 4: Spread the Mixture
Transfer the peanut butter and Rice Krispies mixture into the prepared baking dish. Use a spatula to spread it out evenly and press it down firmly to create a compact layer.
Step 5: Melt the Chocolate
In the microwave or a double boiler, melt the semisweet chocolate chips with the remaining 1 cup of creamy peanut butter. Stir until smooth and glossy. Be careful not to overheat the chocolate.
Step 6: Pour the Chocolate Layer
Pour the melted chocolate mixture over the peanut butter base in the baking dish. Spread it evenly using the spatula to cover the entire surface.
Step 7: Chill Until Firm
Refrigerate the bars for at least 2 hours, or until the chocolate is set and the bars are firm enough to cut.
Step 8: Slice and Serve
Once set, remove the bars from the baking dish using the edges of the parchment paper (if used). Cut into squares or rectangles, and enjoy your homemade No-Bake Chocolate Peanut Butter Bars!
Make It Your Way
- For a nutty twist, consider adding chopped nuts such as peanuts or almonds to the base.
- If you prefer dark chocolate, substitute semisweet chocolate chips with dark chocolate chips.
- Add a sprinkle of sea salt on top of the chocolate layer for an added flavor contrast.
- For a gluten-free version, use gluten-free graham cracker crumbs.
Notes on Ingredients
The ingredients used in these No-Bake Chocolate Peanut Butter Bars are simple and widely available. When selecting your peanut butter, opt for a creamy variety for the smoothest texture. The graham cracker crumbs provide a delightful base, while the powdered sugar adds just the right amount of sweetness. Be sure to use high-quality chocolate chips for the best flavor in the topping.
Storing Tips & Timelines
These No-Bake Chocolate Peanut Butter Bars can be stored in an airtight container in the refrigerator for up to one week. If you want to keep them longer, consider freezing them. Cut the bars into squares, wrap them individually in plastic wrap, and place them in a freezer-safe container. They can last in the freezer for up to three months. Just let them thaw in the refrigerator before enjoying!
Troubleshooting Q&A
What should I do if my chocolate topping is too thick?
If your chocolate topping seems too thick, try adding a teaspoon of vegetable oil or coconut oil to the melted chocolate. This will help to thin it out and make it easier to spread.
Can I use crunchy peanut butter instead of creamy?
Yes, you can definitely use crunchy peanut butter for a different texture. Just keep in mind that it will alter the smoothness of the bars a bit, adding extra crunch!
Why are my bars too crumbly?
If your bars are too crumbly, it may be due to not enough moisture in the base mixture. Make sure you are measuring your ingredients accurately, and if necessary, add a bit more melted butter or peanut butter to help bind it together.
How can I tell when the bars are set and ready to cut?
The bars are ready to cut when the chocolate topping is firm to the touch and the entire layer feels solid. If they are still soft, give them a bit more time in the refrigerator.
That’s a Wrap
These No-Bake Chocolate Peanut Butter Bars are a delightful treat that everyone will love. With their rich flavor, crunchy texture, and easy preparation, they are perfect for any occasion. Whether you’re indulging yourself or sharing with friends and family, these bars will surely be a hit. The combination of chocolate and peanut butter is timeless, and the no-bake aspect makes them an effortless choice for dessert.
So, gather your ingredients and get ready to enjoy a sweet treat that’s sure to satisfy your cravings. You won’t regret making these No-Bake Chocolate Peanut Butter Bars!
No-Bake Chocolate Peanut Butter Bars
Ingredients
Equipment
Method
- Start by greasing a 9x13-inch baking dish with a little butter or lining it with parchment paper for easy removal later.
- In a large mixing bowl, combine the melted butter, graham cracker crumbs, powdered sugar, 1 cup of creamy peanut butter, and salt. Mix until well combined and smooth.
- Gently fold in the Rice Krispies until they are evenly distributed throughout the mixture.
- Transfer the peanut butter and Rice Krispies mixture into the prepared baking dish. Use a spatula to spread it out evenly and press it down firmly to create a compact layer.
- In the microwave or a double boiler, melt the semisweet chocolate chips with the remaining 1 cup of creamy peanut butter. Stir until smooth and glossy.
- Pour the melted chocolate mixture over the peanut butter base in the baking dish. Spread it evenly using the spatula.
- Refrigerate the bars for at least 2 hours, or until the chocolate is set and the bars are firm enough to cut.
- Once set, remove the bars from the baking dish using the edges of the parchment paper (if used). Cut into squares or rectangles, and enjoy!
Notes
- For a nutty twist, consider adding chopped nuts such as peanuts or almonds to the base.
- If you prefer dark chocolate, substitute semisweet chocolate chips with dark chocolate chips.
- Add a sprinkle of sea salt on top for an added flavor contrast.
- For a gluten-free version, use gluten-free graham cracker crumbs.