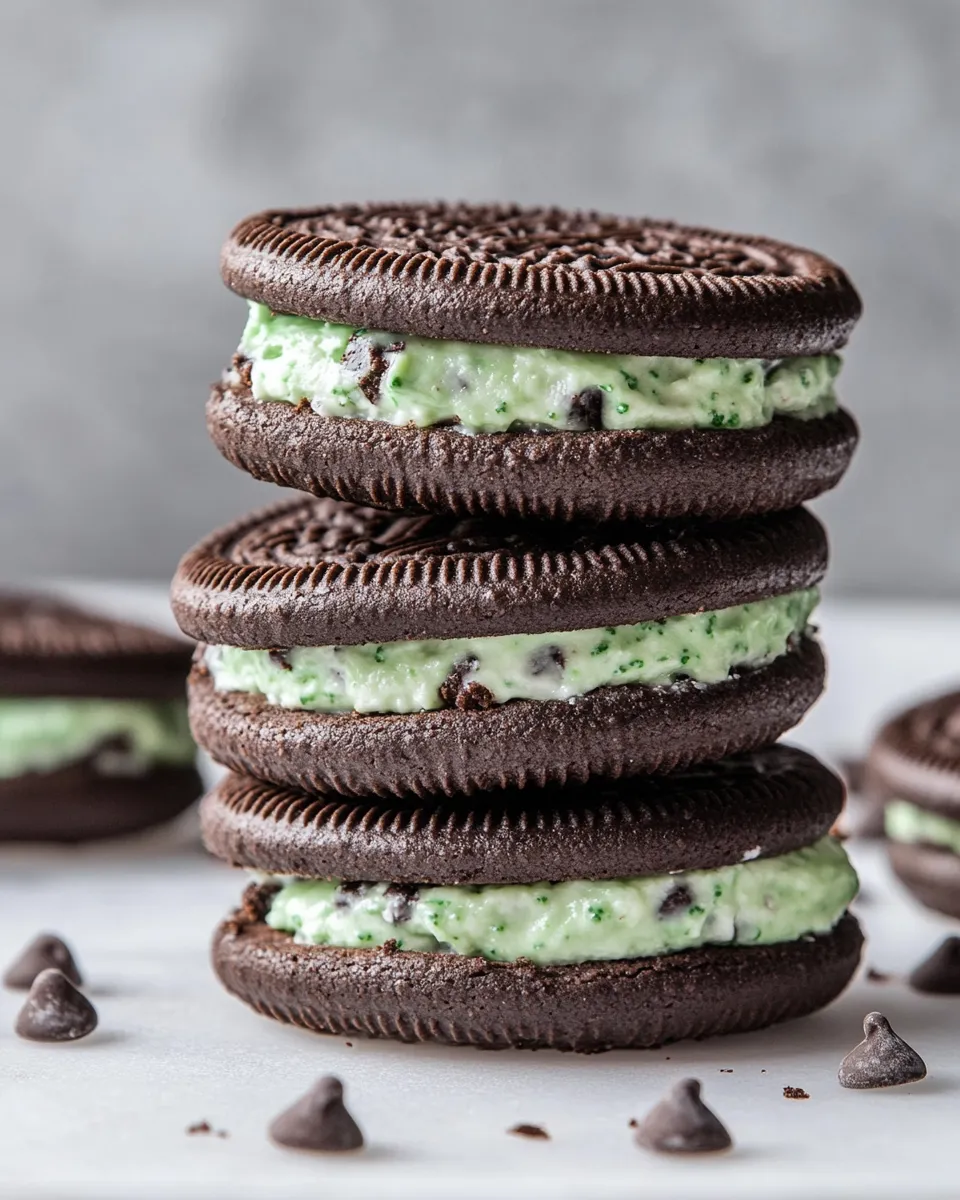
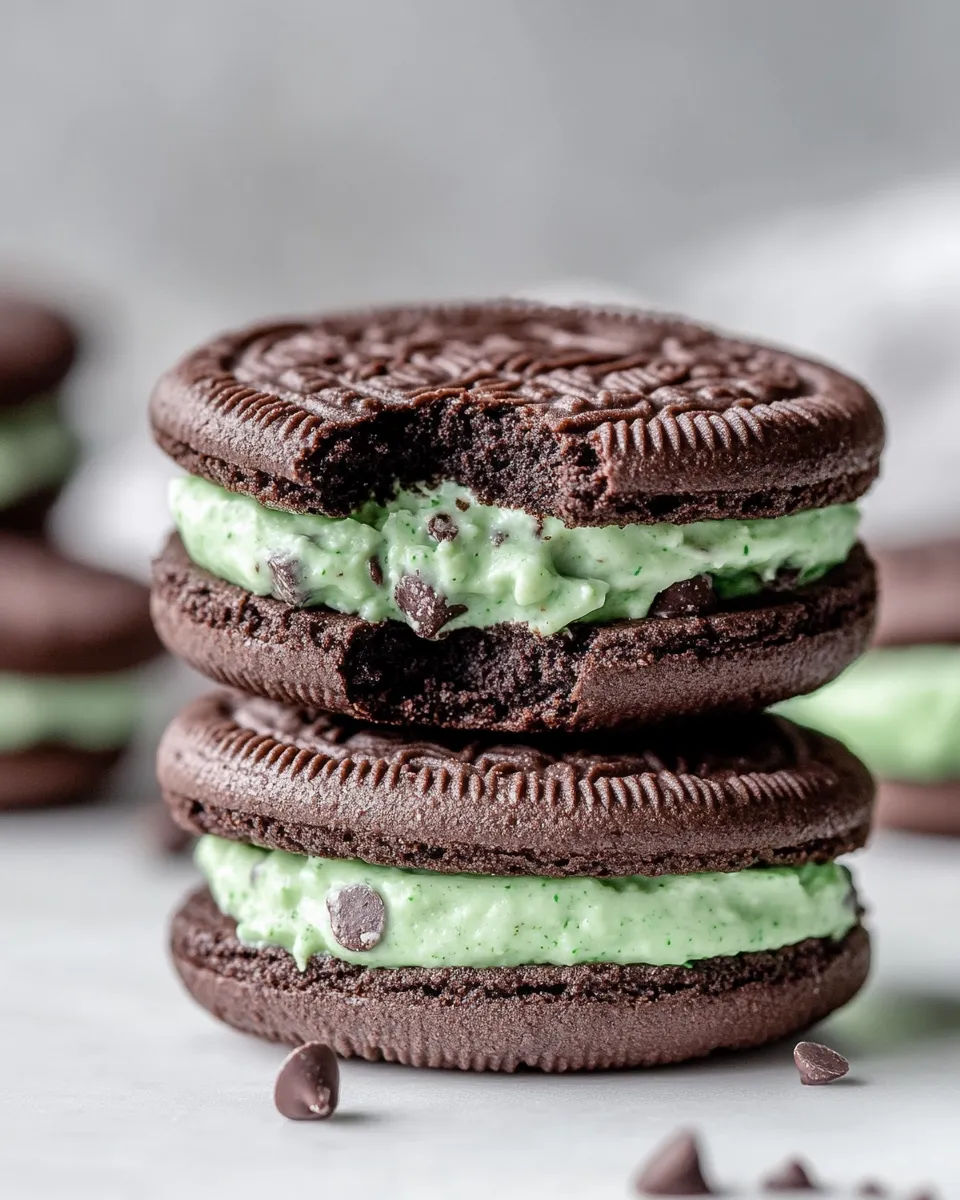
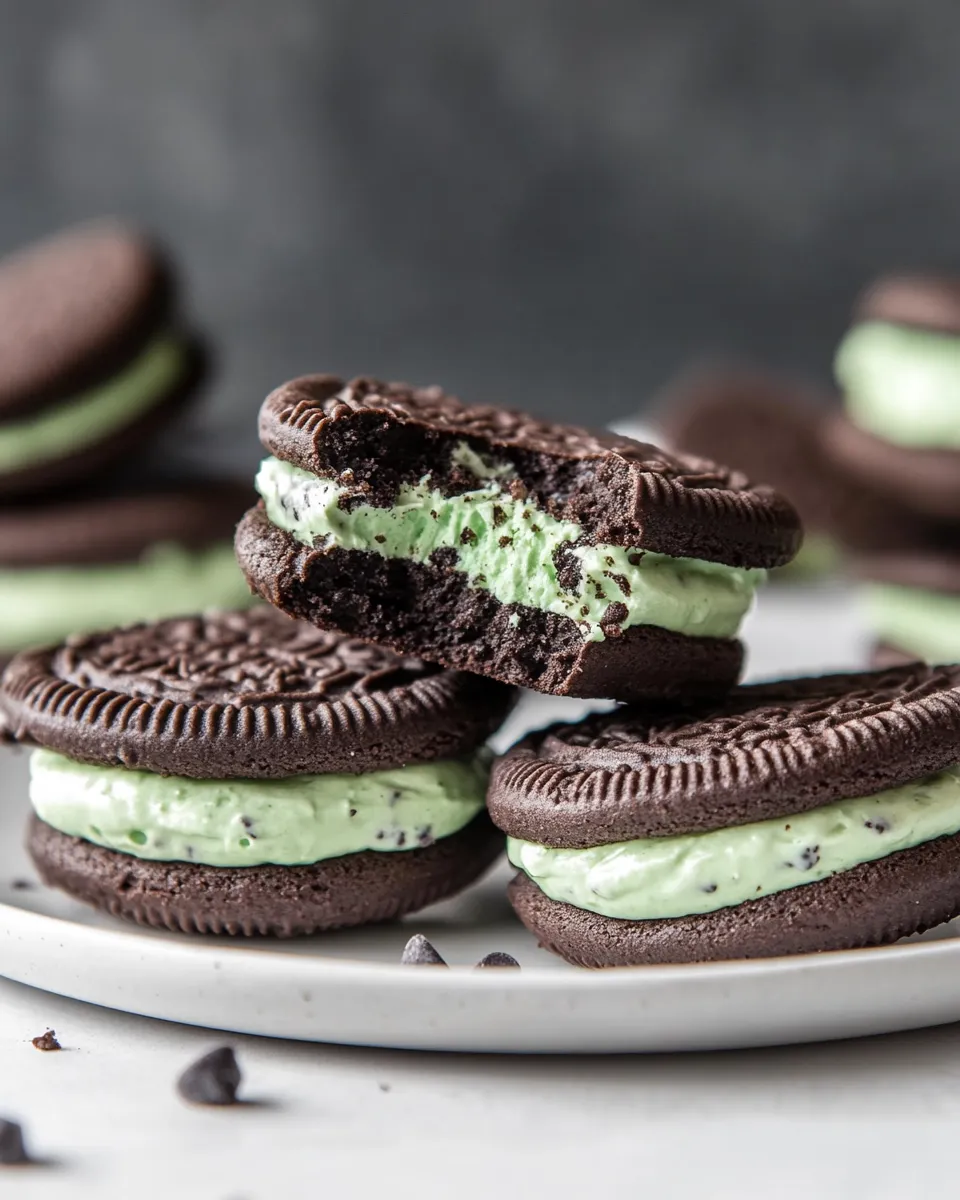
Homemade Mint Chip Oreos
Who doesn’t love a classic Oreo? Now, imagine that classic cookie, but with a refreshing twist of mint and a delightful crunch of chocolate chips. That’s right, we’re diving into the world of Homemade Mint Chip Oreos! These cookies are not only delicious but are also a fun project to whip up in your own kitchen. Perfect for sharing with friends, family, or just indulging on your own, they’re sure to be a hit. Let’s get started on creating these delectable treats!
What Makes This Recipe Special

The beauty of Homemade Mint Chip Oreos lies in their simplicity and the joy of making them from scratch. The rich, dark cocoa pairs perfectly with the cool mint flavor, creating a balance that is both refreshing and indulgent. With the addition of mini chocolate chips, each bite brings a delightful crunch that elevates the traditional Oreo experience. Plus, making them at home allows you to customize the mint intensity and adjust the sweetness to your preference.
Gather These Ingredients
- 1 cup (17g) Hershey’s Special Dark unsweetened cocoa powder – for that rich chocolate flavor.
- 1 teaspoon baking soda – helps the cookies rise.
- 1 teaspoon salt – enhances the overall flavor.
- 1 cup (155g) all-purpose flour – the base of our cookies.
- 1 cup (113g) unsalted butter, softened – for a creamy texture.
- 1 cup (134g) packed brown sugar – adds moisture and depth of flavor.
- 1/2 cup (50g) granulated sugar – for sweetness.
- 1 teaspoon vanilla extract – a classic flavor enhancer.
- 1 large egg – binds the ingredients together.
- 1 cup (113g) unsalted butter – for the creamy filling.
- 1 teaspoon salt – balances the sweetness of the filling.
- 1 1/2 cups (141g) powdered sugar – adds sweetness to the filling.
- 1 teaspoon peppermint extract – for that refreshing minty flavor.
- 1-2 tablespoons heavy whipping cream – adjusts the consistency of the filling.
- 1 cup (112g) mini chocolate chips – for a delightful crunch in the filling.
Essential Tools for Success
- Mixing Bowls – for combining ingredients.
- Electric Mixer – to whip the butter and sugars until fluffy.
- Baking Sheet – where the cookies will bake.
- Parchment Paper – for easy cookie removal.
- Cookie Scoop or Spoon – to portion out cookie dough.
- Cooling Rack – to cool the cookies after baking.
Cooking Homemade Mint Chip Oreos: The Process
Step 1: Prepare the Cookie Dough
In a large mixing bowl, combine the cocoa powder, baking soda, salt, and flour. Whisk together until well mixed. Set aside.
Step 2: Cream the Butter and Sugars
In another bowl, use an electric mixer to beat together the softened unsalted butter, brown sugar, and granulated sugar until light and fluffy. This should take about 2-3 minutes.
Step 3: Add the Egg and Vanilla
Beat in the vanilla extract and large egg until combined. Make sure to scrape down the sides of the bowl to incorporate all ingredients.
Step 4: Combine Dry and Wet Ingredients
Gradually add the dry ingredients from Step 1 into the wet mixture, mixing on low speed until just combined. Be careful not to overmix.
Step 5: Chill the Dough
Cover the cookie dough with plastic wrap and refrigerate for at least 30 minutes. This step is crucial for the cookies to hold their shape while baking.
Step 6: Bake the Cookies
Preheat your oven to 350°F (175°C). Line a baking sheet with parchment paper. Scoop tablespoon-sized balls of dough onto the baking sheet, spacing them about two inches apart. Bake for 10-12 minutes, or until the edges are set. Remove from the oven and let cool on the baking sheet for a few minutes before transferring to a wire rack to cool completely.
Step 7: Make the Mint Filling
In a clean mixing bowl, beat the unsalted butter with salt until creamy. Gradually add the powdered sugar, mixing until smooth. Then, add the peppermint extract and the heavy whipping cream (or milk) to achieve your desired consistency. Fold in the mini chocolate chips.
Step 8: Assemble the Oreos
Once the cookies are completely cool, spread a generous amount of the mint filling on the flat side of one cookie and top it with another cookie, pressing gently to spread the filling to the edges.
Allergy-Friendly Swaps
- Gluten-Free: Substitute all-purpose flour with a 1:1 gluten-free flour blend.
- Dairy-Free: Use vegan butter and a dairy-free cream alternative for the filling.
- Egg-Free: Replace the egg with a flax egg (1 tablespoon ground flaxseed mixed with 2.5 tablespoons of water).
Cook’s Notes
- For a stronger mint flavor, feel free to add a bit more peppermint extract to the filling.
- Ensure your butter is softened but not melted for the best texture.
- If you prefer a thicker filling, reduce the amount of cream you add.
- These cookies can be made ahead of time and stored for later enjoyment!
How to Store & Reheat
Store your Homemade Mint Chip Oreos in an airtight container at room temperature for up to one week. If you want to keep them fresh for longer, consider refrigerating them. To enjoy them warm, pop them in the microwave for about 10-15 seconds to soften the filling slightly, bringing back that fresh-out-of-the-oven goodness!
Ask & Learn
Can I freeze the cookie dough?
Absolutely! You can freeze the cookie dough for up to three months. Just scoop the dough into balls, freeze them on a baking sheet, then transfer to a freezer-safe bag. Bake straight from the freezer, adding a couple of extra minutes to the baking time.
What if I don’t like mint?
If mint isn’t your thing, you can create a vanilla or chocolate filling instead! Simply omit the peppermint extract and add a bit more vanilla for flavor.
Can I use chocolate chips instead of mini chips?
Yes, you can use regular chocolate chips, but mini chips tend to blend better into the filling and give a more delightful texture!
How can I make these cookies more festive?
For a fun twist, consider adding festive sprinkles to the filling or even drizzling melted chocolate over the assembled cookies!
Final Bite
In conclusion, creating your own Homemade Mint Chip Oreos is not only a rewarding experience but also a delicious one. The combination of rich chocolate cookies and refreshing minty filling makes for a treat that’s hard to resist. Whether you’re enjoying them on a cozy evening at home or sharing them at a gathering, these cookies are sure to impress. So roll up your sleeves, gather your ingredients, and get ready to indulge in a delightful baking adventure that will leave you craving more!
Homemade Mint Chip Oreos
Ingredients
Equipment
Method
- In a large mixing bowl, combine the cocoa powder, baking soda, salt, and flour. Whisk together until well mixed. Set aside.
- In another bowl, use an electric mixer to beat together the softened unsalted butter, brown sugar, and granulated sugar until light and fluffy. This should take about 2-3 minutes.
- Beat in the vanilla extract and large egg until combined. Make sure to scrape down the sides of the bowl to incorporate all ingredients.
- Gradually add the dry ingredients from Step 1 into the wet mixture, mixing on low speed until just combined. Be careful not to overmix.
- Cover the cookie dough with plastic wrap and refrigerate for at least 30 minutes. This step is crucial for the cookies to hold their shape while baking.
- Preheat your oven to 350°F (175°C). Line a baking sheet with parchment paper. Scoop tablespoon-sized balls of dough onto the baking sheet, spacing them about two inches apart. Bake for 10-12 minutes, or until the edges are set. Remove from the oven and let cool on the baking sheet for a few minutes before transferring to a wire rack to cool completely.
- In a clean mixing bowl, beat the unsalted butter with salt until creamy. Gradually add the powdered sugar, mixing until smooth. Then, add the peppermint extract and the heavy whipping cream (or milk) to achieve your desired consistency. Fold in the mini chocolate chips.
- Once the cookies are completely cool, spread a generous amount of the mint filling on the flat side of one cookie and top it with another cookie, pressing gently to spread the filling to the edges.
Notes
- For a stronger mint flavor, feel free to add a bit more peppermint extract to the filling.
- Ensure your butter is softened but not melted for the best texture.
- If you prefer a thicker filling, reduce the amount of cream you add.
- These cookies can be made ahead of time and stored for later enjoyment!