Homemade Garlic Rolls
There’s nothing quite like the aroma of freshly baked bread wafting through your home, especially when it’s the irresistible scent of homemade garlic rolls. Soft, fluffy, and infused with buttery garlic goodness, these rolls are perfect for any occasion, whether it’s a family dinner, a holiday feast, or simply a cozy night in. With just a handful of ingredients, you can create a warm, comforting dish that will leave everyone asking for seconds. Let’s dive into this delightful recipe and bring the bakery experience right into your kitchen!
Why This Recipe Is Reliable
This homemade garlic rolls recipe stands out because of its simplicity and reliability. The use of instant yeast means you don’t have to worry about activating it beforehand, cutting down on prep time without sacrificing flavor. The combination of milk, water, and butter enriches the dough, yielding rolls that are soft and tender, while the garlic and Italian seasoning bring a savory punch to each bite. With straightforward steps and common ingredients, this recipe is perfect for both novice bakers and seasoned pros alike.
What You’ll Need
- 4 to 5 cups (589-651g) all-purpose flour: Essential for the structure of the rolls.
- 1/3 cup (67g) granulated sugar: Adds a touch of sweetness to balance the savory flavors.
- 2 envelopes of instant yeast: The leavening agent that helps the rolls rise.
- 1 teaspoon salt: Enhances the overall flavor.
- 3/4 cup (177ml) milk: Provides richness and moisture to the dough.
- 3/4 cup (177ml) water: Helps hydrate the flour for a perfect dough consistency.
- 1/4 cup (57g) unsalted butter: Adds flavor and contributes to a tender texture.
- 1 large egg: Acts as a binder for the ingredients and adds richness.
- 1/4 cup (57g) unsalted butter, melted: For brushing on top of the rolls to give them a beautiful finish.
- 1 teaspoon Italian seasoning: Brings a fragrant herb flavor to the rolls.
- 1 teaspoon garlic powder: Infuses the dough with a delicious garlic taste.
Essential Tools for Success
- Mixing bowl: For combining your ingredients.
- Measuring cups and spoons: Ensure accuracy in your measurements.
- Wooden spoon or dough whisk: To mix the dough effectively.
- Kitchen towel: To cover the dough during rising.
- Baking sheet: For placing the rolls before baking.
- Oven: The essential appliance to bake your rolls to perfection.
Cooking Homemade Garlic Rolls: The Process
Step 1: Prepare the Dough
Begin by warming the milk and water in a small saucepan until it’s just warm to the touch (about 110°F or 43°C). In a mixing bowl, combine 4 cups of flour, sugar, instant yeast, and salt. Mix them well to ensure even distribution.
Step 2: Combine Ingredients
Pour the warm milk and water mixture into the bowl with the dry ingredients. Add the melted butter and the egg. Stir with a wooden spoon until the dough starts to come together.
Step 3: Knead the Dough
Transfer the dough onto a floured surface. Knead for about 8-10 minutes, adding more flour as necessary until the dough is smooth and elastic. It should be slightly sticky but not overly wet.
Step 4: First Rise
Place the kneaded dough in a lightly greased bowl and cover it with a kitchen towel. Let it rise in a warm area for about 1 hour or until it has doubled in size.
Step 5: Shape the Rolls
After the dough has risen, punch it down to release the air. Divide the dough into small pieces, each about the size of a golf ball. Shape each piece into a smooth ball and place them on a greased baking sheet, leaving space between each roll.
Step 6: Second Rise
Cover the shaped rolls with the kitchen towel again and let them rise for an additional 30 minutes. During this time, preheat your oven to 350°F (175°C).
Step 7: Prepare for Baking
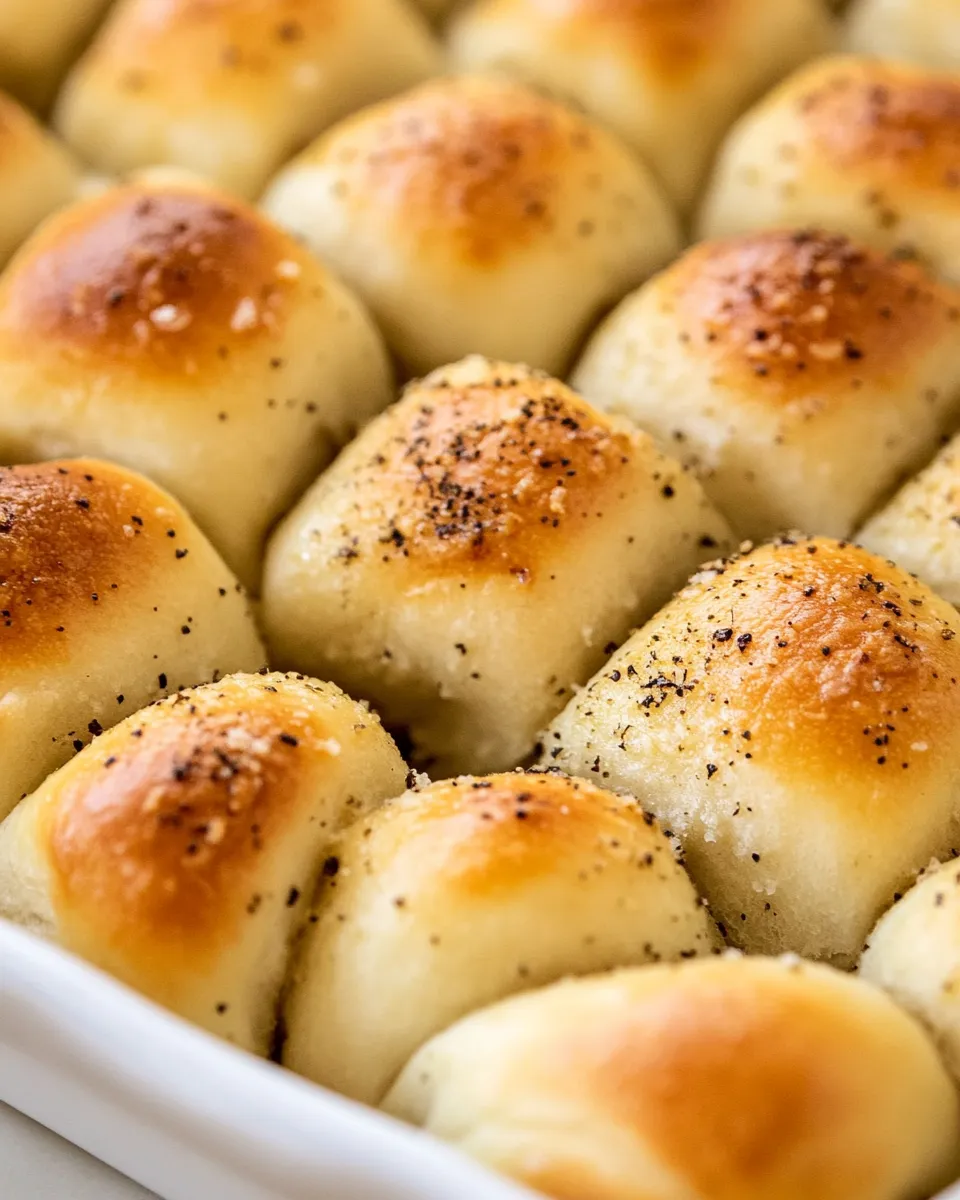
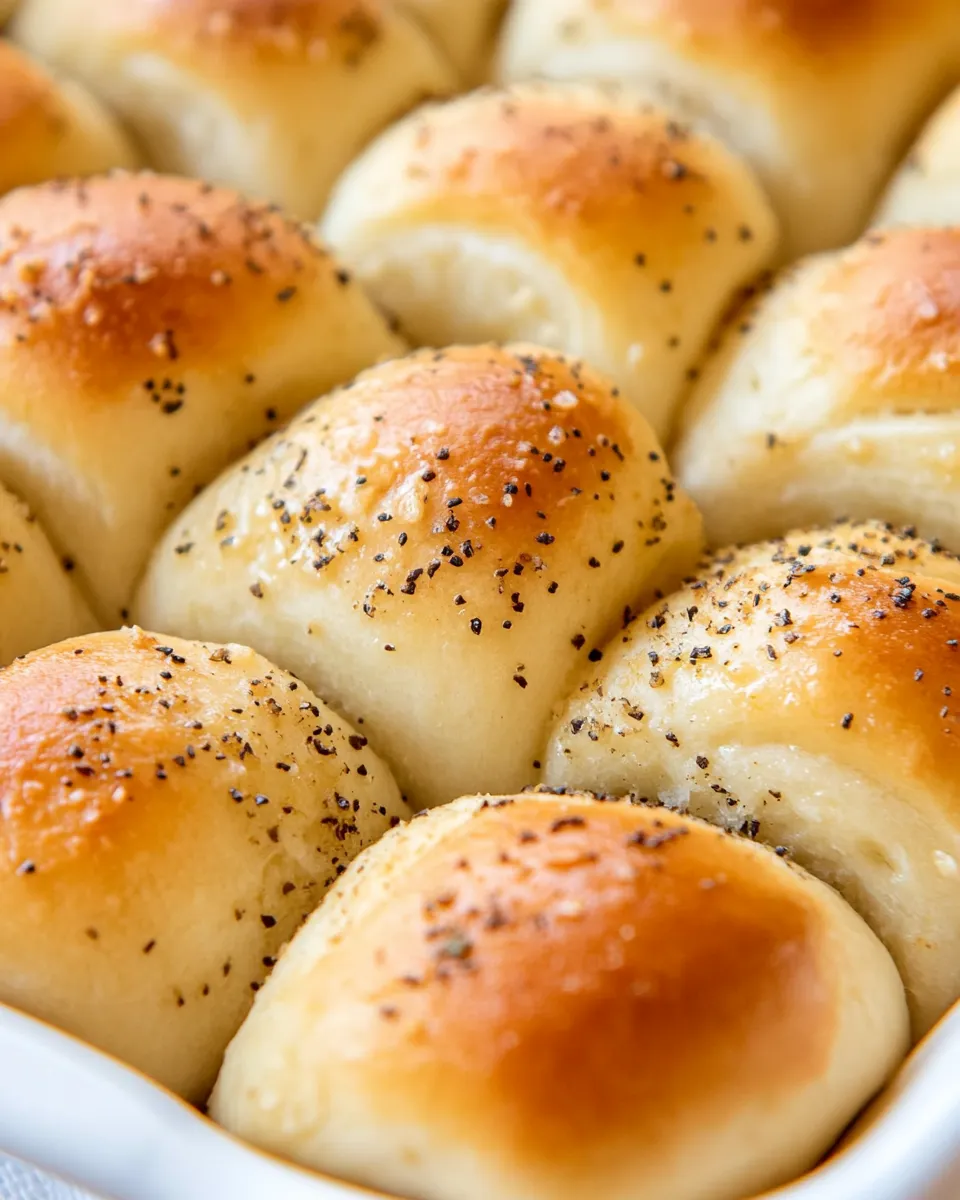
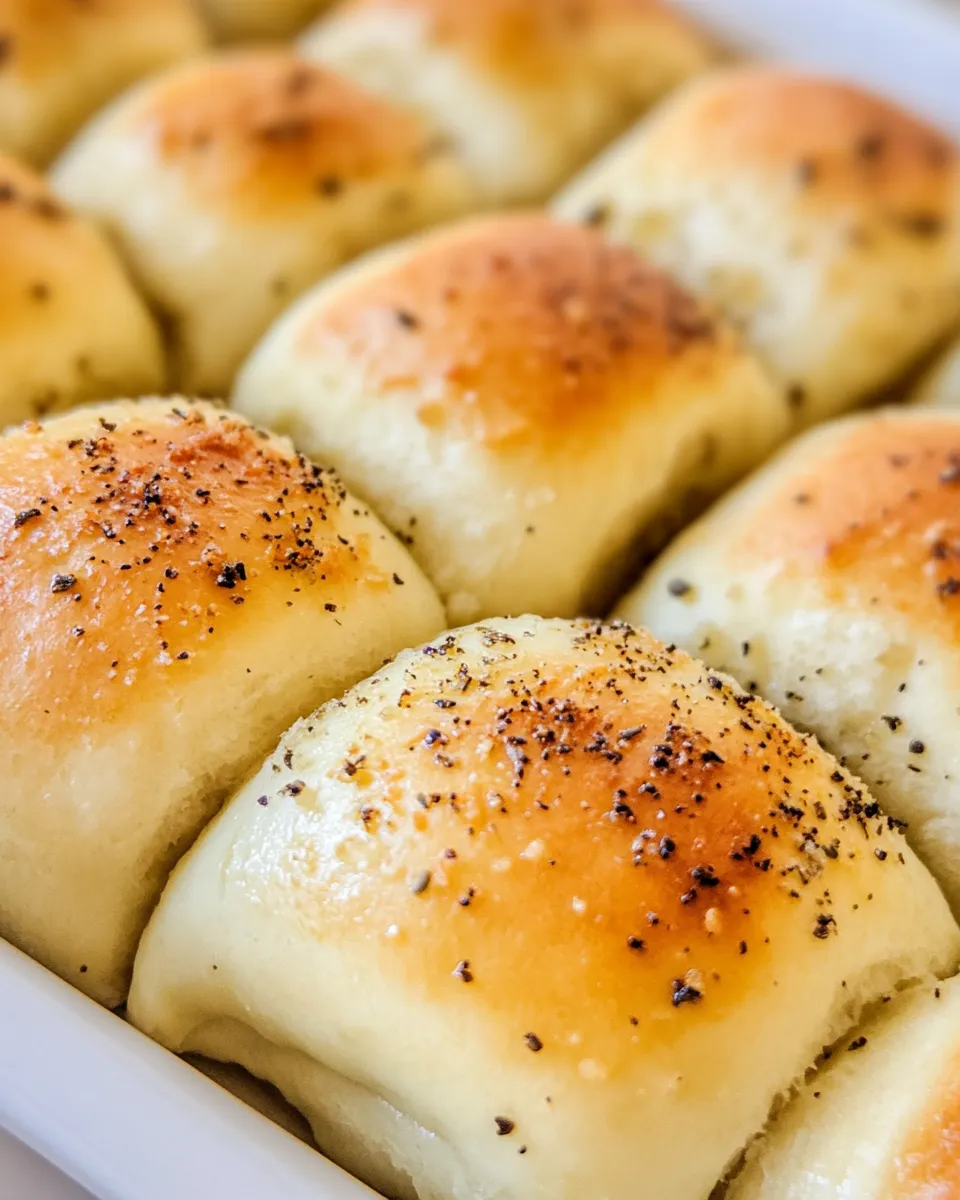
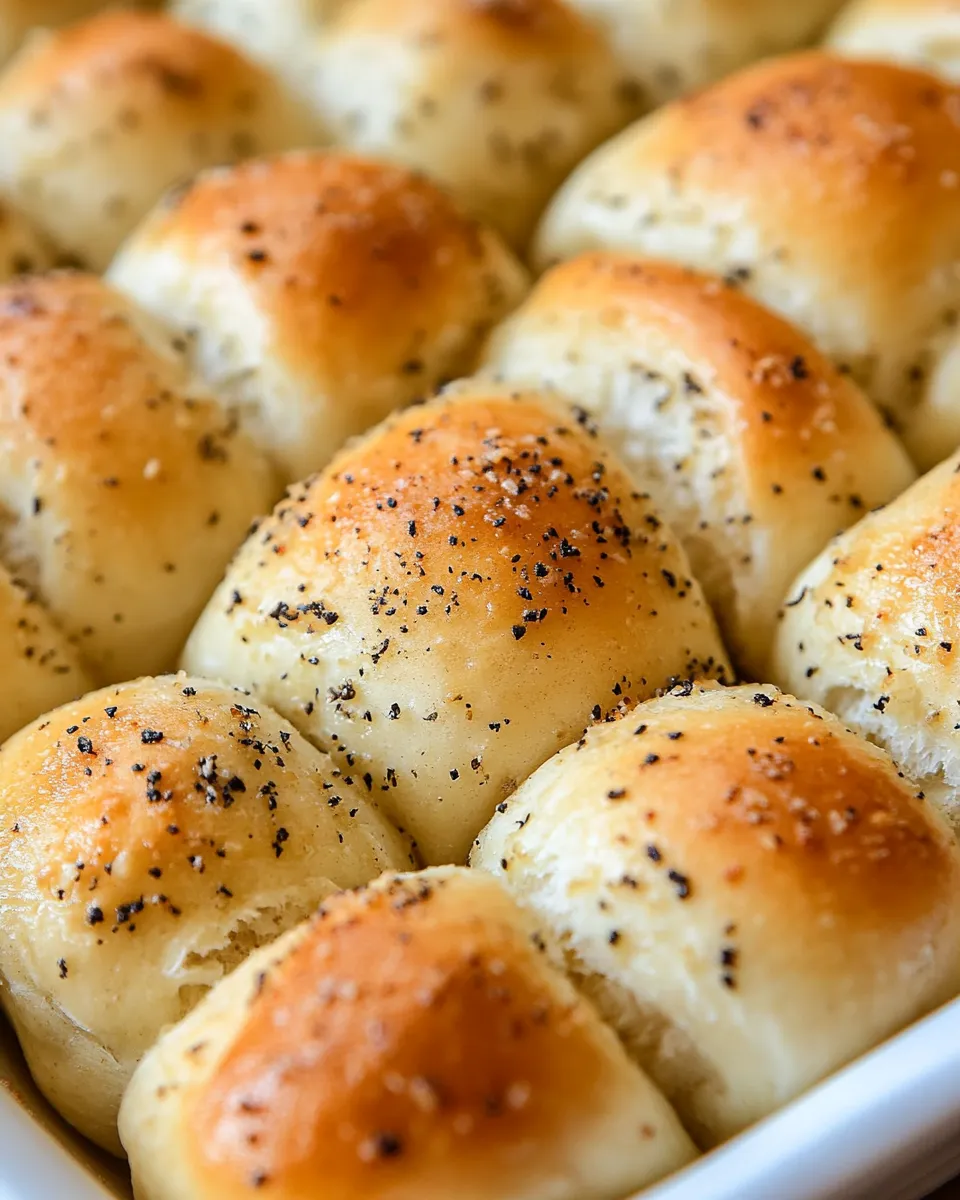
Once the rolls have risen, brush the tops with melted butter, and sprinkle them with Italian seasoning and garlic powder for extra flavor.
Step 8: Bake
Bake the rolls in the preheated oven for 20-25 minutes or until they are golden brown on top. The aroma will fill your kitchen, making it hard to resist!
Step 9: Cool and Serve
Remove the rolls from the oven and brush with any leftover melted butter. Allow them to cool slightly before serving. Enjoy them warm, straight from the oven, or with your favorite dipping sauce!
Texture-Safe Substitutions
- Gluten-free flour: Use a 1:1 gluten-free baking flour for a gluten-free option.
- Non-dairy milk: Substitute almond milk or oat milk for the milk for a dairy-free version.
- Honey or maple syrup: Replace granulated sugar with an equal amount of honey or maple syrup for a natural sweetener.
- Olive oil: Use olive oil instead of butter for a dairy-free fat option.
Errors to Dodge
- Don’t skip the kneading step; it’s crucial for developing gluten and ensuring a fluffy texture.
- Make sure your liquids are not too hot when mixed with yeast; it can kill the yeast and prevent the dough from rising.
- Be patient with the rising times; rushing this step can result in dense rolls.
- Don’t overcrowd the baking sheet; give the rolls room to expand as they bake.
Make-Ahead & Storage
These homemade garlic rolls can be made ahead of time. After shaping the rolls, you can cover them tightly and refrigerate them for up to 24 hours before baking. Allow them to come to room temperature and rise for about 30 minutes before placing them in the oven. For storage, keep any leftovers in an airtight container at room temperature for up to 2 days, or freeze them for up to 3 months. Reheat in the oven or microwave before serving to restore their softness.
Your Top Questions
Can I use active dry yeast instead of instant yeast?
Yes, you can use active dry yeast. Just make sure to activate it in warm water with a bit of sugar before adding it to the flour mixture.
How do I know when the rolls are fully baked?
The rolls are done when they are golden brown on top and sound hollow when tapped on the bottom. You can also use a thermometer; they should reach an internal temperature of about 190°F (88°C).
Can I add cheese to the rolls?
Absolutely! Adding shredded cheese like mozzarella or cheddar to the dough or on top before baking can elevate the flavor and make them even more delicious.
What can I serve with garlic rolls?
These rolls pair wonderfully with soups, salads, or any pasta dish. They also make a great appetizer with marinara or garlic butter dipping sauces.
Wrap-Up
Homemade garlic rolls are a delightful addition to any meal, bringing warmth and comfort to your dining table. With their fluffy texture and rich garlic flavor, they are sure to become a staple in your home. Whether you enjoy them fresh out of the oven or save them for later, these rolls will impress family and friends alike. So roll up your sleeves, gather your ingredients, and let’s create something truly special together!
Homemade Garlic Rolls
Ingredients
Equipment
Method
- Step 1: Prepare the Dough - Warm milk and water until just warm. In a mixing bowl, combine flour, sugar, yeast, and salt.
- Step 2: Combine Ingredients - Pour warm milk and water into the dry ingredients. Add melted butter and egg. Stir until the dough comes together.
- Step 3: Knead the Dough - Transfer dough to a floured surface. Knead for 8-10 minutes until smooth and elastic.
- Step 4: First Rise - Place dough in a greased bowl, cover with a towel, and let rise for 1 hour or until doubled.
- Step 5: Shape the Rolls - Punch down the dough, divide into pieces, shape into balls, and place on a greased baking sheet.
- Step 6: Second Rise - Cover rolls with a towel and let rise for 30 minutes. Preheat oven to 350°F (175°C).
- Step 7: Prepare for Baking - Brush tops with melted butter and sprinkle with Italian seasoning and garlic powder.
- Step 8: Bake - Bake in the oven for 20-25 minutes until golden brown.
- Step 9: Cool and Serve - Remove from oven, brush with leftover butter, and cool slightly before serving.
Notes
- For a gluten-free option, use 1:1 gluten-free baking flour.
- Substitute almond milk for a dairy-free version.
- Add shredded cheese for extra flavor.