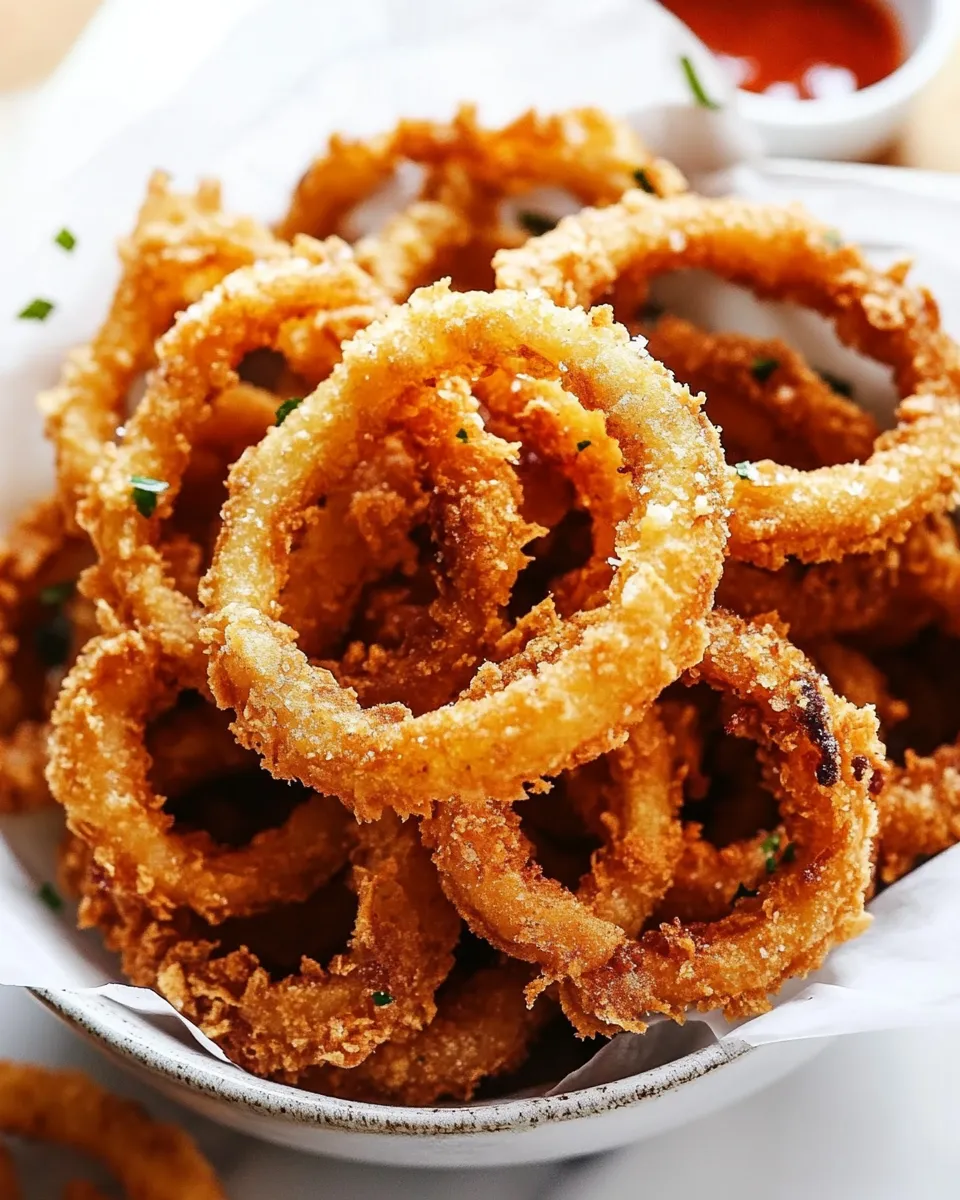
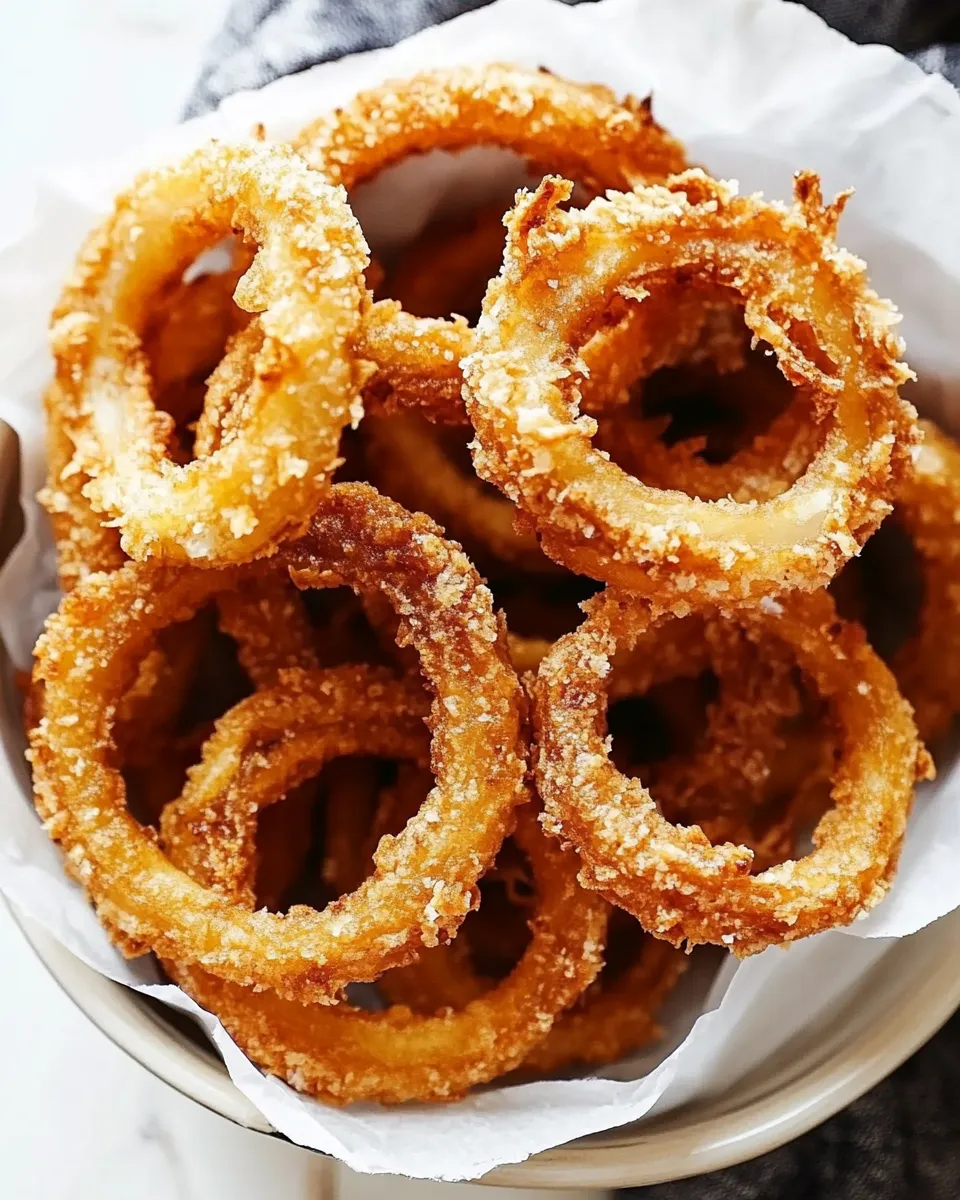
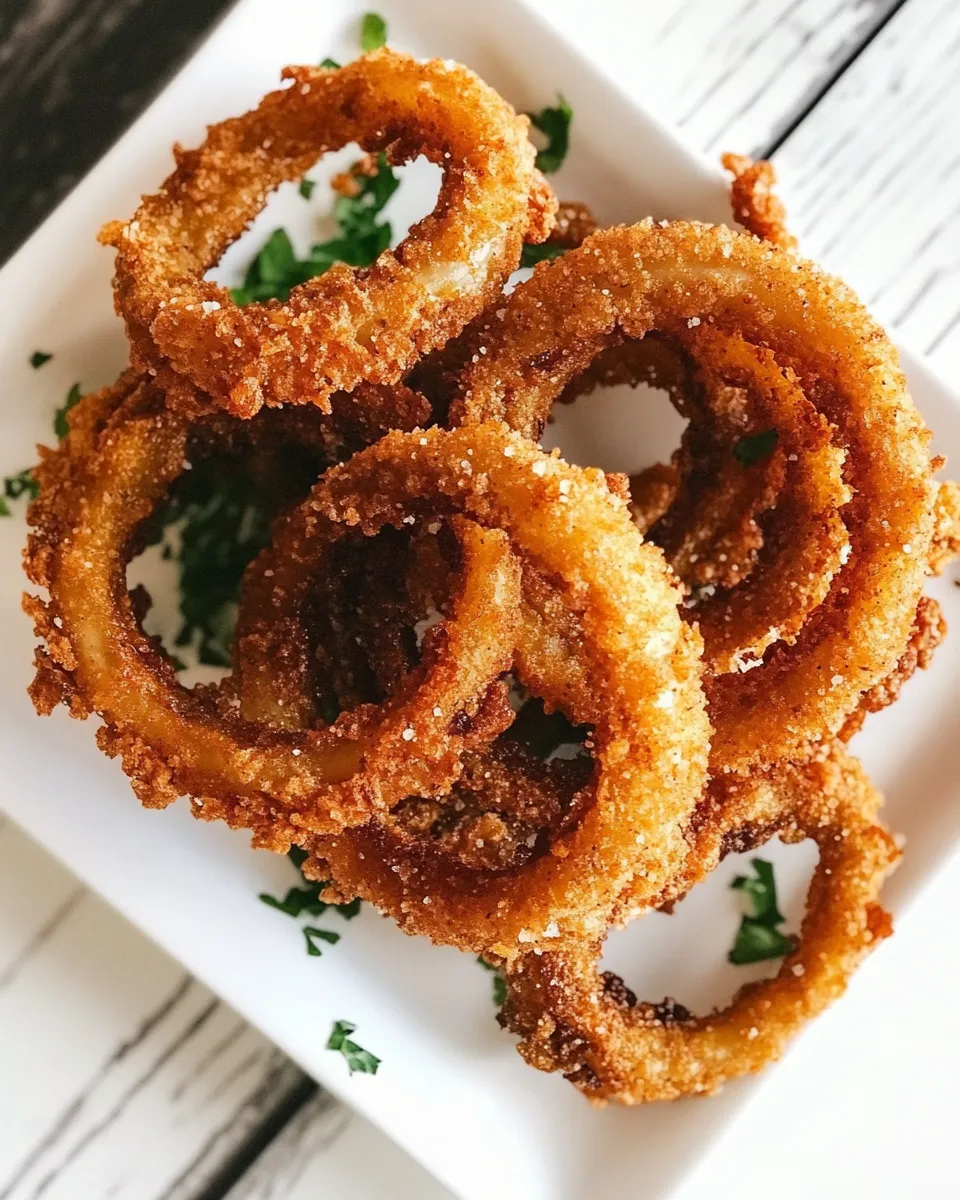
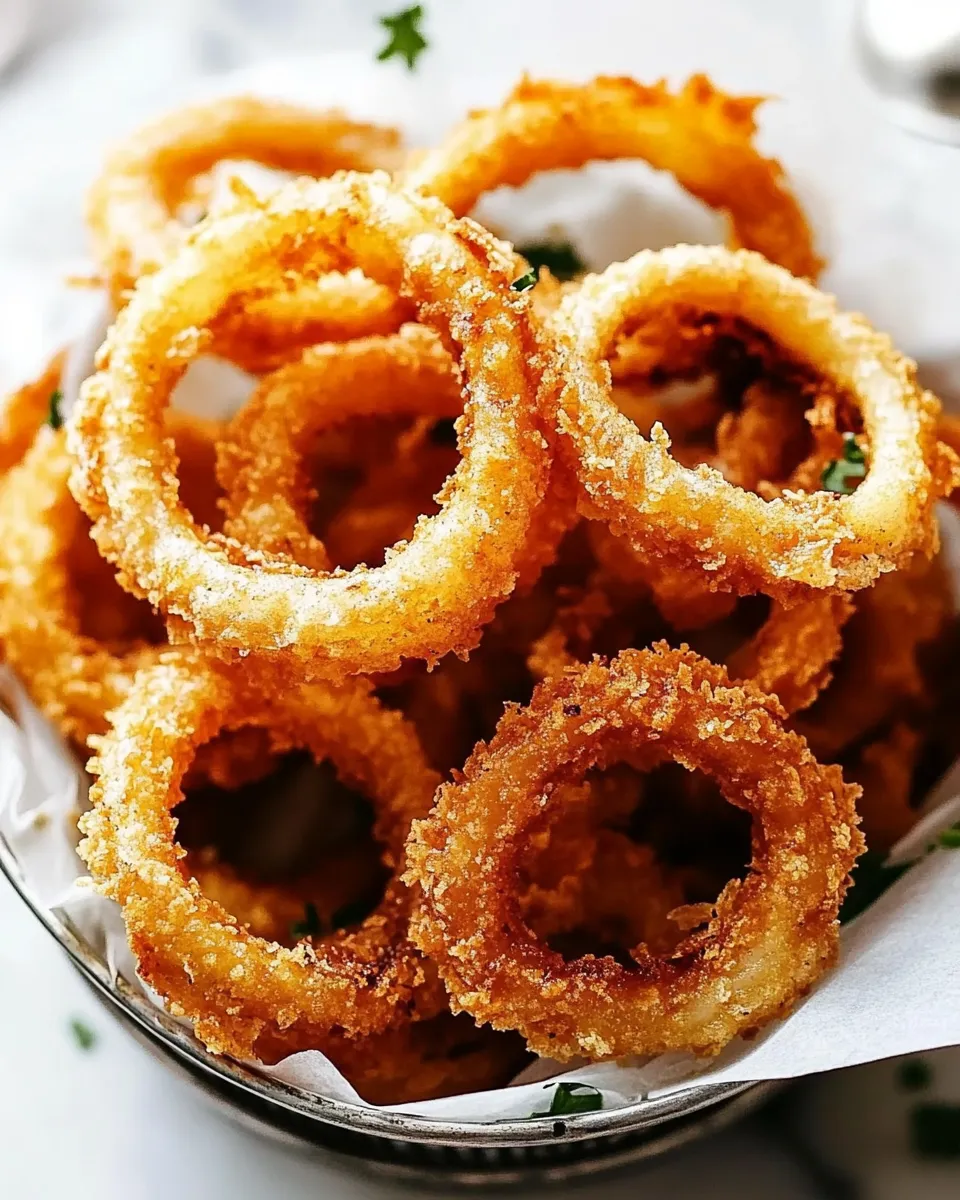
Crispy Onion Rings (Baked or Fried!)
Onion rings are a classic side dish that can elevate any meal, whether you’re enjoying them as a snack, a side, or even as a topping for your favorite burger. The perfect onion ring is crispy, flavorful, and just the right amount of indulgent. Today, I’m thrilled to share my recipe for Crispy Onion Rings (Baked or Fried!) that will leave you craving more. This recipe is versatile, allowing you to choose between baking for a healthier option or frying for that golden, crunchy perfection. Let’s dive into the details!
Why It Deserves a Spot
Crispy Onion Rings (Baked or Fried!) deserve a spot at your dinner table for several reasons. First, they are incredibly easy to make, using simple ingredients that you likely already have on hand. Second, the crunchiness and flavor can be tailored to suit your taste. Lastly, they make for an impressive appetizer at gatherings or a fantastic side dish for family dinners. Whether you’re dipping them in ranch dressing, ketchup, or enjoying them plain, these onion rings are sure to please!
Ingredient Checklist
- Oil for frying – Choose your favorite frying oil, such as vegetable or canola oil.
- 2 large onions – Sweet onions like Vidalia or yellow onions work best for flavor.
- 1 cup all-purpose flour – This will help create a base for the batter.
- 1 teaspoon baking powder – This helps the batter become light and airy.
- 3 large eggs – Used to bind the ingredients together.
- 2 cups panko breadcrumbs – For that extra crunch and texture.
- 1/2 cup grated parmesan cheese – Adds a cheesy, savory flavor.
- 1 teaspoon paprika – For a hint of smokiness.
- 1/2 teaspoon garlic powder – To enhance the overall flavor.
Recommended Tools
- Large mixing bowls – For combining your ingredients.
- Cutting board and knife – To slice the onions into rings.
- Frying pan or deep fryer – If you choose to fry your onion rings.
- Baking sheet – For baking the onion rings if you choose that method.
- Cooling rack – To let your fried onion rings drain excess oil.
Crispy Onion Rings (Baked or Fried!) Made Stepwise
Step 1: Prepare the Onions
Start by peeling the onions and slicing them into thick rings, about 1/4 to 1/2 inch thick. Carefully separate the rings and set them aside.
Step 2: Make the Batter
In a large mixing bowl, combine the all-purpose flour, baking powder, paprika, garlic powder, and a pinch of salt. Whisk the dry ingredients together until well mixed.
Step 3: Prepare the Egg Wash
In another bowl, crack the three large eggs and whisk them until well beaten. This will help the breadcrumbs adhere to the onion rings.
Step 4: Combine the Coating
In a separate bowl, mix the panko breadcrumbs with the grated parmesan cheese. This will give your onion rings that crispy, cheesy coating.
Step 5: Dredge the Onion Rings
Take each onion ring and first dip it into the flour mixture, ensuring it’s well coated. Shake off any excess flour before dipping it into the egg wash. Finally, coat the onion ring with the panko and parmesan mixture, pressing gently to help the crumbs stick. Repeat this process for all the onion rings.
Step 6: Choose Your Cooking Method
For frying, heat your oil in a frying pan over medium heat. Once the oil is hot, carefully place the onion rings in the oil, cooking them in batches to avoid overcrowding. Fry until golden brown, about 2-3 minutes per side. Remove and place on a cooling rack to drain excess oil.
For baking, preheat your oven to 425°F (220°C). Line a baking sheet with parchment paper and arrange the coated onion rings in a single layer. Bake for about 20-25 minutes, flipping halfway through, until they are crispy and golden brown.
Tailor It to Your Diet
- Gluten-free: Substitute all-purpose flour with a gluten-free flour blend and use gluten-free breadcrumbs.
- Vegan: Replace eggs with a flaxseed meal mixture (1 tablespoon flaxseed meal + 3 tablespoons water) for binding.
- Low-carb: Use crushed pork rinds instead of panko breadcrumbs for a keto-friendly option.
- Spicy: Add cayenne pepper or chili powder to the flour mixture for a spicy kick.
What I Learned Testing
- Thickness matters: For the perfect onion ring, slice your onions thick enough so they hold up during frying or baking.
- Let them rest: Allow the coated onion rings to sit for a few minutes before cooking to help the coating adhere better.
- Temperature is key: If frying, ensure the oil is hot enough (around 350°F) to achieve that crispy texture quickly without absorbing too much oil.
- Variations are endless: Experimenting with different spices and coatings can yield deliciously unique onion rings every time.
Storage & Reheat Guide
If you have any leftover onion rings (which is rare!), store them in an airtight container in the refrigerator for up to 3 days. To reheat, place them in a preheated oven at 375°F (190°C) for about 10-15 minutes until heated through and crispy again. Avoid microwaving, as it may make them soggy.
Your Questions, Answered
Can I use sweet onions instead of regular onions?
Yes! Sweet onions like Vidalia or Walla Walla are perfect for onion rings as they add a deliciously sweet flavor that pairs beautifully with the crispy coating.
How do I make sure my onion rings are crispy?
To achieve maximum crispiness, ensure your oil is hot enough before frying. Additionally, coating the rings thoroughly and allowing them to rest before cooking helps create that desired crunch.
Can I freeze onion rings before cooking?
Absolutely! You can freeze the coated onion rings on a baking sheet, then transfer them to a freezer bag once frozen. Fry or bake them straight from the freezer, adding a couple of extra minutes to the cooking time.
What dips pair well with onion rings?
Onion rings are delicious with a variety of dips, including ranch dressing, spicy ketchup, barbecue sauce, or even a tangy garlic aioli. Choose your favorite or try them all!
Make It Tonight
Now that you know how to create these irresistible Crispy Onion Rings (Baked or Fried!), it’s time to roll up your sleeves and get cooking. Whether you choose to bake them for a healthier option or fry them for that authentic crunch, you’re in for a treat. Serve them alongside your favorite burger or as a stand-alone snack, and watch them disappear in no time!
Crispy Onion Rings (Baked or Fried!) are not just a recipe; they’re an experience. From the moment you slice the onions to the final crispy bite, these onion rings bring joy and satisfaction to the table. So gather your ingredients, invite some friends, and enjoy the delightful crunch of homemade onion rings tonight!
Crispy Onion Rings (Baked or Fried!)
Ingredients
Equipment
Method
- Start by peeling the onions and slicing them into thick rings, about 1/4 to 1/2 inch thick. Carefully separate the rings and set them aside.
- In a large mixing bowl, combine the all-purpose flour, baking powder, paprika, garlic powder, and a pinch of salt. Whisk the dry ingredients together until well mixed.
- In another bowl, crack the three large eggs and whisk them until well beaten. This will help the breadcrumbs adhere to the onion rings.
- In a separate bowl, mix the panko breadcrumbs with the grated parmesan cheese. This will give your onion rings that crispy, cheesy coating.
- Take each onion ring and first dip it into the flour mixture, ensuring it's well coated. Shake off any excess flour before dipping it into the egg wash. Finally, coat the onion ring with the panko and parmesan mixture, pressing gently to help the crumbs stick. Repeat this process for all the onion rings.
- For frying, heat your oil in a frying pan over medium heat. Once the oil is hot, carefully place the onion rings in the oil, cooking them in batches to avoid overcrowding. Fry until golden brown, about 2-3 minutes per side. Remove and place on a cooling rack to drain excess oil.
- For baking, preheat your oven to 425°F (220°C). Line a baking sheet with parchment paper and arrange the coated onion rings in a single layer. Bake for about 20-25 minutes, flipping halfway through, until they are crispy and golden brown.
Notes
- Slice onions thick enough to hold up during cooking.
- Let coated onion rings rest for a few minutes before cooking.
- Ensure oil is hot enough for frying to achieve maximum crispiness.
- Experiment with different spices for unique flavors.