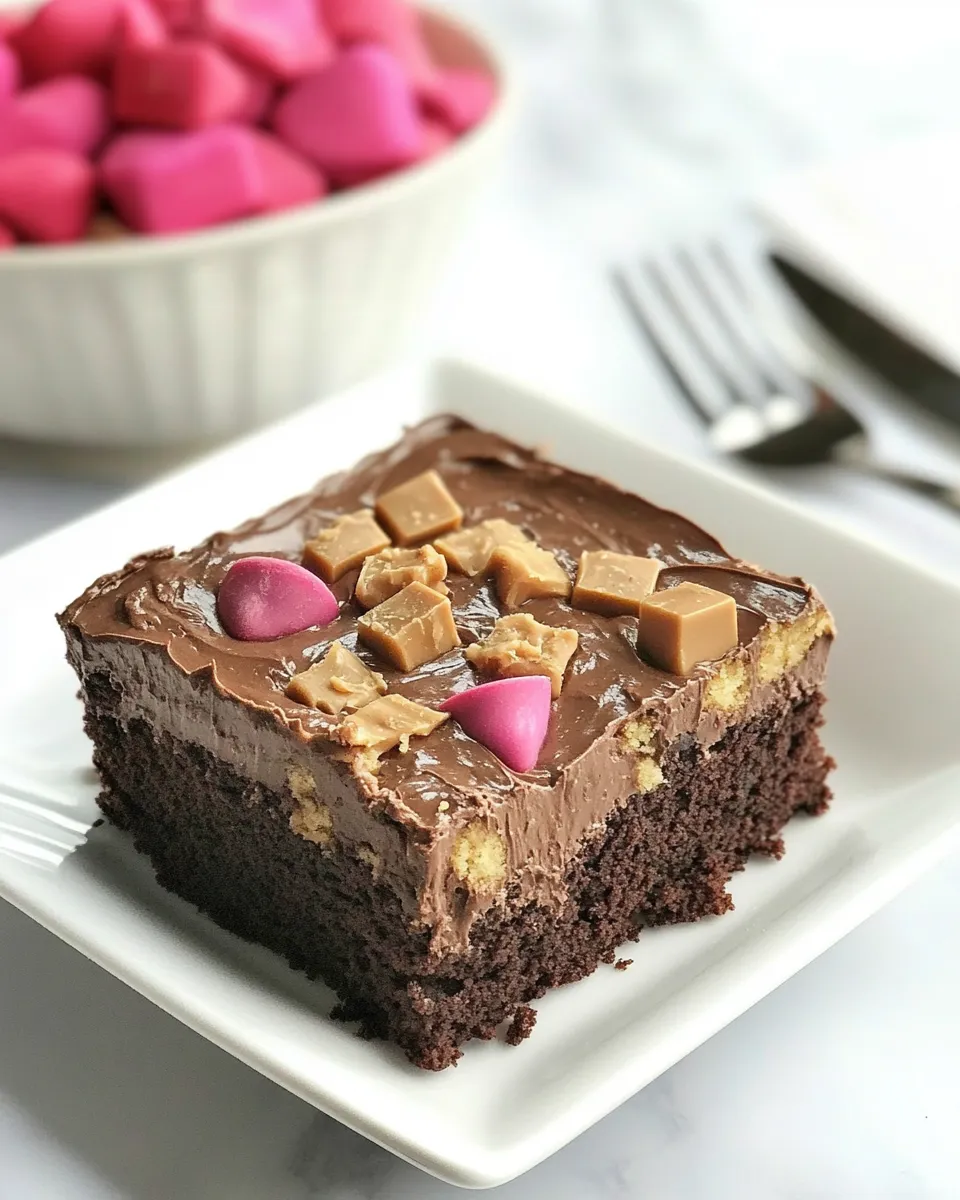
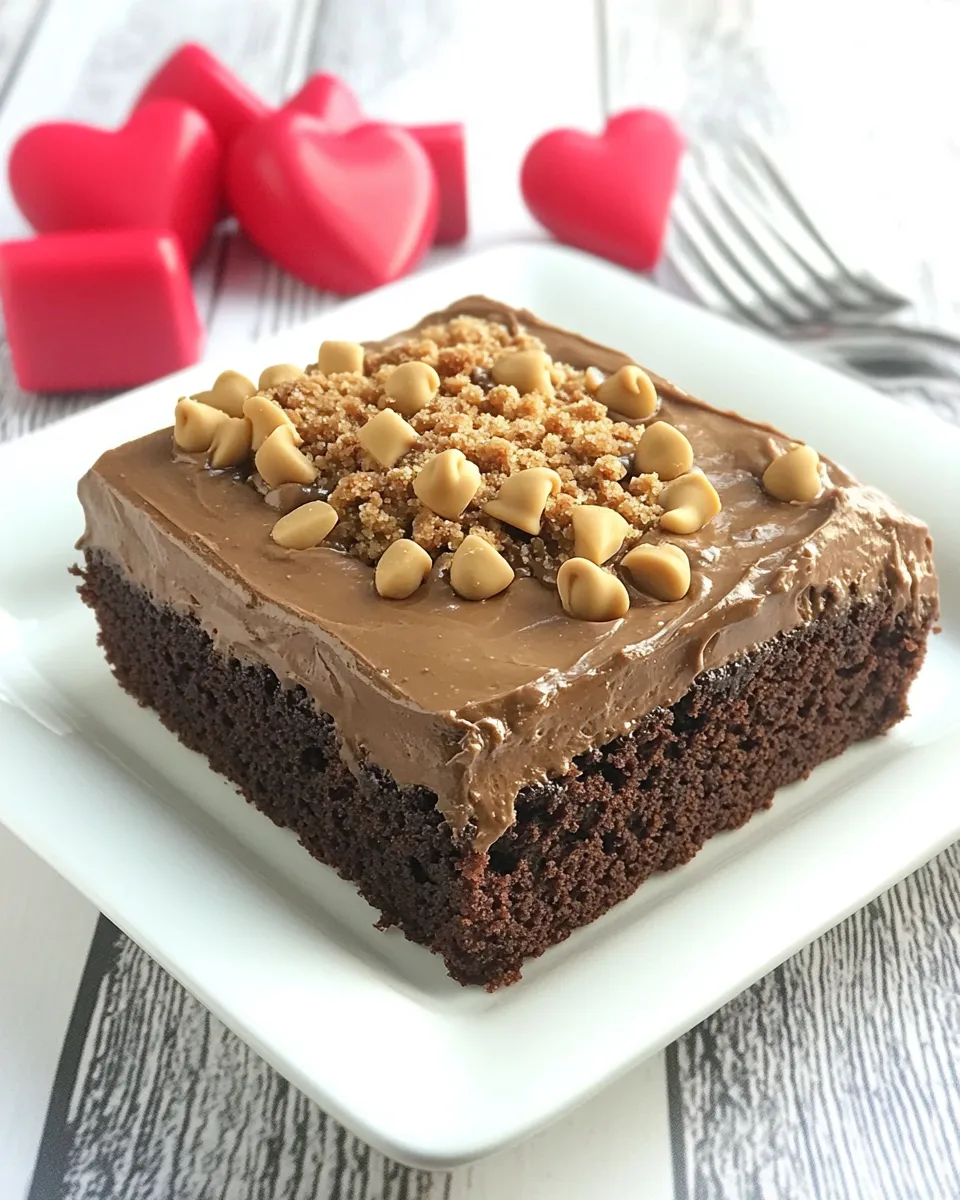
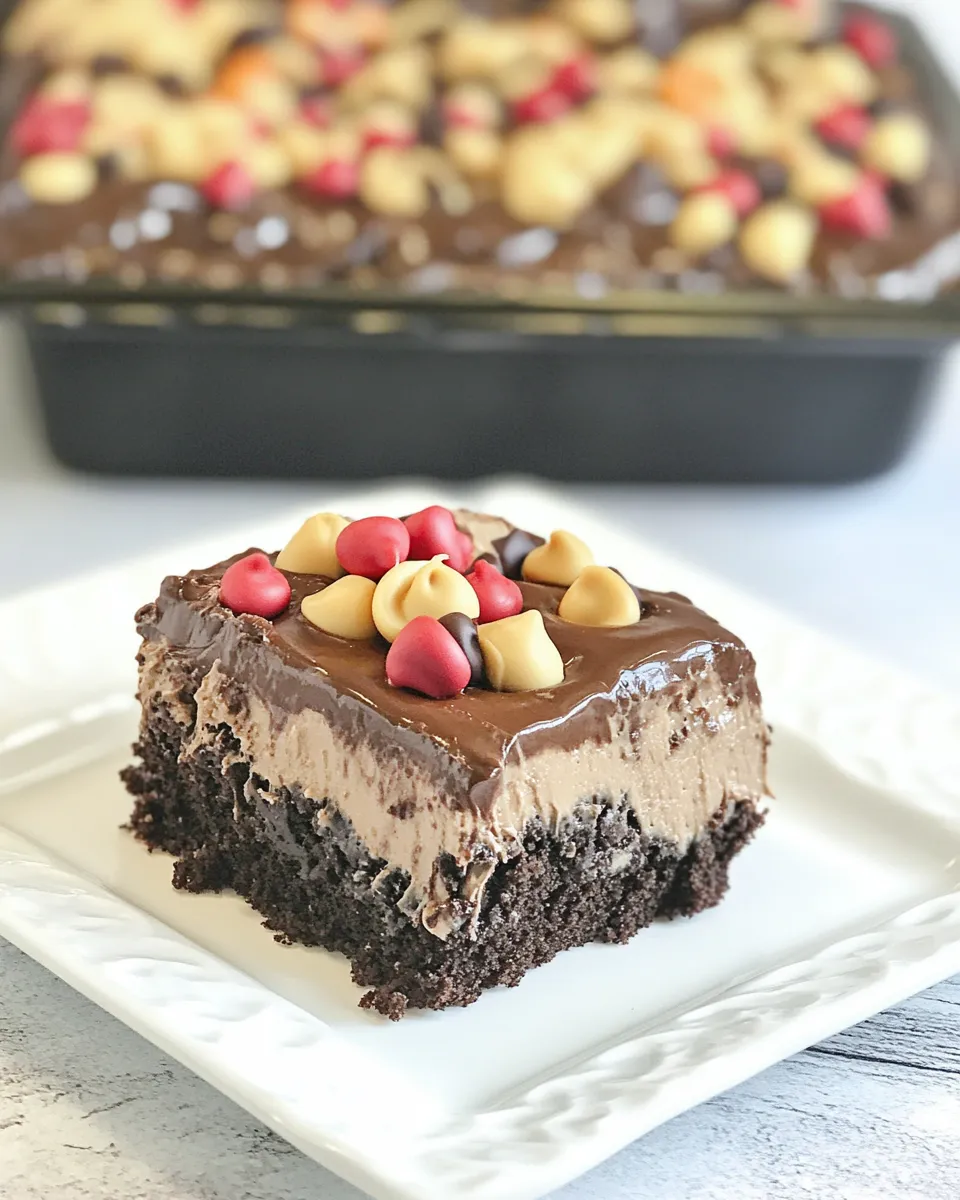
Chocolate Peanut Butter Poke Cake
Indulging in a slice of Chocolate Peanut Butter Poke Cake is like diving into a world of flavors that dance together in perfect harmony. This delightful dessert combines the rich taste of chocolate with the creamy goodness of peanut butter, making it an irresistible treat for any occasion. Whether you’re celebrating a birthday, hosting a gathering, or simply satisfying your sweet tooth, this cake is sure to impress. Let’s embark on this delicious journey together and create a dessert that will leave everyone begging for seconds!
The Upside of Chocolate Peanut Butter Poke Cake
What makes Chocolate Peanut Butter Poke Cake so special? Here are just a few reasons why this dessert stands out:
– **Decadent Layers**: The combination of chocolate and peanut butter creates a rich flavor profile that is hard to resist.
– **Easy Preparation**: Using a box cake mix simplifies the baking process, making it accessible for bakers of all skill levels.
– **Poke Cake Delight**: The ‘poke’ method allows the cake to absorb creamy goodness, enhancing the moisture and flavor in every bite.
– **Perfect for Sharing**: This cake serves a crowd, making it ideal for parties and family gatherings.
– **No Baking Skills Required**: With straightforward steps, anyone can whip up this delicious treat.
Gather These Ingredients
To create your Chocolate Peanut Butter Poke Cake, gather the following ingredients:
- 1 box yellow cake mix
- 1 cup water (as directed on the cake mix box)
- 1/3 cup vegetable oil (as directed on the cake mix box)
- 3 large eggs (as directed on the cake mix box)
- 2/3 cup peanut butter
- 1-1/2 cups chocolate syrup (Hershey’s)
- 1 can sweetened condensed milk
- 8 regular Reese’s peanut butter cups, divided
- 1 (8-oz) container Cool Whip, thawed
- 1 (16-oz) can chocolate frosting
Gear Checklist
Before you start baking, make sure you have the following gear:
- 9×13 inch baking pan – for baking and serving the cake.
- Mixing bowls – for combining your cake ingredients and toppings.
- Electric mixer – to ensure a smooth and fluffy cake batter.
- Measuring cups and spoons – for accurate ingredient measurements.
- Wooden spoon or spatula – for mixing and spreading frosting.
- Toothpick or skewer – to poke holes in the cake.
Chocolate Peanut Butter Poke Cake in Steps
Now that you have everything ready, let’s dive into the step-by-step process for creating your Chocolate Peanut Butter Poke Cake.
Step 1: Bake the Cake
Preheat your oven to 350°F (175°C). In a large mixing bowl, combine the yellow cake mix, water, vegetable oil, and eggs. Use an electric mixer to beat the ingredients together until well combined and smooth. Pour the batter into the prepared 9×13 inch baking pan and spread it evenly.
Step 2: Bake and Cool
Bake the cake according to the package instructions, usually about 25-30 minutes or until a toothpick inserted in the center comes out clean. Once baked, remove the cake from the oven and let it cool in the pan for about 10 minutes.
Step 3: Poke the Cake
Using a toothpick or skewer, poke holes all over the top of the warm cake. Make sure to poke deep enough to allow the toppings to seep in, but not so deep that the cake falls apart.
Step 4: Prepare the Filling
In a medium bowl, whisk together the sweetened condensed milk and chocolate syrup until smooth. Pour this mixture evenly over the poked cake, ensuring it fills the holes. Allow the cake to cool completely.
Step 5: Add Peanut Butter and Candy
In a small bowl, mix the peanut butter until creamy. Spread the peanut butter over the top of the cooled cake. Chop 4 of the Reese’s peanut butter cups and sprinkle them over the peanut butter layer.
Step 6: Top with Cool Whip
Spread the thawed Cool Whip over the peanut butter layer. Use a spatula to smooth it out evenly over the top of the cake.
Step 7: Finish with Chocolate Frosting
Finally, spread the chocolate frosting evenly over the Cool Whip layer. For a decorative touch, you can use a spatula to create swirls or peaks.
Step 8: Add Final Touches
Chop the remaining 4 Reese’s peanut butter cups and sprinkle them on top of the frosting for an extra layer of peanut butter goodness.
Step 9: Chill and Serve
Cover the cake with plastic wrap and refrigerate for at least 4 hours, preferably overnight. This allows the flavors to meld beautifully. When ready to serve, slice into squares and enjoy this decadent dessert!
Customize for Your Needs
Feel free to make this Chocolate Peanut Butter Poke Cake your own! Here are some customization ideas:
- Use a different cake mix, such as chocolate or vanilla, for a unique flavor twist.
- Incorporate crushed graham crackers or Oreos into the layers for added texture.
- Swap out the Reese’s cups for other candies like M&M’s or Snickers for a different flavor profile.
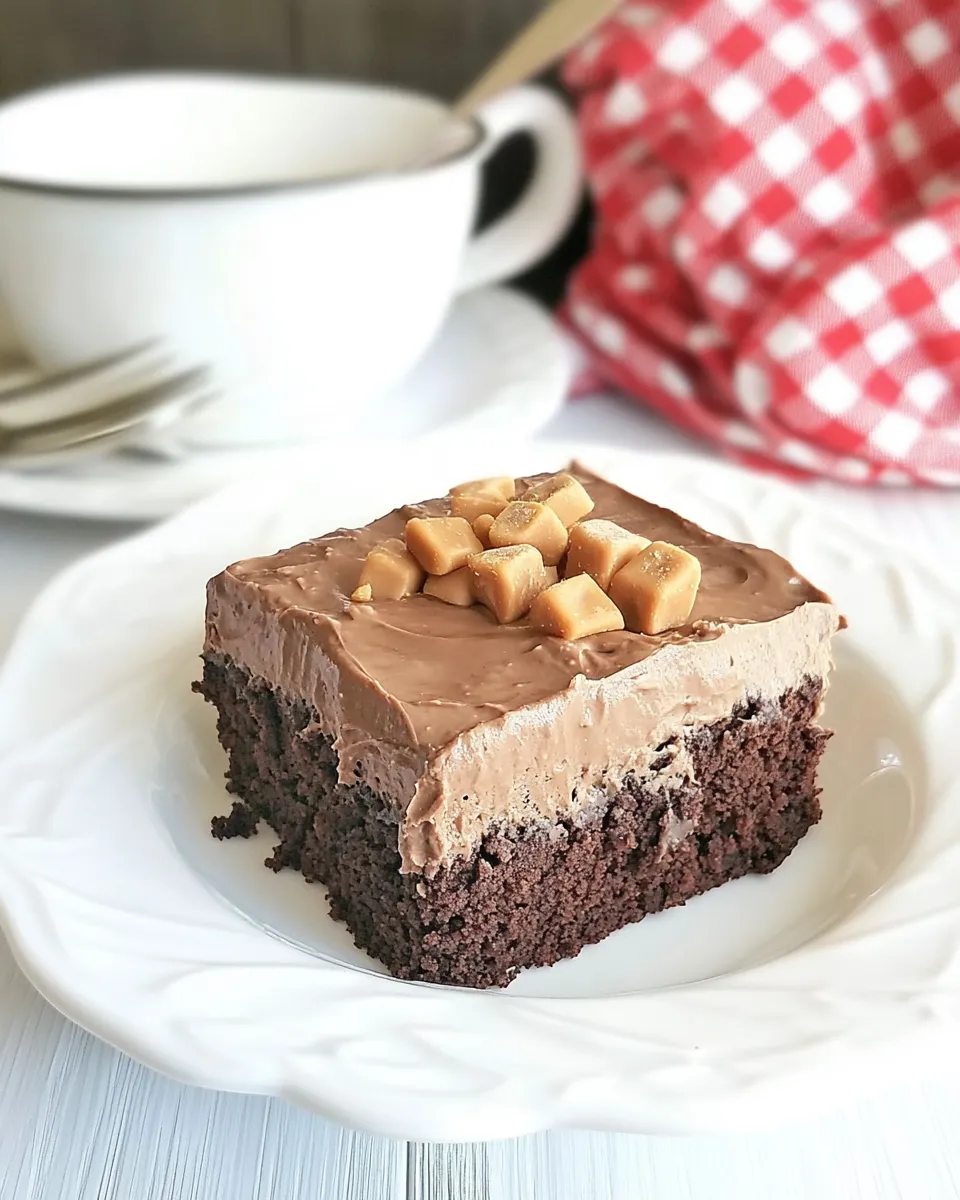
- Add a drizzle of caramel sauce on top for an extra indulgent treat.
Cook’s Commentary
This Chocolate Peanut Butter Poke Cake is not only delicious but also incredibly versatile. You can experiment with different toppings or fillings to suit your taste. The moistness of the cake combined with the chocolate and peanut butter flavors creates a delightful experience that everyone will love. Just remember, the longer you let it chill in the fridge, the better it gets, as the flavors have more time to blend together.
Refrigerate, Freeze, Reheat
To keep your Chocolate Peanut Butter Poke Cake fresh:
- Refrigerate: Store covered in the fridge for up to 5 days. The flavors will continue to develop!
- Freeze: You can freeze the cake for up to 3 months. Be sure to wrap it tightly in plastic wrap and then in aluminum foil.
- Reheat: It’s best served chilled, but if you prefer it a bit warm, you can microwave individual slices for about 15-20 seconds.
Reader Questions
Can I use natural peanut butter instead of regular peanut butter?
Yes, you can use natural peanut butter, but keep in mind that it may have a different texture and flavor. Stir it well before using to ensure it’s smooth.
What can I substitute for the Cool Whip?
If you prefer a homemade option, you can whip heavy cream with a bit of sugar and vanilla extract to create your own whipped topping.
How can I make this cake gluten-free?
Simply substitute the yellow cake mix with a gluten-free cake mix. Ensure that all other ingredients are also gluten-free.
Can I make this cake ahead of time?
Absolutely! This cake is perfect for making ahead of time. Just cover it and refrigerate until you’re ready to serve.
Save & Share
If you’ve enjoyed making this Chocolate Peanut Butter Poke Cake, don’t forget to share it with friends and family! Spread the love by posting your cake photos on social media and tagging your favorite food bloggers. This cake is a crowd-pleaser, and your loved ones will definitely appreciate the deliciousness!
The Chocolate Peanut Butter Poke Cake is a luscious dessert that combines rich flavors and creamy textures in every bite. With its easy preparation and customizable nature, it’s a perfect addition to your repertoire of favorite desserts. So gather your ingredients, follow the steps, and treat yourself to this delightful cake that’s sure to bring smiles all around! Enjoy every delicious bite!
Chocolate Peanut Butter Poke Cake
Ingredients
Equipment
Method
- Preheat your oven to 350°F (175°C). In a large mixing bowl, combine the yellow cake mix, water, vegetable oil, and eggs. Use an electric mixer to beat the ingredients together until well combined and smooth. Pour the batter into the prepared 9x13 inch baking pan and spread it evenly.
- Bake the cake according to the package instructions, usually about 25-30 minutes or until a toothpick inserted in the center comes out clean. Once baked, remove the cake from the oven and let it cool in the pan for about 10 minutes.
- Using a toothpick or skewer, poke holes all over the top of the warm cake. Make sure to poke deep enough to allow the toppings to seep in, but not so deep that the cake falls apart.
- In a medium bowl, whisk together the sweetened condensed milk and chocolate syrup until smooth. Pour this mixture evenly over the poked cake, ensuring it fills the holes. Allow the cake to cool completely.
- In a small bowl, mix the peanut butter until creamy. Spread the peanut butter over the top of the cooled cake. Chop 4 of the Reese's peanut butter cups and sprinkle them over the peanut butter layer.
- Spread the thawed Cool Whip over the peanut butter layer. Use a spatula to smooth it out evenly over the top of the cake.
- Finally, spread the chocolate frosting evenly over the Cool Whip layer. For a decorative touch, you can use a spatula to create swirls or peaks.
- Chop the remaining 4 Reese's peanut butter cups and sprinkle them on top of the frosting for an extra layer of peanut butter goodness.
- Cover the cake with plastic wrap and refrigerate for at least 4 hours, preferably overnight. This allows the flavors to meld beautifully. When ready to serve, slice into squares and enjoy this decadent dessert!
Notes
- Store leftovers covered in the fridge for up to 5 days for optimal flavor.
- Freeze the cake for up to 3 months, wrapped tightly to prevent freezer burn.
- Reheat individual slices in the microwave for 15-20 seconds for a warm treat.