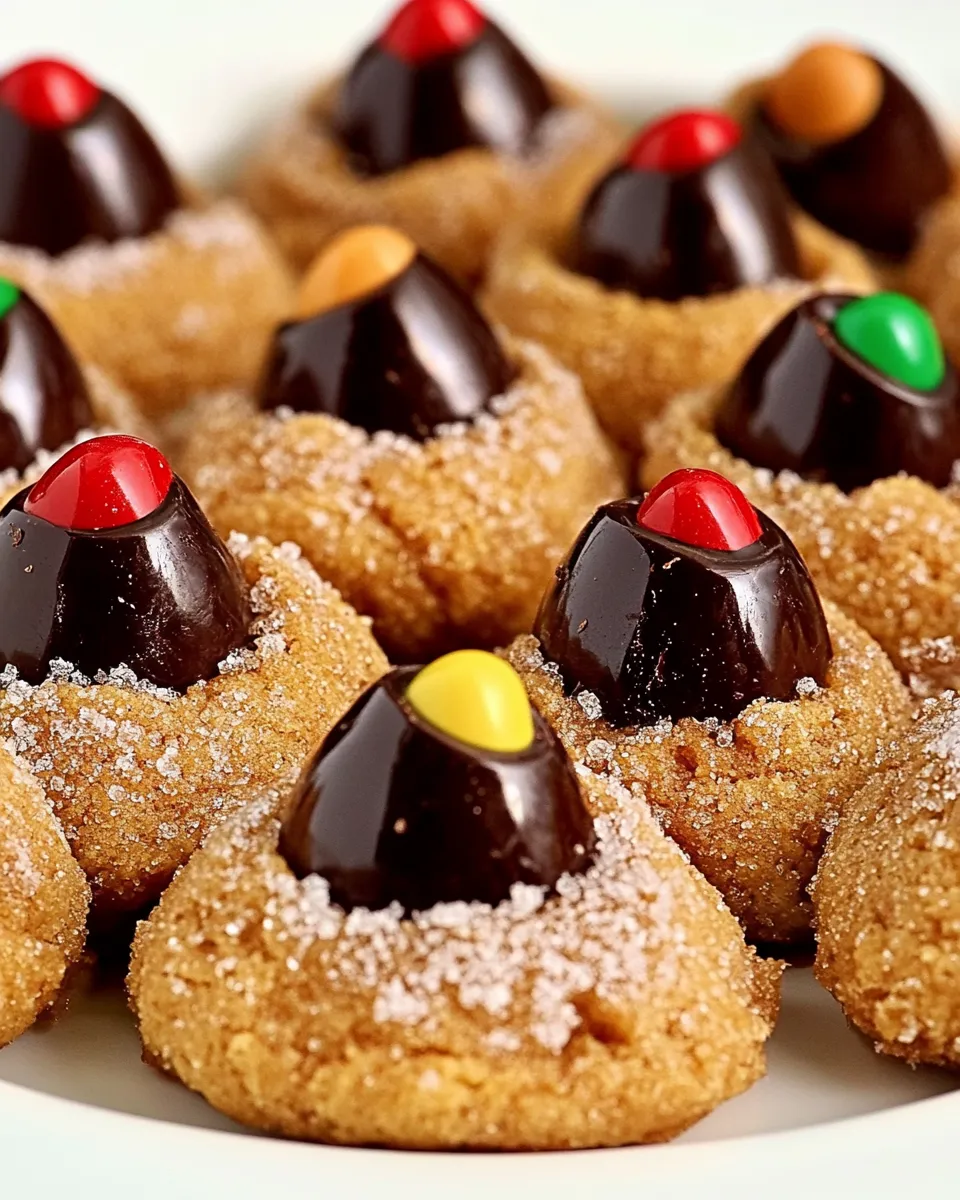
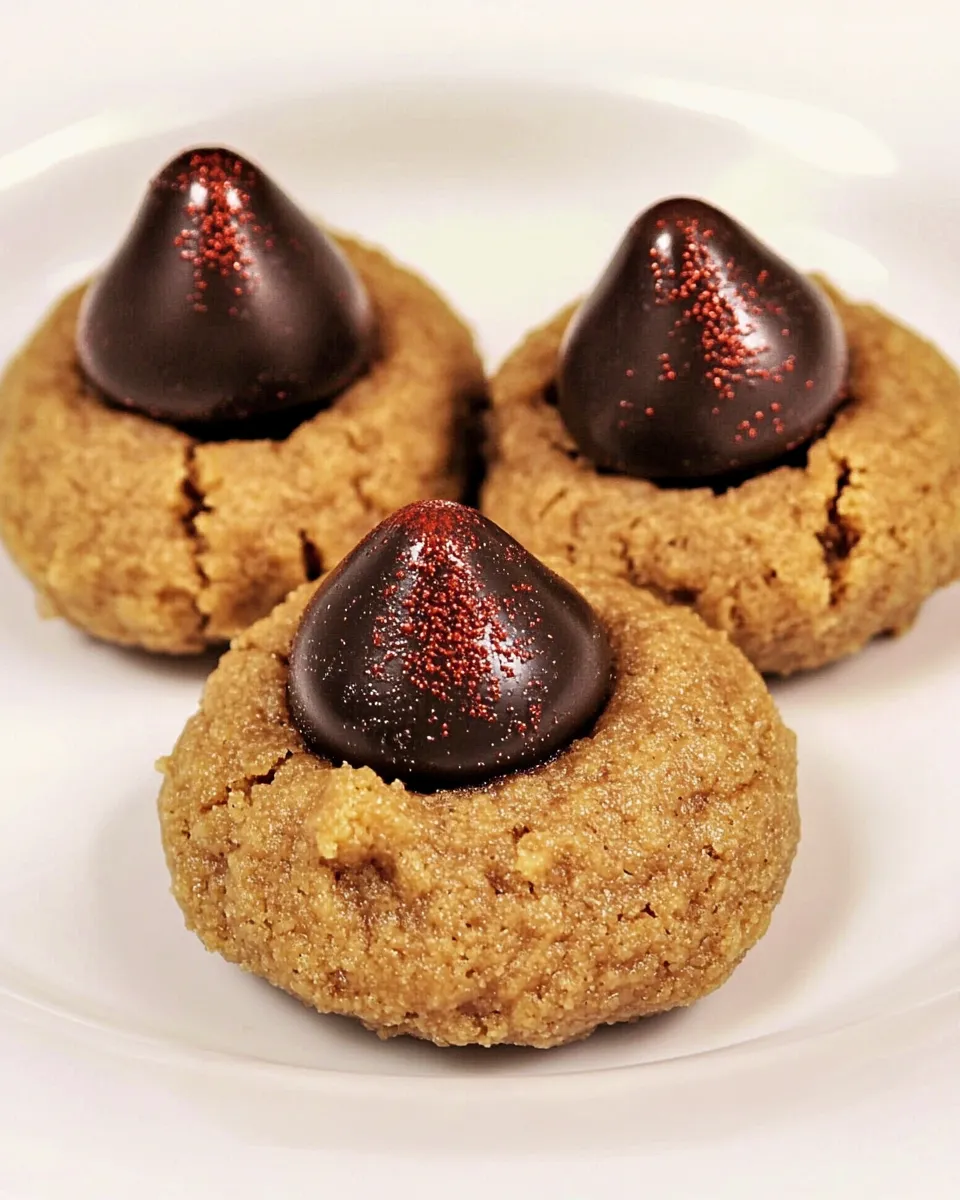
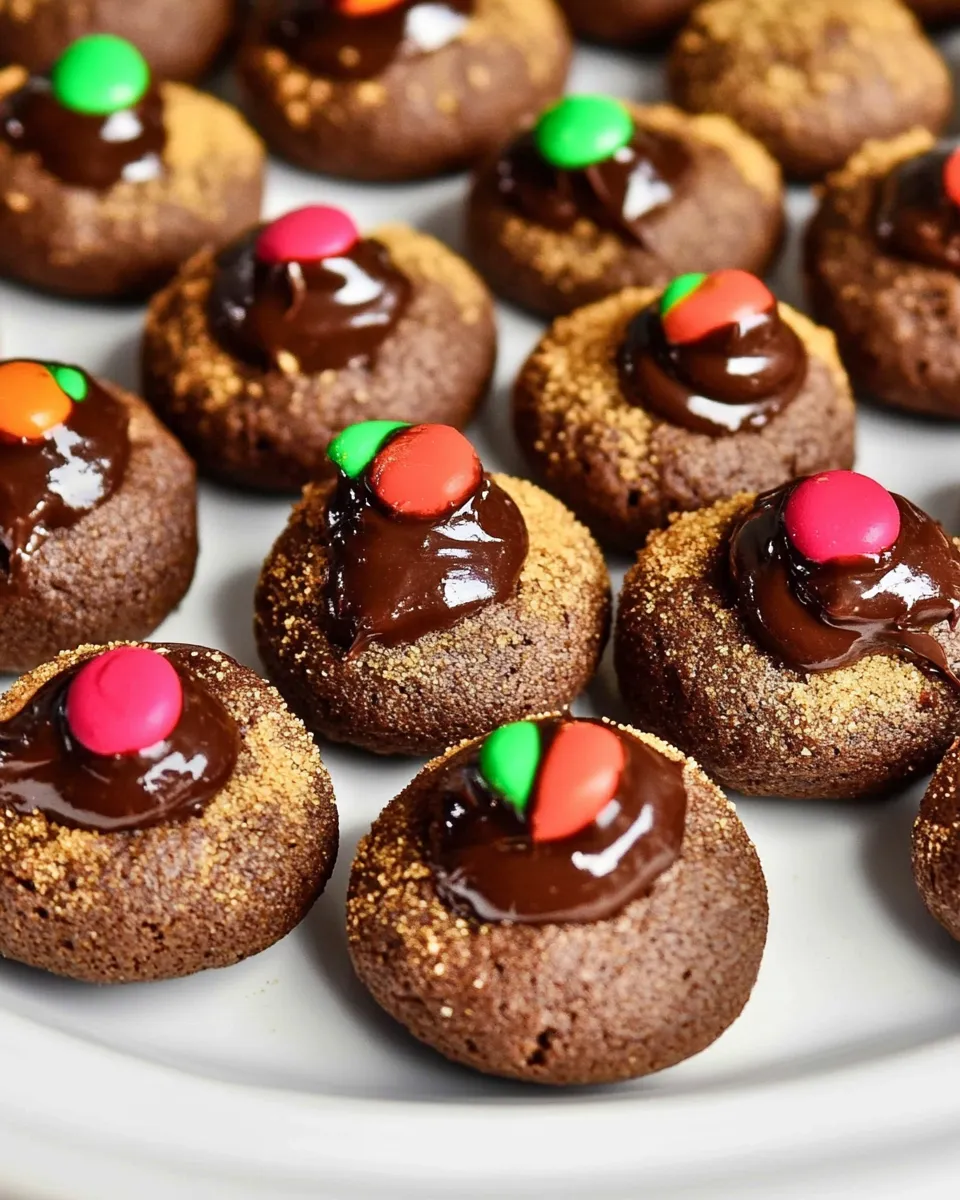
Chocolate Kiss Peanut Butter Blossoms
If you’re on the hunt for a cookie that harmoniously blends the rich, nutty flavor of peanut butter with the sweet indulgence of chocolate, then look no further than Chocolate Kiss Peanut Butter Blossoms. These delightful treats are not only easy to make but also bring a nostalgic warmth to any occasion. With their soft, chewy texture and signature chocolate kiss on top, they are bound to become a favorite in your household. Let’s dive into the world of these scrumptious cookies and discover why they deserve a spot in your recipe collection!
The Upside of Chocolate Kiss Peanut Butter Blossoms
Chocolate Kiss Peanut Butter Blossoms are more than just cookies; they are a sweet reminder of childhood memories and family gatherings. Their delightful combination of flavors makes them a hit among both kids and adults alike. These cookies are perfect for:
- Festive celebrations, including holidays and birthdays.
- Sharing with friends and neighbors as a sweet gesture.
- Indulging during cozy nights at home with a glass of milk.
- Bringing joy to potluck parties or bake sales.
Each bite offers a satisfying crunch from the sugar coating, followed by the smoothness of peanut butter, and the chocolate kiss that completes the experience.
The Essentials
To whip up a batch of Chocolate Kiss Peanut Butter Blossoms, you will need the following ingredients:
- 1 cup all-purpose flour
- 1 teaspoon salt
- 1 cup packed brown sugar
- 1 cup smooth peanut butter
- 2 tablespoons milk
- 1 teaspoon vanilla extract
- 1 teaspoon baking soda
- ½ cup granulated white sugar
- ½ cup shortening
- 1 large egg
- Sugar, for rolling
- 48 chocolate kisses, unwrapped
These ingredients come together to create a cookie that is not only delicious but also quick to prepare.
Appliances & Accessories
Before you start baking, gather these essential appliances and accessories:
- Mixing Bowl: A large bowl for mixing your ingredients.
- Electric Mixer: To effortlessly cream the shortening and sugars together.
- Measuring Cups and Spoons: For precise ingredient measurements.
- Baking Sheet: A cookie sheet lined with parchment paper for easy cleanup.
- Cookie Scoop: For uniform cookie sizes.
- Oven Mitts: To safely remove your cookies from the oven.
With these tools at your disposal, you’re ready to embark on your baking adventure!
Chocolate Kiss Peanut Butter Blossoms: Step-by-Step Guide
Now, let’s get down to the fun part—baking these irresistible cookies! Follow this step-by-step guide for perfect results.
Step 1: Preheat Your Oven
Preheat your oven to 350°F (175°C). This step is crucial for ensuring your cookies bake evenly.
Step 2: Mix the Dry Ingredients
In a medium bowl, whisk together the all-purpose flour, salt, and baking soda. Set aside.
Step 3: Cream the Shortening and Sugars
In a large mixing bowl, combine the shortening, brown sugar, and granulated sugar. Using an electric mixer, beat until light and fluffy.
Step 4: Add the Wet Ingredients
Add the smooth peanut butter, milk, vanilla extract, and egg to the creamed mixture. Beat until well combined.
Step 5: Combine Dry and Wet Ingredients
Gradually add the dry ingredient mixture to the wet ingredients, mixing until just combined. Be careful not to overmix.
Step 6: Form the Cookies
Using a cookie scoop or your hands, form the dough into 1-inch balls. Roll each ball in granulated sugar to coat.
Step 7: Bake
Place the cookie balls on a baking sheet lined with parchment paper, spacing them about 2 inches apart. Bake in the preheated oven for 8-10 minutes, or until the edges are lightly golden.
Step 8: Add the Chocolate Kisses
Remove the cookies from the oven and immediately press a chocolate kiss into the center of each cookie. Allow them to cool on the baking sheet for a few minutes before transferring to a wire rack to cool completely.
Holiday & Seasonal Touches
Chocolate Kiss Peanut Butter Blossoms can easily be adapted for various holidays and seasons. Here are some fun ideas:
- Christmas: Use festive colored sugar for rolling the cookies or top with candy canes instead of chocolate kisses.
- Valentine’s Day: Swap regular chocolate kisses for heart-shaped candies.
- Halloween: Use orange and black sugar for a spooky touch, or top with candy corn.
- Easter: Replace chocolate kisses with pastel-colored chocolate eggs for a seasonal flair.
These simple adjustments can make your cookies even more festive and fun!
Things That Go Wrong
Even the best bakers face challenges now and then. Here are some common issues you might encounter while baking Chocolate Kiss Peanut Butter Blossoms:
- Cookies Spreading Too Much: Ensure you’re using the correct amount of flour. Too little flour can cause excessive spreading.
- Hard Cookies: Overbaking is a common culprit. Keep a close eye on your cookies and take them out when they’re just set.
- Chocolate Kisses Melting: If you press the kisses in too hard or too soon, they may melt. Allow cookies to cool slightly before adding.
- Dry Cookies: Make sure you’re measuring your ingredients accurately. Too much flour can lead to a dry texture.
Don’t let these issues deter you; they can be easily fixed with a little attention to detail!
Shelf Life & Storage
If you manage to have any leftovers (which is unlikely!), here’s how to store your Chocolate Kiss Peanut Butter Blossoms:
Store the cookies in an airtight container at room temperature for up to 5 days. For longer storage, you can freeze the cookies for up to 3 months. Just be sure to separate layers with parchment paper to prevent sticking.
Helpful Q&A
Can I use crunchy peanut butter instead of smooth?
Yes! Using crunchy peanut butter will add extra texture to your cookies, making them even more delightful.
What if I don’t have shortening? Can I substitute it?
Absolutely! You can substitute an equal amount of unsalted butter for shortening. This will give your cookies a slightly different flavor but will still be delicious.
Can I make these cookies gluten-free?
Yes! You can use a 1:1 gluten-free baking blend to substitute the all-purpose flour, and the results will be just as tasty.
How can I make these cookies less sweet?
If you prefer a less sweet cookie, consider reducing the amount of sugar in the recipe by ¼ cup. This will help balance the sweetness without compromising the texture.
Let’s Eat
Now that you’ve mastered the art of making Chocolate Kiss Peanut Butter Blossoms, it’s time to indulge in your delicious creation. Whether enjoyed fresh out of the oven or shared with loved ones, these cookies will undoubtedly bring smiles and satisfaction. Pair them with a glass of cold milk or a steaming cup of coffee, and savor every delightful bite. Happy baking!
Chocolate Kiss Peanut Butter Blossoms
Ingredients
Equipment
Method
- Step 1: Preheat your oven to 350°F (175°C).
- Step 2: In a medium bowl, whisk together the all-purpose flour, salt, and baking soda. Set aside.
- Step 3: In a large mixing bowl, combine the shortening, brown sugar, and granulated sugar. Using an electric mixer, beat until light and fluffy.
- Step 4: Add the smooth peanut butter, milk, vanilla extract, and egg to the creamed mixture. Beat until well combined.
- Step 5: Gradually add the dry ingredient mixture to the wet ingredients, mixing until just combined.
- Step 6: Using a cookie scoop or your hands, form the dough into 1-inch balls. Roll each ball in granulated sugar to coat.
- Step 7: Place the cookie balls on a baking sheet lined with parchment paper, spacing them about 2 inches apart. Bake for 8-10 minutes.
- Step 8: Remove the cookies from the oven and immediately press a chocolate kiss into the center of each cookie. Allow to cool slightly before transferring to a wire rack.
Notes
- Store cookies in an airtight container at room temperature for up to 5 days.
- Freeze cookies for up to 3 months, separating layers with parchment paper.
- For a crunchier texture, feel free to use crunchy peanut butter instead of smooth.