Black Forest Mini Cheesecakes
There’s something undeniably enchanting about the combination of chocolate, cherries, and cream. Enter the delightful world of Black Forest Mini Cheesecakes! These little desserts pack all the indulgent flavors of the classic Black Forest cake but are perfectly portioned for a sweet treat without the guilt. With a luscious chocolate cheesecake base, a rich cherry topping, and a dollop of whipped cream, these mini cheesecakes are sure to impress at any gathering.
Why Black Forest Mini Cheesecakes is Worth Your Time

Creating Black Forest Mini Cheesecakes is not just about making a dessert; it’s about crafting an experience. The layers of creamy chocolate cheesecake paired with the tart pop of cherries create a symphony of flavors that dance on your palate. Not only are they visually stunning, but they also provide a delightful combination of textures – from the crumbly Oreo crust to the silky smooth filling. Whether you’re hosting a party, celebrating a special occasion, or simply treating yourself, these mini cheesecakes are a guaranteed crowd-pleaser. Plus, they’re super easy to whip up, making them a stress-free addition to your dessert repertoire!
What Goes Into Black Forest Mini Cheesecakes
Creating these delectable Black Forest Mini Cheesecakes requires a few simple ingredients. Here’s what you’ll need:
- 12 Oreos – The perfect base for a rich, chocolaty crust.
- 1 1/2 Tbsp salted butter, melted – To bind the crust together.
- 4.5 oz (3/4 cup) semi-sweet chocolate chips – Melted and cooled slightly for a creamy filling.
- 2/3 cup granulated sugar – Sweetens the cheesecake beautifully.
- 2 Tbsp unsweetened cocoa powder – For an extra chocolatey flavor.
- 1 pinch salt – Balances the sweetness.
- 12 oz cream cheese, softened – The star of the cheesecake filling.
- 2 large eggs – Helps to set the cheesecake.
- 1 tsp vanilla extract – Adds a warm, aromatic flavor.
- 1/4 cup heavy cream – Contributes to the creaminess.
- 1/4 cup sour cream – Adds tang and richness.
- 15 oz cherry pie filling – For that iconic topping; you can use homemade or store-bought.
- 1 1/4 cups heavy cream – For the whipped cream topping.
- 2 1/2 Tbsp granulated sugar – To sweeten the whipped cream.
- Finely chopped or shaved chocolate (optional) – For a gorgeous garnish.
Must-Have Equipment
Before you dive into making these delightful treats, gather the necessary equipment:
- 12-cup muffin tin – To create the mini cheesecakes.
- Parchment paper liners – For easy removal of the cheesecakes.
- Mixing bowls – For combining ingredients.
- Electric mixer – To whip the cream cheese and other ingredients smoothly.
- Rubber spatula – For folding in the ingredients effortlessly.
- Double boiler or microwave-safe bowl – To melt the chocolate.
- Whisk – For blending the filling ingredients.
Mastering Black Forest Mini Cheesecakes: How-To
Now that you’re equipped with the right ingredients and tools, let’s dive into the step-by-step process for creating these Black Forest Mini Cheesecakes.
Step 1: Prepare the Crust
Start by preheating your oven to 325°F (160°C). Next, in a food processor, pulse the Oreos until they resemble fine crumbs. Combine the crushed Oreos with the melted salted butter in a mixing bowl, stirring until well combined.
Step 2: Assemble the Crust
Line your muffin tin with parchment paper liners. Evenly distribute the Oreo mixture into each muffin cup, pressing down with the back of a spoon to create a firm crust. Bake in the preheated oven for about 10 minutes, then remove and let cool while you prepare the filling.
Step 3: Make the Cheesecake Filling
In a large mixing bowl, beat the softened cream cheese with an electric mixer until smooth and creamy. Gradually add in the granulated sugar, cocoa powder, and a pinch of salt, mixing until everything is well combined.
Step 4: Incorporate Eggs and Chocolate
Add the eggs, one at a time, mixing well after each addition. Pour in the melted and slightly cooled semi-sweet chocolate, vanilla extract, heavy cream, and sour cream. Mix until the filling is smooth and creamy.
Step 5: Fill the Muffin Tin
Spoon the cheesecake filling over the cooled Oreo crusts in the muffin tin, filling each cup to about 3/4 full. Smooth the tops with a spatula for an even finish.
Step 6: Bake the Cheesecakes
Bake the mini cheesecakes in the oven for 18-20 minutes or until the edges are set and the centers have a slight jiggle. Turn off the oven and leave the cheesecakes inside for another 10 minutes. This helps prevent cracks.
Step 7: Cool and Chill
Remove the cheesecakes from the oven and allow them to cool to room temperature. Once cooled, transfer them to the refrigerator and chill for at least 4 hours, or overnight if you can wait!
Step 8: Prepare the Whipped Cream
In a mixing bowl, beat the heavy cream and sugar until soft peaks form. Be careful not to overbeat; you want a light and fluffy texture.
Step 9: Assemble and Serve
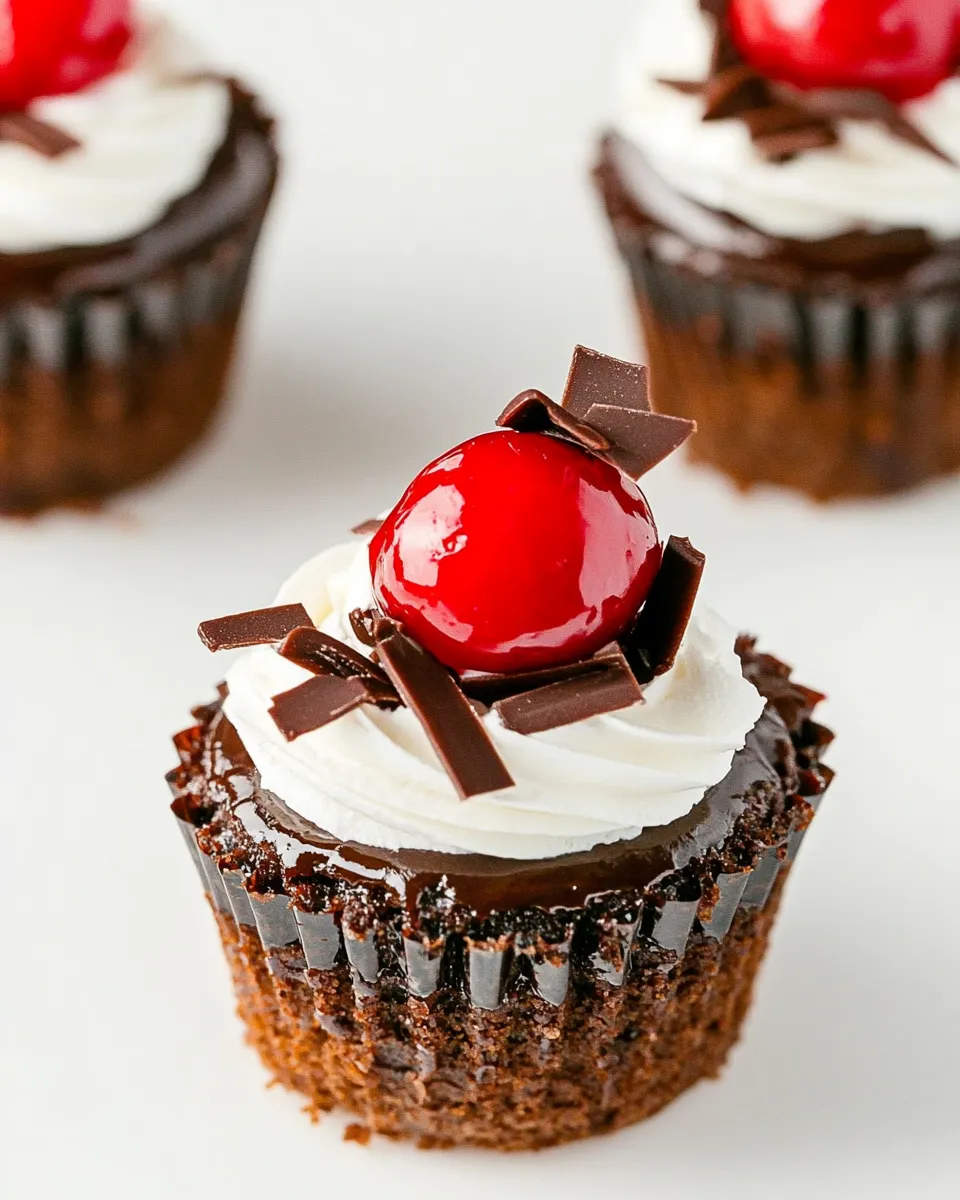
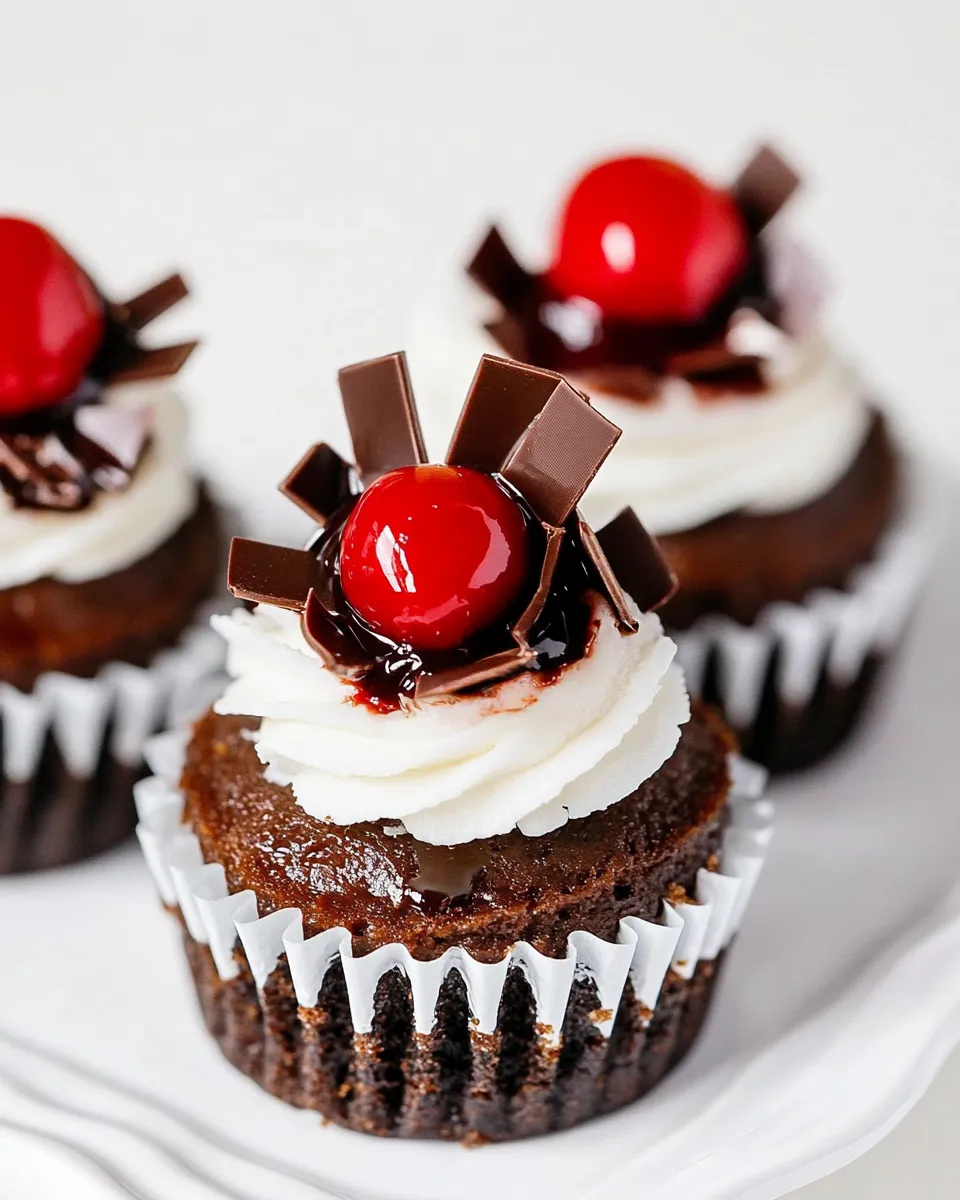
Once the cheesecakes are chilled, top each mini cheesecake with a generous spoonful of cherry pie filling, followed by a dollop of whipped cream. For an elegant touch, garnish with finely chopped or shaved chocolate.
In-Season Flavor Ideas
While Black Forest Mini Cheesecakes are delightful as they are, consider experimenting with some seasonal flavors:
- Fresh Strawberries – Swap out the cherry pie filling for fresh strawberry slices and a drizzle of chocolate.
- Raspberry Swirl – Incorporate raspberry puree into the cheesecake filling for a tangy twist.
- Pumpkin Spice – Add pumpkin puree and spices for a fall-inspired cheesecake.
- Lemon Zest – Brighten the flavor with a touch of lemon zest in the filling.
Watch Outs & How to Fix
Even the most experienced bakers can run into a few hiccups. Here are some common issues and how to fix them:
- Cracks in Cheesecakes: If your cheesecakes crack during baking, try lowering the oven temperature or leaving them in the oven to cool gradually.
- Overbaking: Keep an eye on baking time; overbaking can lead to a dry texture. Remove them when the centers are slightly jiggly.
- Sticking to Liners: If your cheesecakes stick, allow them to cool completely before removing them from the muffin tin.
- Too Sweet: If the filling is too sweet for your taste, reduce the sugar by a tablespoon next time.
Shelf Life & Storage
To ensure your Black Forest Mini Cheesecakes stay fresh and delicious, consider the following:
Store the mini cheesecakes in an airtight container in the refrigerator for up to 5 days. If you want to make them ahead of time, they can be frozen for up to 2 months. To freeze, wrap each cheesecake tightly in plastic wrap and place them in a freezer-safe container. When ready to enjoy, thaw them in the refrigerator overnight.
Black Forest Mini Cheesecakes Q&A
Can I make these mini cheesecakes ahead of time?
Absolutely! These mini cheesecakes can be made up to 2 days in advance. Just make sure to store them in the refrigerator and add the cherry topping and whipped cream just before serving for the best presentation.
What can I use instead of cream cheese?
If you’re looking for a cream cheese substitute, you can try using mascarpone cheese for a similar texture, or a plant-based cream cheese if you have dietary restrictions.
Can I use fresh cherries instead of pie filling?
Yes, fresh cherries can be used! Just pit and chop them, and toss them with a bit of sugar to create a simple topping.
What if I don’t have a food processor?
You can crush the Oreos by placing them in a sealed plastic bag and using a rolling pin to break them down into crumbs. It’s a fun and effective method!
Ready to Cook?
Now that you have all the tips, tricks, and insights for making the perfect Black Forest Mini Cheesecakes, it’s time to roll up your sleeves and get baking! These mini desserts are not only a feast for the eyes but also a delight for the taste buds. Whether you’re serving them at a gathering or enjoying them solo, each bite will transport you to chocolate cherry heaven. So gather your ingredients, follow the steps, and get ready to impress with these irresistible treats!

Black Forest Mini Cheesecakes
Ingredients
Equipment
Method
- Step 1: Preheat your oven to 325°F (160°C). In a food processor, pulse the Oreos until they resemble fine crumbs. Combine with melted salted butter.
- Step 2: Line your muffin tin with parchment paper liners. Evenly distribute the Oreo mixture into each cup and press down to create a firm crust. Bake for about 10 minutes, then let cool.
- Step 3: In a mixing bowl, beat the softened cream cheese until smooth. Gradually add sugar, cocoa powder, and salt, mixing until well combined.
- Step 4: Add eggs one at a time, mixing well after each addition. Pour in melted chocolate, vanilla extract, heavy cream, and sour cream. Mix until smooth.
- Step 5: Spoon the filling over the cooled crusts in the muffin tin, filling each cup to about 3/4 full. Smooth the tops with a spatula.
- Step 6: Bake for 18-20 minutes until edges are set and centers jiggle. Turn off the oven and leave them inside for 10 minutes.
- Step 7: Cool to room temperature, then refrigerate for at least 4 hours, or overnight.
- Step 8: Beat the heavy cream with sugar until soft peaks form.
- Step 9: Top each cheesecake with cherry pie filling and a dollop of whipped cream. Garnish with chocolate if desired.
Notes
- Store mini cheesecakes in an airtight container in the refrigerator for up to 5 days.
- They can be frozen for up to 2 months. Wrap each cheesecake tightly in plastic wrap.
- Add toppings just before serving for best presentation.