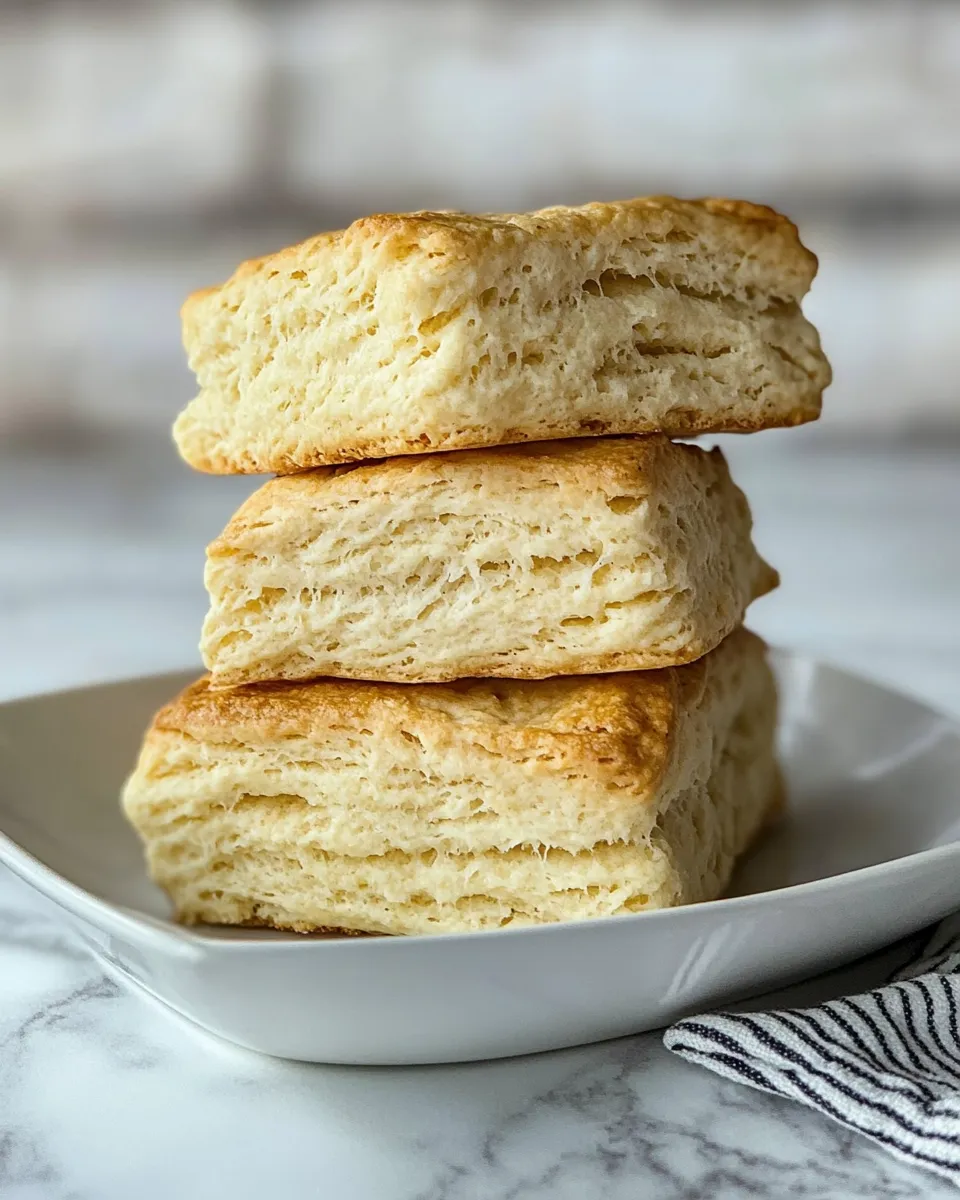
2 Ingredient Scones
Creating delightful scones doesn’t have to be complicated or time-consuming. With just two simple ingredients, you can whip up a batch of fluffy, tender scones that are perfect for breakfast, brunch, or even an afternoon tea. The beauty of these 2 Ingredient Scones lies in their simplicity—self-rising flour and heavy cream combine to create a dough that bakes up beautifully. Whether you enjoy them plain or with your favorite spreads, these scones are sure to impress!
What You’ll Love About This Recipe
This 2 Ingredient Scones recipe is a game-changer for busy mornings or impromptu gatherings. Here’s why you’ll love it:
- Quick and Easy: With only two ingredients, you can have fresh scones in under 30 minutes.
- Versatile: Customize with your favorite mix-ins like chocolate chips, dried fruits, or nuts.
- Minimal Mess: Fewer ingredients mean less cleanup!
- Light and Fluffy: The combination of self-rising flour and heavy cream creates perfectly tender scones.
- Perfect for Any Occasion: Whether it’s breakfast or a tea party, these scones fit right in.
Ingredient Notes
Creating these scones is straightforward, but understanding each ingredient can enhance your baking experience:
- Self-Rising Flour: This flour already contains baking powder and salt, making it an ideal choice for quick recipes. If you don’t have self-rising flour, you can make your own by combining all-purpose flour with baking powder and salt.
- Heavy Cream: The richness of heavy cream adds moisture and flavor to the scones. It helps create a tender crumb that’s hard to resist. Make sure to use full-fat heavy cream for the best results.
Must-Have Equipment
Before you dive into making your 2 Ingredient Scones, gather the following tools:
- Mixing Bowl: A large mixing bowl is essential for combining your ingredients.
- Measuring Cups: Accurate measurements ensure the perfect texture of your scones.
- Baking Sheet: A standard baking sheet lined with parchment paper helps prevent sticking.
- Rolling Pin (optional): If you prefer a more uniform thickness, a rolling pin can be helpful.
- Sharp Knife or Pastry Cutter: Use this to cut the dough into scone shapes.
2 Ingredient Scones Cooking Guide

Follow these simple steps, and you’ll have a batch of delicious scones ready to enjoy:
Step 1: Preheat the Oven
Preheat your oven to 425°F (220°C). This high temperature is crucial for achieving that golden-brown exterior.
Step 2: Combine Ingredients
In a large mixing bowl, combine 3 cups of self-rising flour with 2 cups of heavy cream. Stir until a soft dough forms. It’s okay if it’s a bit sticky!
Step 3: Shape the Dough
Turn the dough out onto a lightly floured surface. Gently knead it a few times until it comes together. Pat or roll the dough into a circle about 1-inch thick.
Step 4: Cut the Scones
Using a sharp knife or pastry cutter, cut the dough into wedges or use a round cookie cutter for traditional scone shapes. Place them on a lined baking sheet, leaving space between each scone.
Step 5: Bake
Bake the scones in the preheated oven for 12-15 minutes, or until they are lightly golden on top. Keep an eye on them to prevent over-baking.
Step 6: Cool and Serve
Once baked, remove the scones from the oven and let them cool for a few minutes on a wire rack. Serve warm with butter, jam, or your favorite spread!
Health-Conscious Tweaks

While the classic 2 Ingredient Scones are delicious as is, you can make a few adjustments to suit your dietary preferences:
- Swap Flour: Use whole wheat self-rising flour for added fiber and nutrients.
- Lower Fat Option: Replace heavy cream with a lighter cream or a plant-based alternative, though the texture may vary.
- Add Flaxseed: Incorporate ground flaxseed for an extra boost of omega-3 fatty acids.
- Mix in Fruits: Add fresh fruits like blueberries or raspberries for natural sweetness and added vitamins.
Problems & Prevention
Baking can be a bit tricky, but here are some common issues you might encounter with your 2 Ingredient Scones and how to prevent them:
- Dough Too Sticky: If the dough is excessively sticky, try adding a little more flour while kneading until it reaches the right consistency.
- Dense Scones: Ensure you measure your ingredients accurately. Too much flour can lead to dense scones.
- Uneven Baking: Make sure to space the scones evenly on the baking sheet to promote even heat distribution.
- Burnt Bottoms: If your oven tends to run hot, consider reducing the temperature slightly or placing the baking sheet on a higher rack.
Save for Later: Storage Tips
If you find yourself with leftover scones, here’s how to keep them fresh:
Store the cooled scones in an airtight container at room temperature for up to 2 days. For longer storage, wrap them tightly in plastic wrap and freeze for up to 3 months. When ready to enjoy, simply thaw at room temperature and warm them in the oven for a few minutes to restore their fluffy texture.
Top Questions & Answers
Can I add mix-ins to the scone dough?
Absolutely! Feel free to add chocolate chips, nuts, or dried fruit to the dough before shaping the scones. Just be mindful of the overall moisture content.
What can I serve with scones?
Scones are delightful with various toppings. Try serving them with clotted cream, butter, fruit preserves, or even a drizzle of honey.
Can I make the dough ahead of time?
Yes! You can prepare the dough and refrigerate it for up to 24 hours. Just remember to bring it to room temperature before baking for the best results.
What if I don’t have self-rising flour?
You can make your own by combining 3 cups of all-purpose flour with 1.5 tablespoons of baking powder and 0.75 teaspoons of salt. Mix well before using in the recipe.
Hungry for More?
If you enjoyed these 2 Ingredient Scones, you might be eager to explore more simple and delicious recipes. From decadent desserts to savory treats, there’s a world of culinary delights waiting for you. Consider trying other quick-bake options or exploring various flavor combinations to elevate your scone game.
Once you master the basics, the possibilities are endless! Whether it’s adding spices, experimenting with different types of flour, or even trying out sweet versus savory versions, the joy of baking lies in creativity. So, roll up your sleeves, grab your ingredients, and dive into the wonderful world of baking with these easy scones as your starting point.
Freshly baked 2 Ingredient Scones are just moments away—get started today, and enjoy the delightful experience of homemade goodness!

2 Ingredient Scones
Ingredients
Equipment
Method
- Preheat your oven to 425°F (220°C).
- In a large mixing bowl, combine 3 cups of self-rising flour with 2 cups of heavy cream. Stir until a soft dough forms.
- Turn the dough out onto a lightly floured surface. Gently knead it a few times until it comes together. Pat or roll the dough into a circle about 1-inch thick.
- Using a sharp knife or pastry cutter, cut the dough into wedges or use a round cookie cutter for traditional scone shapes. Place them on a lined baking sheet.
- Bake the scones in the preheated oven for 12-15 minutes, or until they are lightly golden on top.
- Once baked, remove the scones from the oven and let them cool for a few minutes on a wire rack. Serve warm.
Notes
- For extra flavor, add chocolate chips or dried fruits to the dough.
- Store leftover scones in an airtight container for up to 2 days.
- Reheat frozen scones in the oven for a fresh taste.